The theme has a members area built in: a dashboard page that greets each member, and a course library for your lessons. Use them to run a course, a membership or a client area without a separate course plugin.
The theme lays the members area out. Who can sign up, what they pay and which level sees what stay with the membership plugin you choose, and the theme works with any of them.
The Member Dashboard:
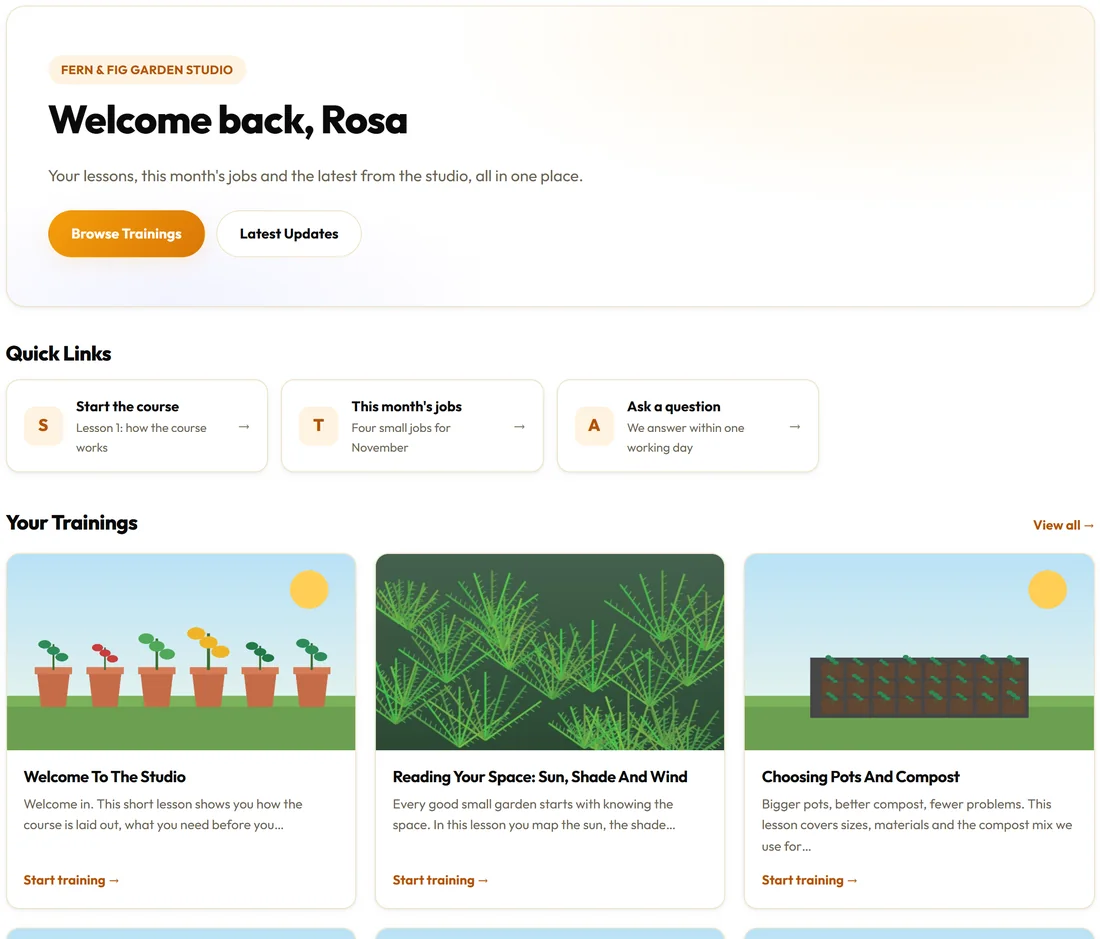
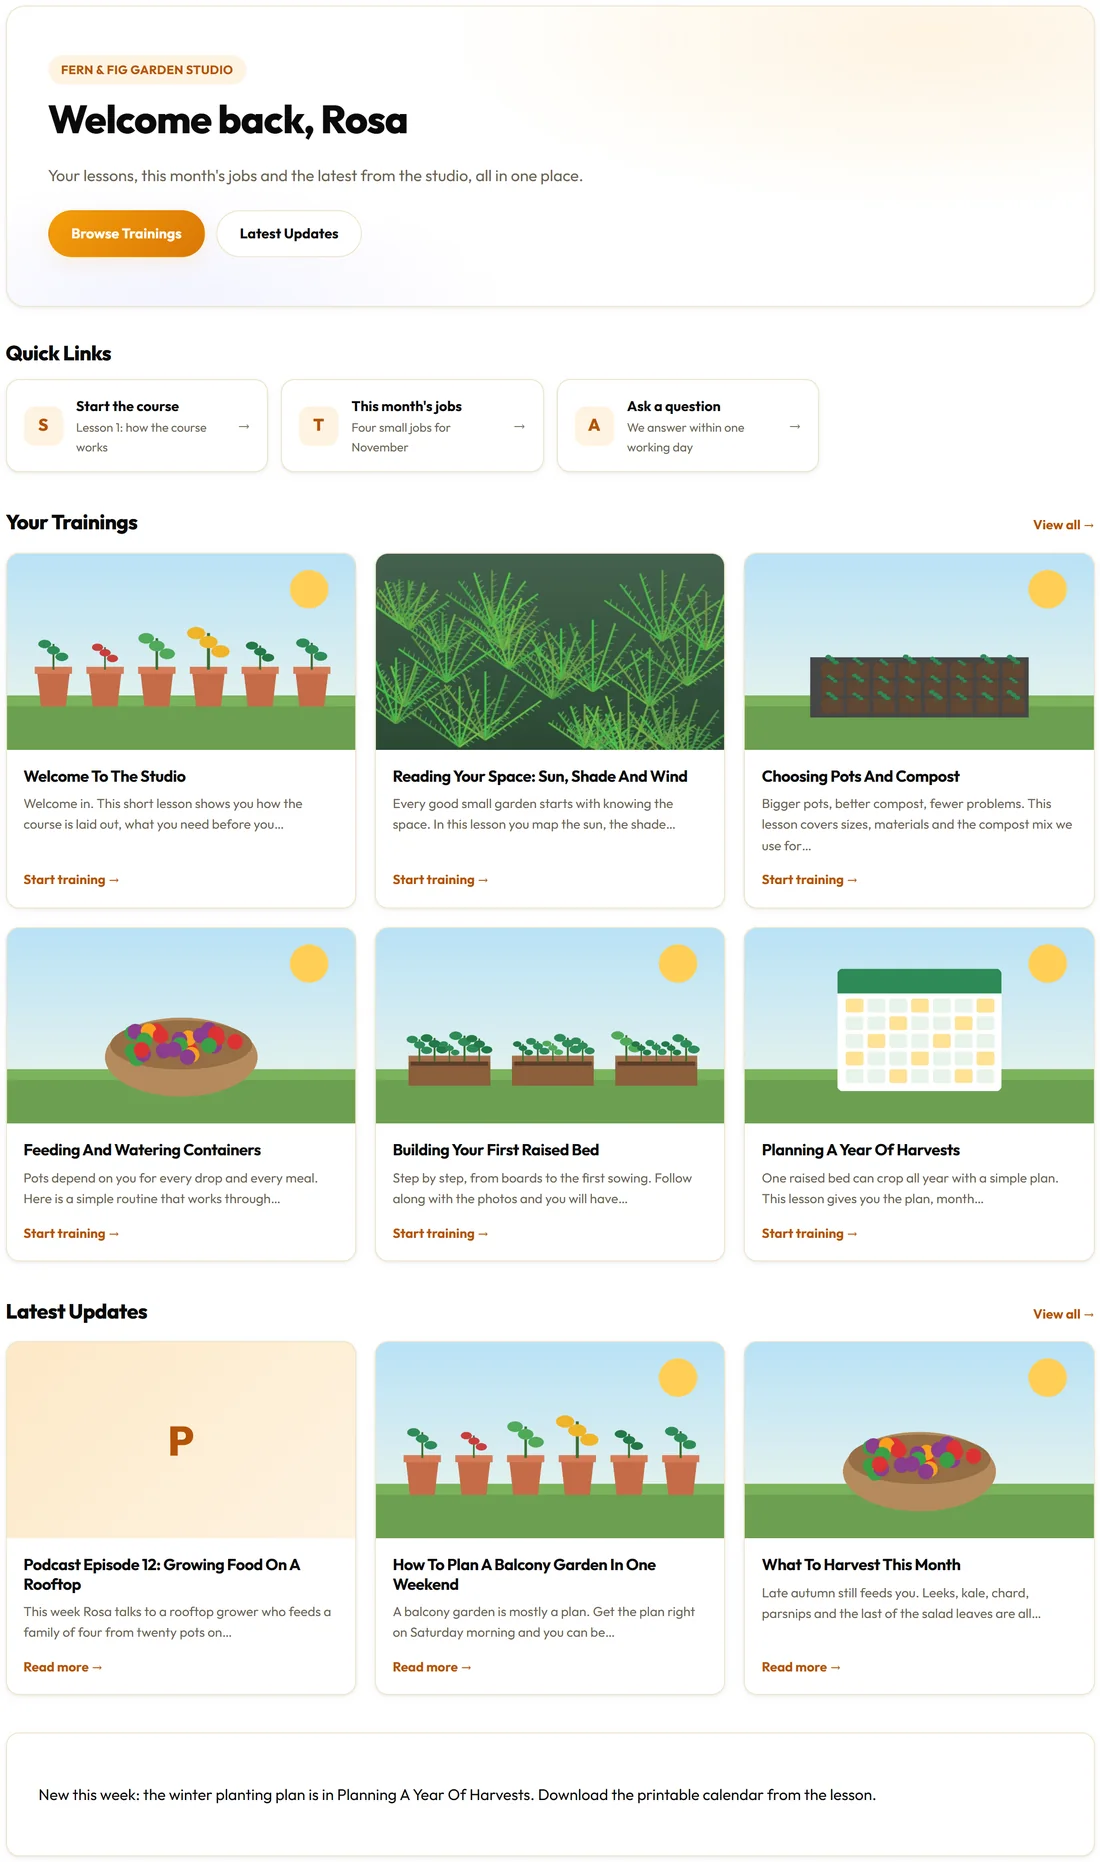
The Member Dashboard is a page template that turns any page into a members home. From top to bottom it shows:
- A welcome hero. A signed-in member sees Welcome back with their first name. Everyone else sees your Dashboard heading. Under it sits your Dashboard intro line.
- Buttons for Browse Trainings and, when you have a blog page, Latest Updates.
- Quick Links: one card for each item in the menu you assign to Dashboard Quick Links. A link's Description shows under its title.
- Your Trainings: your first six trainings in course order, with View all.
- Latest Updates: your three newest posts, with View all.
- Anything you write in the page itself appears underneath.
Sections with nothing in them are simply left out.
Setting up the dashboard, step by step:
- Create a page, for example Members. The Setup Wizard's Dashboard front page option does this for you.
- In the page settings of the editor, set its Template to Member Dashboard, and publish it.
- To make it your front page, go to Settings, Reading, choose A static page and pick it as the Homepage.
- Build a menu for the quick-link cards under Appearance, Menus and assign it to Dashboard Quick Links. Fill in each link's Description (switch it on under Screen Options if you do not see the box).
- Set the Dashboard heading and Dashboard intro line in Appearance, Customize, ResultsAiX Theme.
The heading is what visitors who are not signed in see. Signed-in members always see Welcome back with their first name.
Trainings, your course library:
Trainings are their own content type, separate from your blog. You get a Trainings menu in the admin with All Trainings, Add New Training and Topics, a library at /training/, and topic pages at /topic/ to group lessons into modules.
Adding a lesson:
- Go to Trainings, Add New Training.
- Write the title and the lesson. Add a featured picture; it shows on the library and dashboard cards.
- Under Topics in the side column, tick the module it belongs to, or add a new topic.
- Under Page Attributes, set Order. Give lesson 1 the number 1, lesson 2 the number 2, and so on.
- Write a short Excerpt if you want to choose the line shown on the cards.
- Press Publish.
The library, the topic pages, the dashboard grid and the Previous lesson and Next lesson links all follow the Order numbers.
The library and a lesson:
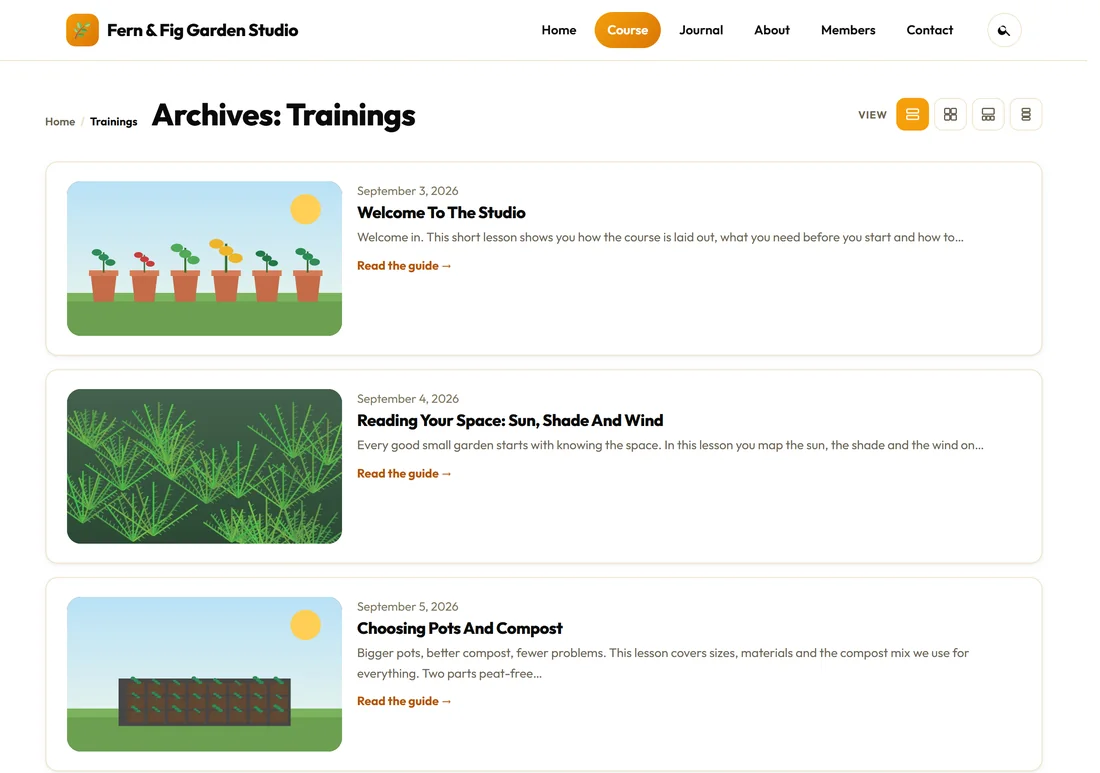

The library at /training/ lists every training in course order with its picture, date, title and a short line. Visitors can switch the view with the same four icons as the blog. In the Member portal layout the top bar says Training Library.
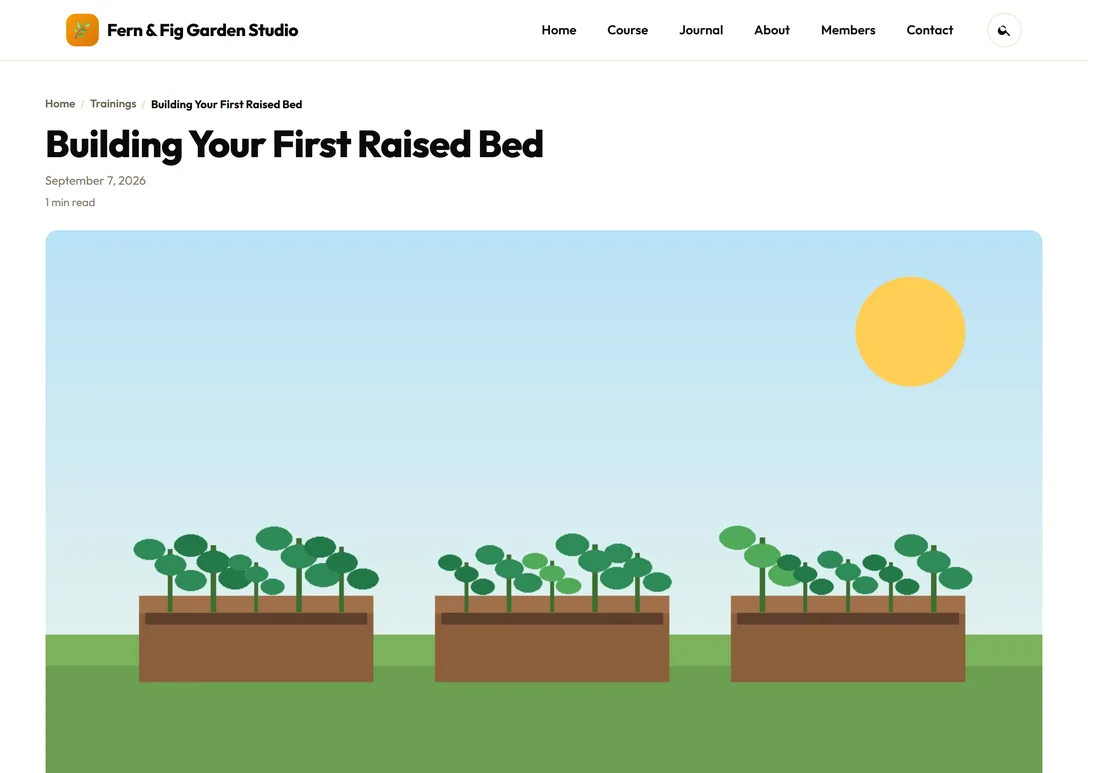
Each lesson has an All Trainings link back to the library, its topics under the title, breadcrumbs, and Previous lesson and Next lesson links at the end.
If a training shows a Not Found page after you first activate the theme, go to Settings, Permalinks and press Save Changes once.
Who can open your trainings:
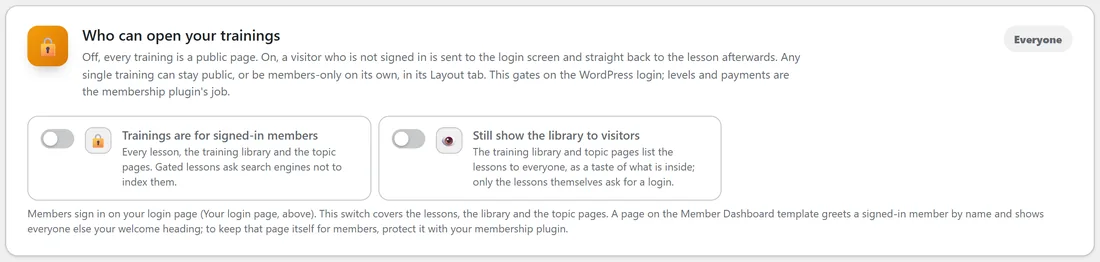
Out of the box every training is a public page. To keep them for members, go to Your Site, Who can open your trainings:
- Trainings are for signed-in members: every lesson, the training library and the topic pages send a visitor who is not signed in to the login screen, and straight back to the lesson after signing in. The login screen tells them That training is for members. Sign in and it opens straight away. Gated lessons ask search engines not to index them.
- Still show the library to visitors: the library and topic pages stay open as a taste of what is inside, and only the lessons ask for a login.
Press Save Your Site. The card's label says Everyone or Members only.
One training, its own rule:
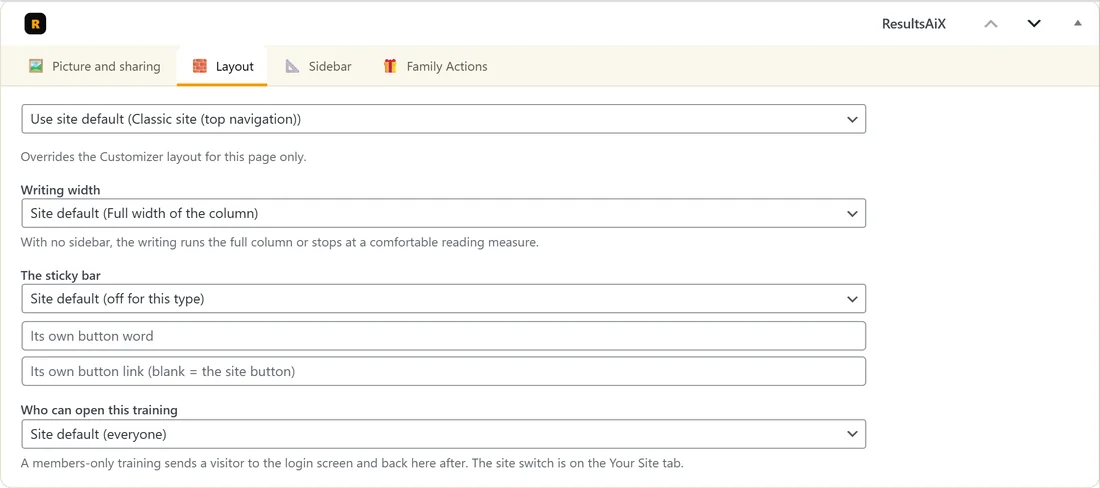
Any single training can override the site switch on its Layout tab, under Who can open this training:
- Site default (everyone, or members only, whichever the switch says).
- Signed-in members only.
- Everyone, even when the library is members only.
A free first lesson is a common choice: the whole library is for members, and lesson 1 is set to Everyone.
The switch checks the WordPress login only. It does not handle levels, payments or sign-ups. To keep the Dashboard page itself for members, protect it with your membership plugin.
Handy shortcodes for members pages:
- [raix_trainings count="6" topic=""] shows a grid of trainings, optionally from one topic (use the topic's slug).
- [raix_member_name fallback="there"] prints the signed-in member's first name, or the fallback word for a visitor.
- [raix_avatar] shows the signed-in member's picture, or their initial when they have no profile picture. Nothing shows for a visitor who is not signed in.
- [raix_logged_in]...[/raix_logged_in] and [raix_logged_out]...[/raix_logged_out] show different words to signed-in and signed-out visitors. They change what a page says, not who may open it.
- [raix_progress percent="40" label="Course progress"] draws a progress bar at the percentage you set.
The Shortcode Studio builds each of these for you with a live preview. See Widgets, Shortcodes And The Plugin Family.
A real example:
Fern & Fig has seven lessons in three topics: Start Here, Containers and Raised Beds, ordered 1 to 7. The Members page uses the Member Dashboard template with the heading Welcome to the Fern & Fig members area. Its Quick Links menu has three cards: Start the course, This month's jobs and Ask a question. When Rosa signs in, the page says Welcome back, Rosa.
Tips:
- Give every training a featured picture. The library and the dashboard grid look far better with them.
- Number lessons 10, 20, 30 and so on, and you can slip a new lesson in between later without renumbering.
- For the app feel, switch the site to the Member portal layout. See Layouts And The App-Style Member Portal.