Short on time? Here is the whole plugin in six steps. The Getting Started Guide walks through each one in more detail, with pictures.
The six steps:

- Install and activate WP Record With Privacy, open 🔒 Record Privacy in your WordPress menu, and activate your free copy with your name and email.
- Open ⚙️ Settings. Email Addresses and Names (any format) are already switched on, using the Partial reveal style. Switch on anything else your screens show, such as Phone Numbers, IP Addresses, Street Addresses or Prices / Revenue, then click Save Settings at the bottom.
- Open 📊 Dashboard and click ▶ Turn On Privacy Mode. The page reloads and the panel shows 🔒 ON.
- Visit every screen you plan to show and check the data is masked.
- Record.
- Back on the Dashboard, click ⏸ Turn Off Privacy Mode. Your admin shows real data again.
That's it. Nothing in your database changed at any point.
How you know it is on:


Three things tell you masking is running, and they show on every admin screen:
- The Dashboard panel reads 🔒 ON and the button changes to ⏸ Turn Off Privacy Mode.
- A purple 🔒 Privacy Recording ON badge sits in the top admin bar. The number in brackets is how many filters are switched on.
- A purple banner starting Privacy Recording Mode is ON sits at the top of the page, with a Turn off when done link that takes you back to the Dashboard.
A quick example:
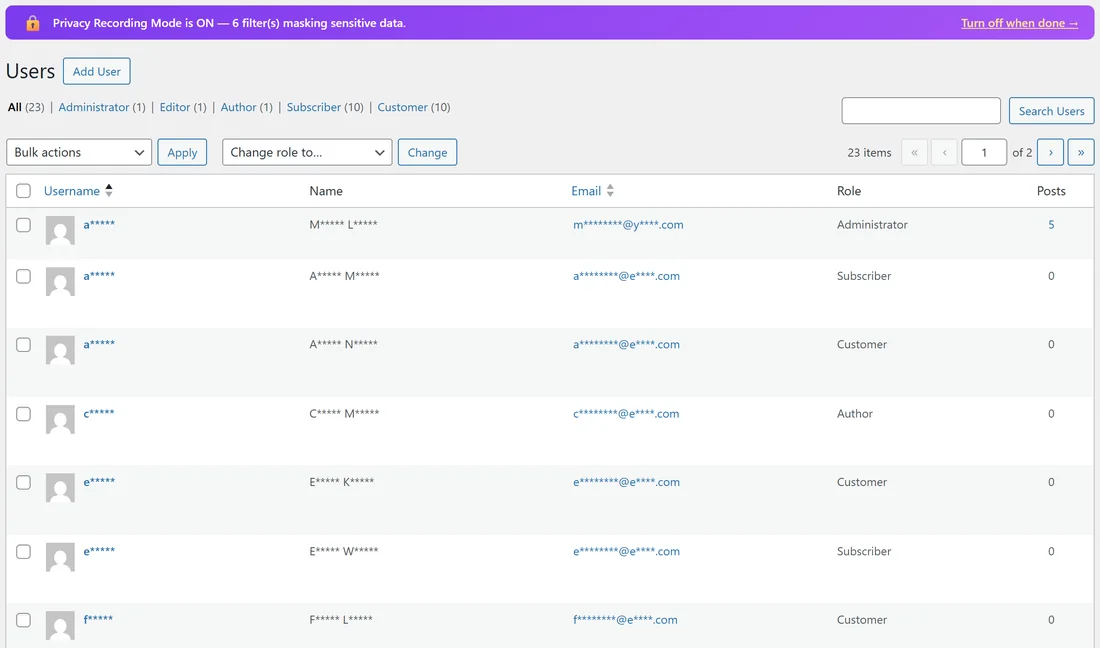
Maya runs Harbor Lane Coffee at yoursite.com and wants to record a two minute video showing new staff how to find a customer in the Users screen. She leaves the two default filters on, switches on Usernames, clicks Save Settings, turns the switch on, opens Users and checks the list. Every username, name and email shows only its first letter. She records, then turns the switch off. Total set-up time: under a minute.
Two habits that keep you safe:
- Keep real edits for when the switch is off. Form fields only look masked while you record and still save your real values, but changes are easiest to check with real data on screen.
- Always run through your screens once before you press Record.
Next steps:
Read The 11 Privacy Filters, One By One to see what each switch covers, and Mask Styles And The Mask Character to choose how hidden data looks on camera.