This guide gets a working contact form onto your site in five minutes, with no AI key and no other plugin. By the end you will have sent yourself a test entry and seen where it came from.
Step 1, open a new form:
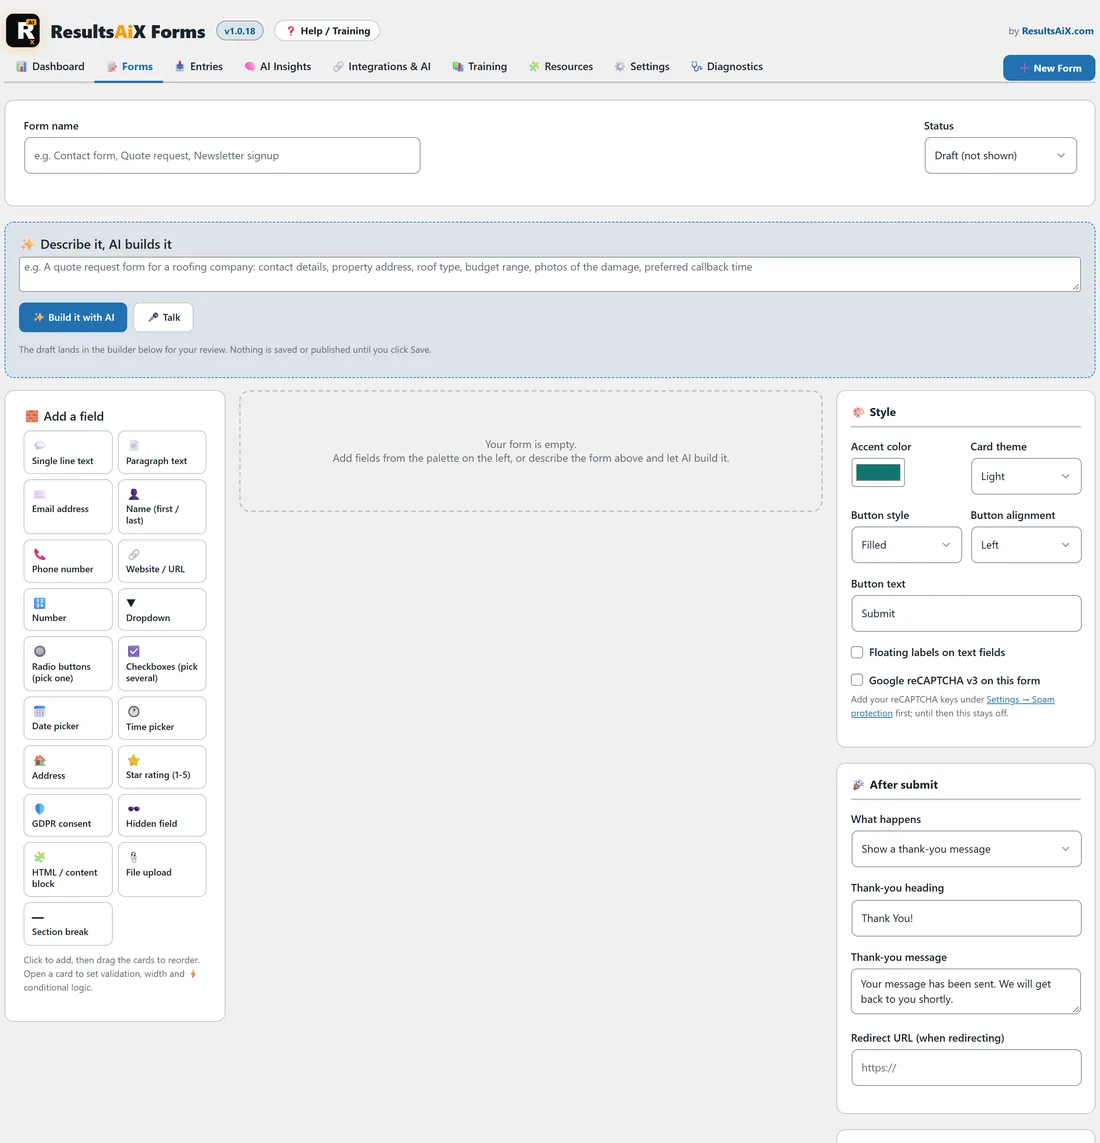
- Click AiX Forms in the WordPress sidebar.
- Click the New Form button at the right of the tab row.
- Type a Form name, for example Contact Us. Only you see this name.
The builder opens empty, with the message "Your form is empty." in the middle. If you have an AI key connected, a box called "Describe it, AI builds it" sits above the builder; you can ignore it for now.
Step 2, add your fields:
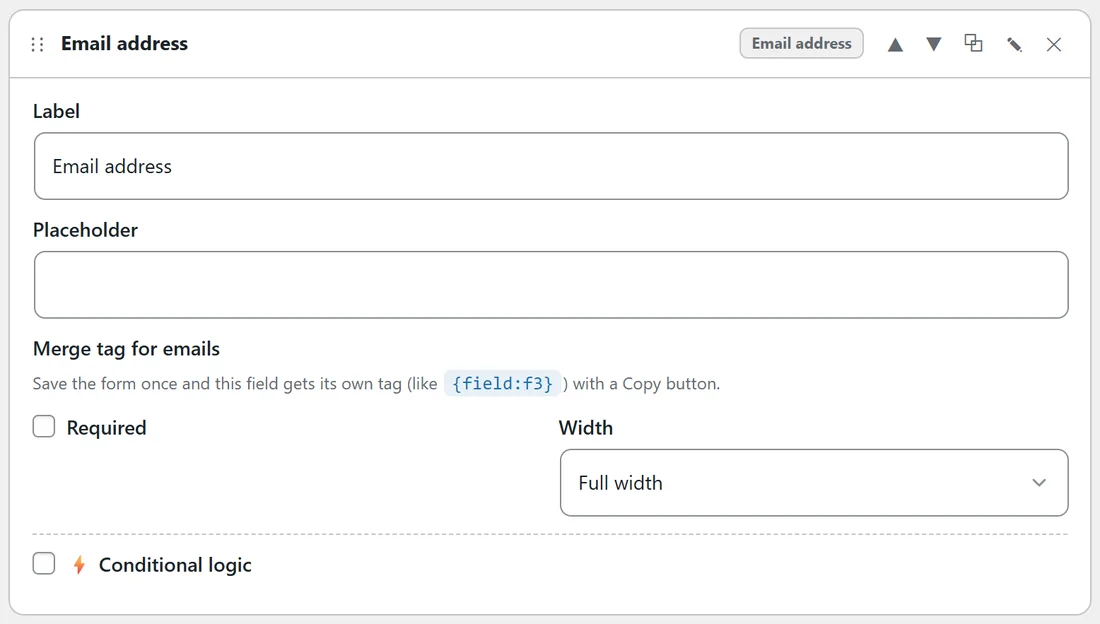
Click a field type in the Add a field palette to add it. A card appears in the middle column, already open so you can change it. For a contact form, add:
- Name (first / last). Tick Required.
- Email address. Tick Required and set Width to Half width.
- Phone number. Set Width to Half width, so it sits next to the email.
- Dropdown. Change the Label to "What is it about?", type your options (for example A new project, Billing, Something else) and tick Required.
- Paragraph text. Change the Label to "Your message" and tick Required.
- GDPR consent, if your visitors are in the UK or EU. Type your consent sentence as the Label and tick Required.
Drag a card by its header to move it, or use the up and down arrows.
Step 3, check the preview:
Scroll down to Live preview. It shows the real form, drawn by the same code and stylesheet your visitors get, and it updates a moment after you stop typing.
Step 4, choose what happens after submit:
In the After submit box on the right, leave What happens on "Show a thank-you message" and write your own Thank-you heading and Thank-you message. Line breaks are kept, so short paragraphs work well.
Step 5, check the emails:
Notification email is ticked for you, so each submission is emailed to the Default notification email from Settings, or to your site's admin email when that is empty. To send it somewhere else, type the address in Send to. For a thank you email to the visitor, tick "Send the submitter a thank-you email" in Confirmation email.
Step 6, set it live and save:

- At the top, change Status from "Draft (not shown)" to "Active (live)".
- Click Save form at the bottom right.
You see "Form saved. It is live wherever it is embedded." and, under the Form name, the form's shortcode, for example [resultsaix_form id="2"].
Step 7, put it on a page:
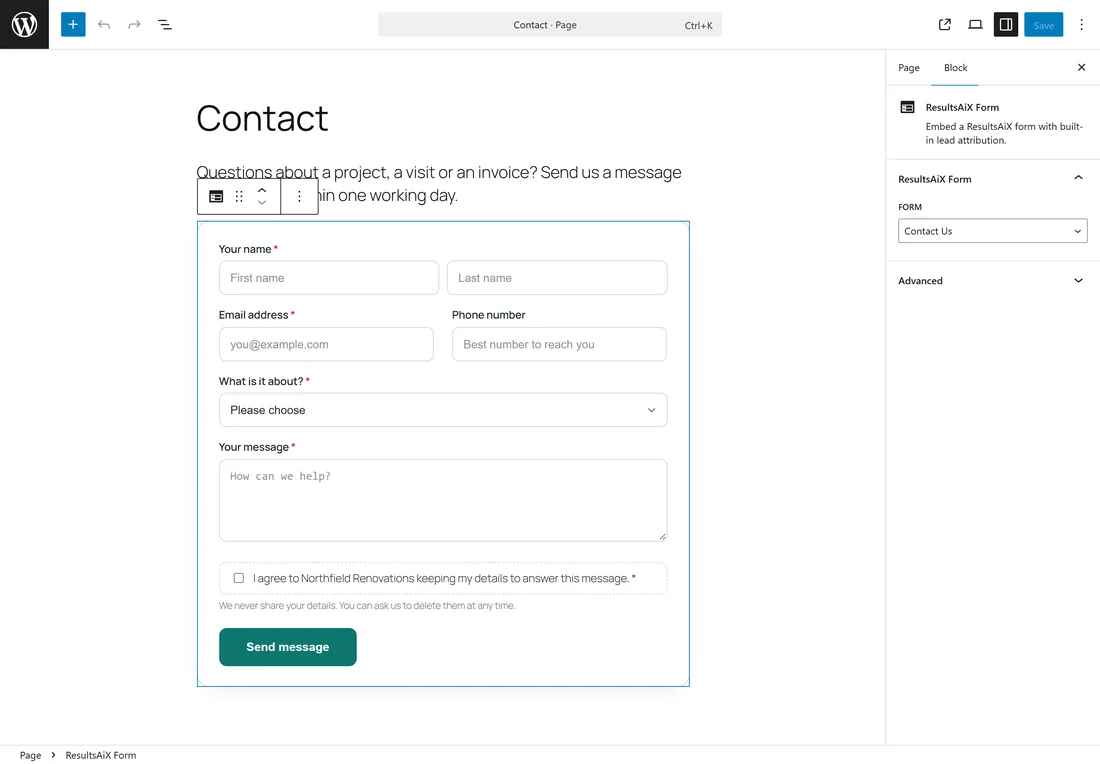
- Open the page in the WordPress editor, for example your Contact page.
- Click the plus button and search for ResultsAiX Form.
- Add the block and pick your form from the Form dropdown in the sidebar.
- Click Update or Publish.
The editor shows the real form straight away. In a page builder or the classic editor, paste the shortcode instead. See Publishing A Form: Shortcode, Block, Elementor And Page Builders.
Step 8, send a test entry:
- Open the page in a private browser window, so you see it as a visitor.
- Fill in the form, wait a few seconds, and click the button.
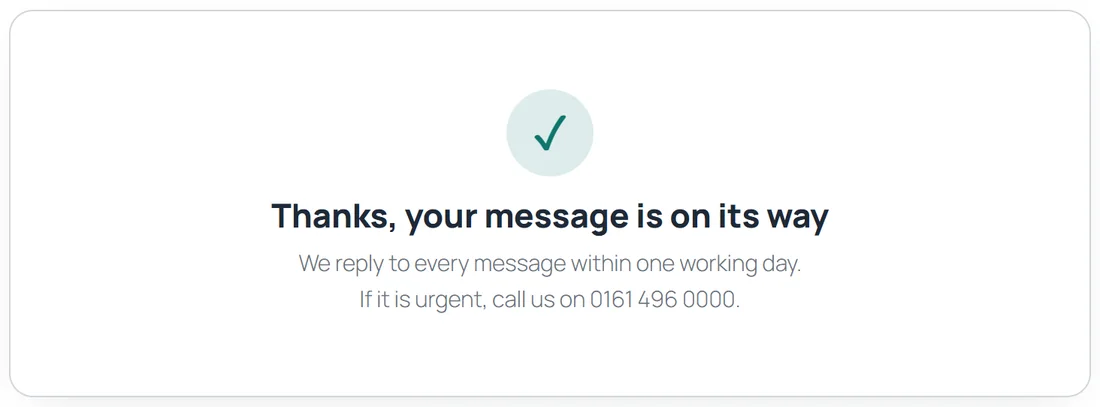
- The thank you message appears where the form was.
To see where an entry came from in testing, add ?utm_campaign=test to the page address before you fill in the form.
Step 9, see it arrive:
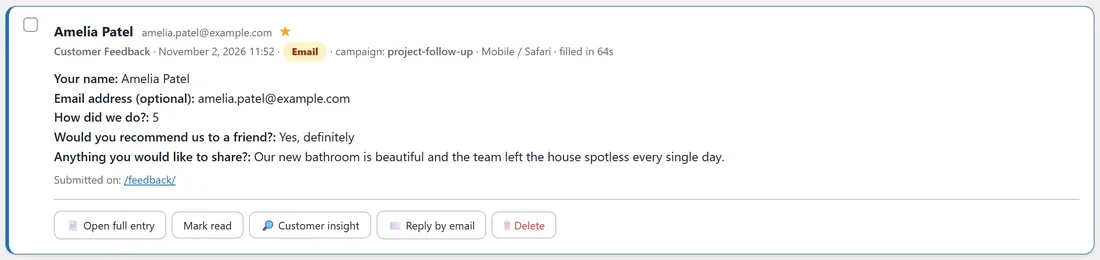
Open the Entries tab. Your test entry is at the top, marked unread, with its form, date, traffic source, campaign, device and browser, and how long you took to fill it in. If a notification email was on, it is in your inbox too.
Making the form your own:
Before you publish, spend a minute in the Style box.
- Accent color: your brand colour, used for the button and highlights.
- Button text: something specific, such as Send message or Request my quote, rather than Submit.
- Button alignment: Full width works well on phones.
See Styling A Form: Colours, Buttons, Floating Labels And The Thank You Message for every option.
Choosing a starting point:
- Starting from scratch, as above, takes five minutes for a contact form.
- If you have an AI key, describe the form in one sentence and click Build it with AI, then check the draft. See AI Form Drafting And AI Insights: What AI Does In ResultsAiX Forms.
- If you already have a similar form, click Duplicate on the Forms tab and change the copy.
The finished example:
The Northfield Renovations Contact Us form built this way has six fields, a teal Send message button, the subject "New message from {name}: {form_title}", a thank you email to the visitor, and a thank you message that ends with the office phone number for urgent jobs.
Checking everything works:
- The page shows the form when you are logged out.
- A test entry arrives on the Entries tab with the right form name.
- The notification email arrives, and Reply goes to the address you typed in the form.
- The thank you email arrives at the test address, if you switched it on.
- The Dashboard shows one more entry for Today.
If something does not look right:
- The page shows nothing where the form should be: check the form's Status is Active (live) and that you clicked Save form. Logged in administrators see a short note in its place explaining this.
- The button says "That was a little too fast": you sent the test within 3 seconds. Fill it in at a normal pace, or see Spam Protection: Five Built In Layers, reCAPTCHA v3 And Akismet.
- No email arrived: check Send to in the Notification email box and the error log on the Diagnostics tab.
Building the same form for a second site:
On another site with ResultsAiX Forms, build the form again or describe it with AI. Forms live on the site where they are built, and so do their entries.
Tips:
- Keep forms short. Every extra field lowers the start to submit rate on the Dashboard.
- Save once after adding fields, then add conditional logic. Saving gives each field its permanent id. See Conditional Logic: Show Or Hide Fields Based On Answers.
- Next, read Building A Form: The Builder, Field Cards And Validation for every setting on a field card.