The theme looks after the search engine basics, adds your tracking codes in the right place, and collects email addresses with a form that keeps every lead on your own site first. You set each part once, on its own tab.
Where to find it:
- ResultsAiX Theme, SEO: built-in SEO, internal links, the default social image and your sitemap.
- ResultsAiX Theme, Settings, Tracking codes.
- ResultsAiX Theme, Integrations: your autoresponder.
- Leads in the WordPress sidebar.
- On every post, page and training: the SEO tab of the ResultsAiX panel.
Built-in SEO:
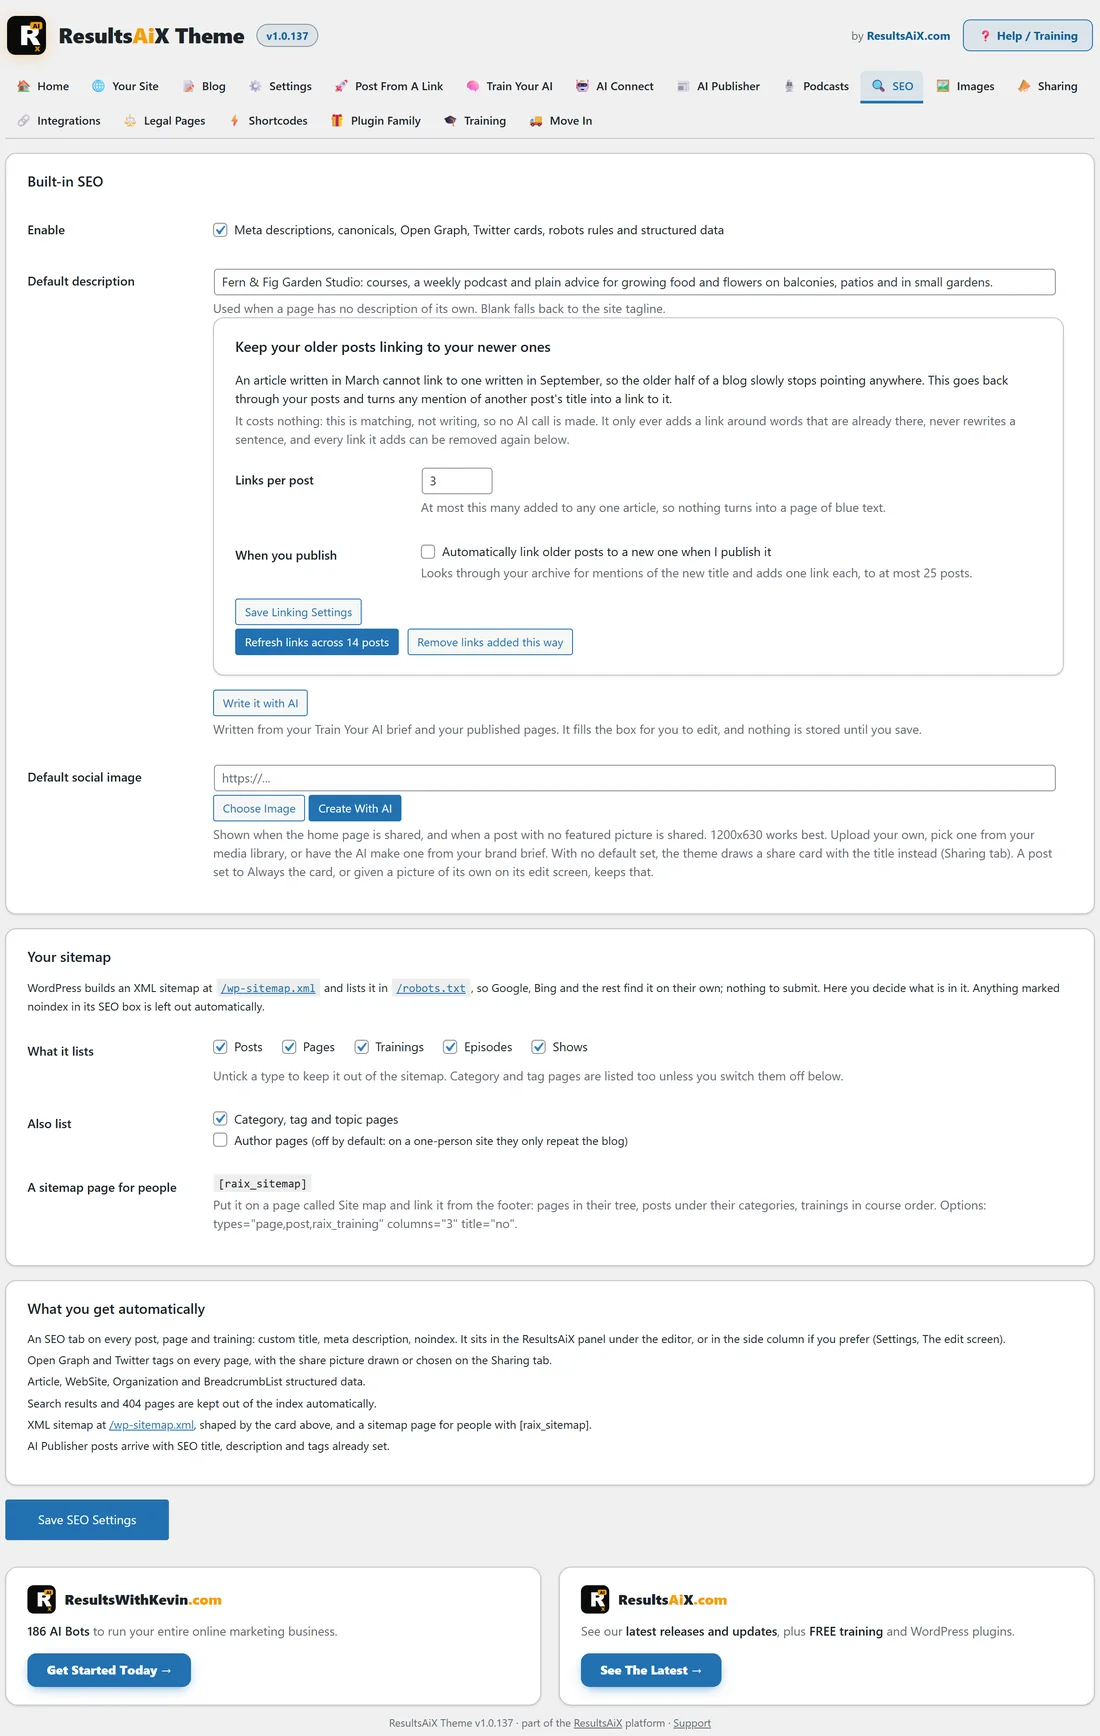
With Enable ticked, every page gets a title, meta description, canonical link, Open Graph and Twitter tags, robots rules and structured data (Article, WebSite, Organization and BreadcrumbList). Search results and 404 pages are kept out of the index. Default description is used when a page has none of its own; blank falls back to your tagline, and Write it with AI drafts one from your brief. If Yoast, Rank Math, All in One SEO or SEOPress is active, the theme's own SEO output steps aside so nothing is printed twice.
The SEO tab on each page:
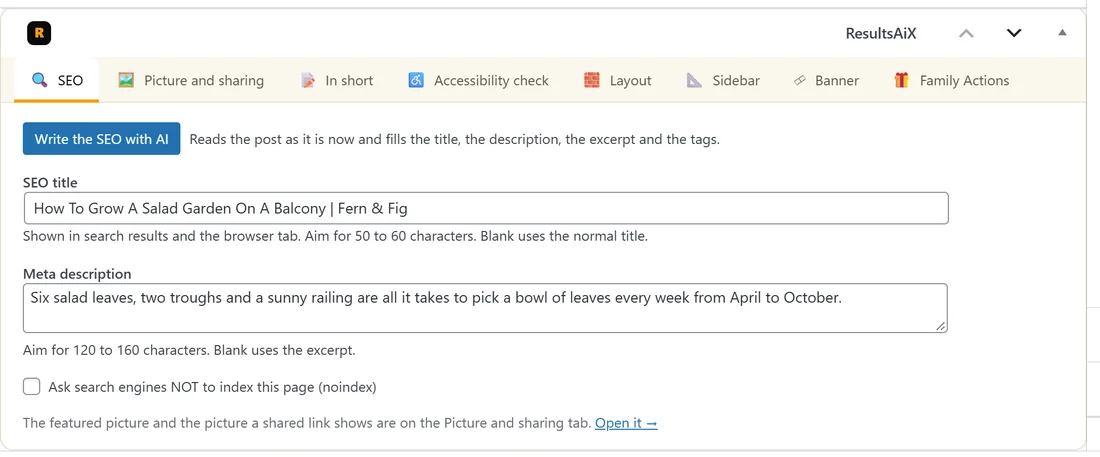
- Write the SEO with AI: reads the post as it is and fills the title, the description, the excerpt and the tags.
- SEO title: shown in search results and the browser tab. Aim for 50 to 60 characters. Blank uses the normal title.
- Meta description: aim for 120 to 160 characters. Blank uses the excerpt.
- Ask search engines NOT to index this page (noindex). A noindex page is also left out of the sitemap.
Default social image:
The picture shown when the home page is shared, and when a post with no featured picture is shared. 1200 by 630 works best. Upload one, pick one from the media library or let the AI make one. With none set, the theme draws a share card instead. See Sharing: Share Buttons, Share Cards, The Post Picture And Site Search.
Keep older posts linking to newer ones:
An article written in March cannot link to one written in September. This goes back through your posts and turns any mention of another post's title into a link to it. It is matching, not writing, so no AI call is made, nothing is rewritten, and it never links inside a heading or an existing link.
- Links per post: at most this many added to any one article (1 to 10, 3 to start).
- When you publish: Automatically link older posts to a new one when I publish it. It looks for mentions of the new title and adds one link each, to at most 25 posts.
- Press Save Linking Settings, then Refresh links across your posts to run it now.
- Remove links added this way takes every one of them out again.
Your sitemap:
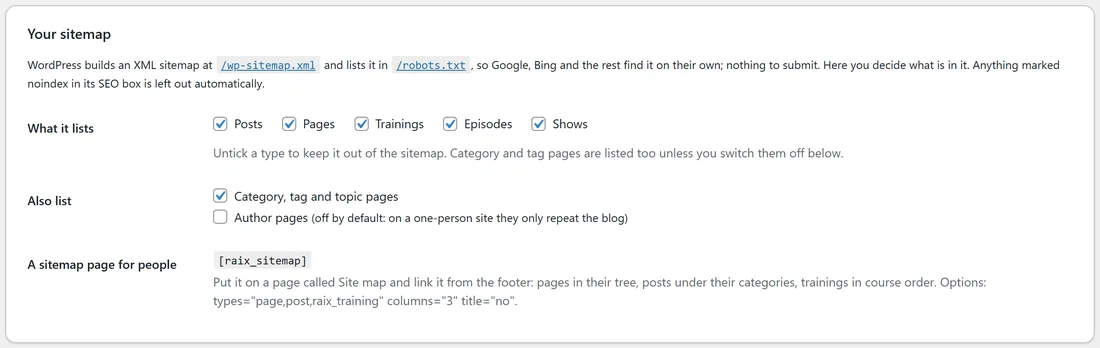
WordPress builds a sitemap at /wp-sitemap.xml and lists it in robots.txt, so search engines find it on their own. In Your sitemap:
- What it lists: Posts, Pages, Trainings, Episodes and Shows. Untick a type to keep it out.
- Also list: Category, tag and topic pages, and Author pages (off by default).
- A sitemap page for people: [raix_sitemap] on a page called Site map. Options: types="page,post,raix_training", columns="3", title="no".
Press Save SEO Settings.
Tracking codes:
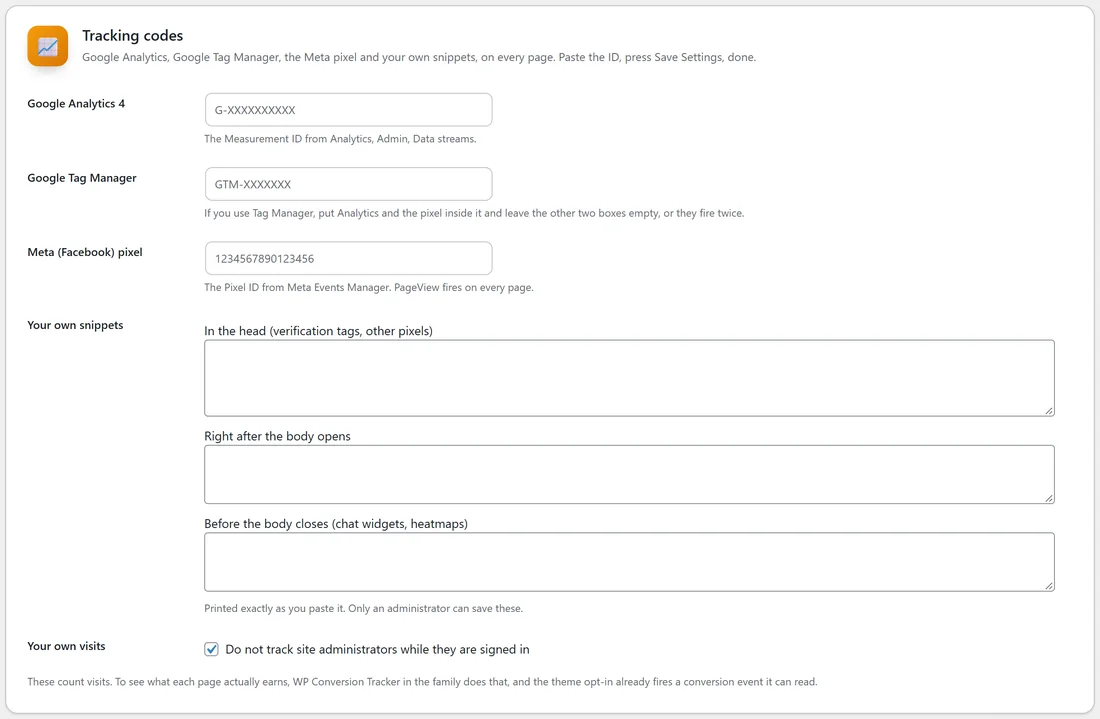
Settings, Tracking codes has these boxes.
- Google Analytics 4: the Measurement ID, which looks like G-ABC123XYZ.
- Google Tag Manager: looks like GTM-ABC123. If you use Tag Manager, put Analytics and the pixel inside it and leave the other two boxes empty.
- Meta (Facebook) pixel: the Pixel ID, a number. PageView fires on every page.
- Your own snippets: In the head, Right after the body opens, and Before the body closes. Printed exactly as you paste them. Only an administrator can save these.
- Your own visits: Do not track site administrators while they are signed in.
Each ID is checked for its shape before it is saved, and a wrong one is not saved, with a line saying which one and what it should look like. With the cookie notice on, these codes wait for the visitor's consent.
The opt-in form:
[raix_optin heading="Get the free guide" text="Join and get every update." button="Send It To Me" redirect="/thank-you/"] puts a form on any page, post, training, the dashboard or a Landing page. Options: heading, text, button, name_field (yes or no), redirect and source. Visitors see You are in! Check your inbox, or go to your thank-you page. The Shortcode Studio builds it for you, and the form fires a conversion event WP Conversion Tracker can read.
Your autoresponder:
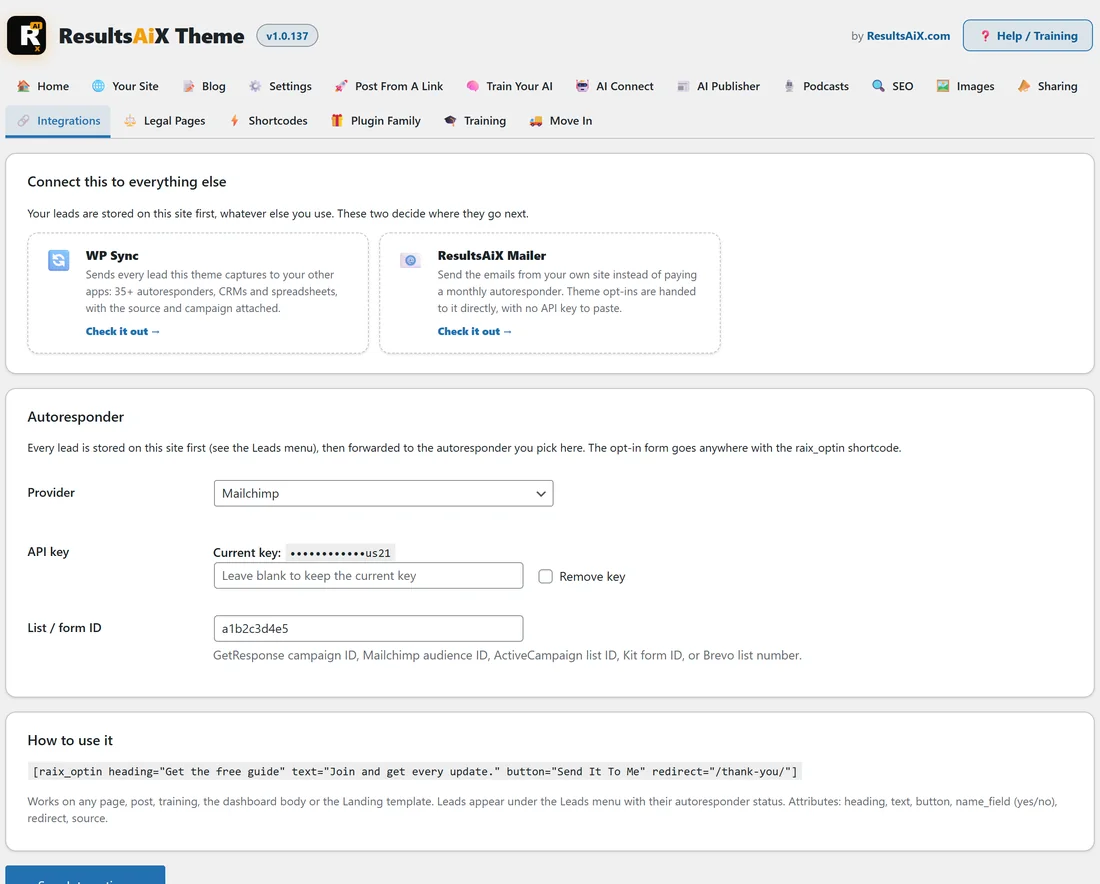
On Integrations, Autoresponder, Provider has None (store leads locally only), GetResponse, Mailchimp, ActiveCampaign, Kit (ConvertKit), Brevo (Sendinblue), AWeber (web form, posted from the visitor's browser), LeadsLeap / SendSteed (posted from the visitor's browser) and Custom HTML form (paste any autoresponder's code).
- API key and, for some, API URL.
- List / form ID: the GetResponse campaign ID, Mailchimp audience ID, ActiveCampaign list ID, Kit form ID or Brevo list number.
- AWeber list name, or the LeadsLeap username and list ID.
Press Save Integrations. Above the form, WP Sync and ResultsAiX Mailer are shown as the two family plugins that take leads further.
Your leads:
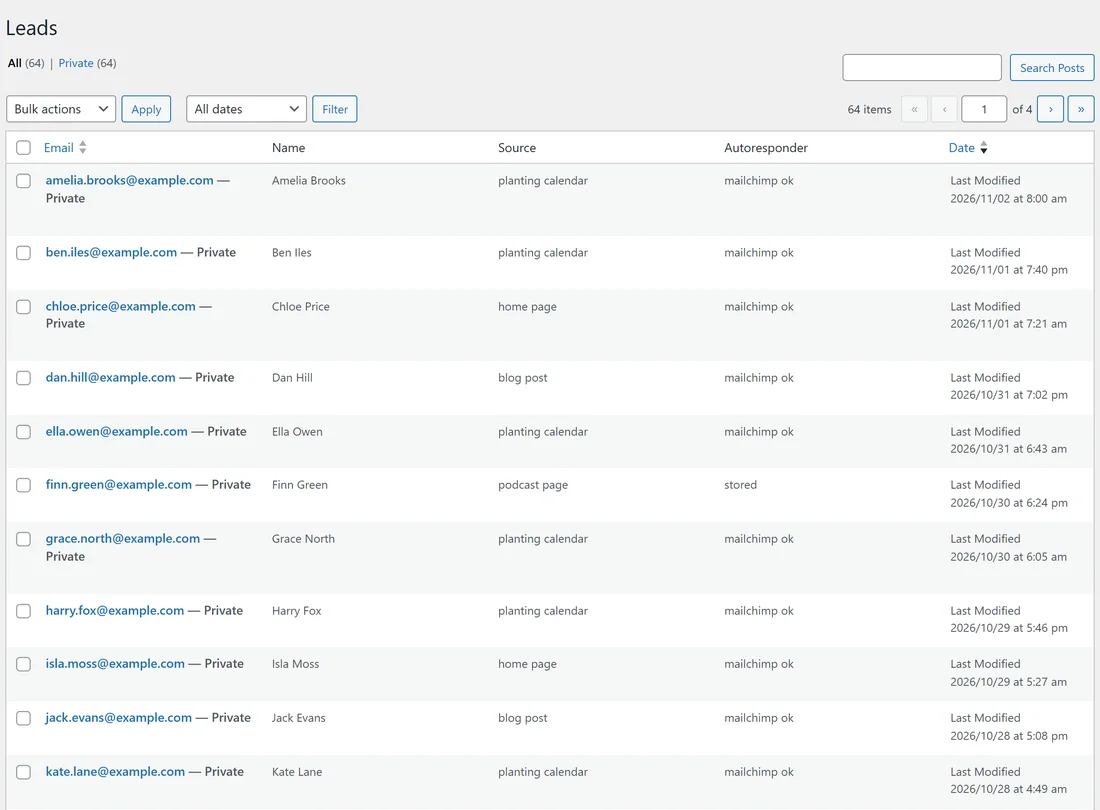
Every lead is stored on your site first, under Leads in the WordPress sidebar, with Email, Name, Source, Autoresponder and Date. Autoresponder says stored, the provider with ok, or the provider with failed. Each captured lead is also handed to ResultsAiX Mailer, WP Sync and WP Conversion Tracker when they are installed.
A real example:
Jo's Free Planting Calendar page has [raix_optin] with source="planting calendar" and redirect="/thank-you/", and the home page has one with source="home page". Integrations sends every lead to Jo's Mailchimp audience. In Leads, Jo can see that most sign-ups come from the planting calendar, and each shows mailchimp ok.
Tips:
- Give each form its own source so you can see which page brings the most leads.
- Use Refresh links across your posts after publishing a batch of new posts.
- Next, design the forms and boxes with the Shortcode Studio. See Shortcodes, Blocks, Widgets And The Plugin Family.