Some slides need the picture to be the star: a screenshot of your booking page, a photo of your studio, a step in a tutorial. Full Frame shows the slide's image clean and full size, and turns the slide's words into a small caption at the bottom.
Where to find it:

On Create Video, under Slides. The Full Frame button appears on any slide that has an image, next to Regenerate or Replace Image.
Step by step:
- On the slide you want, click Upload Image and choose your screenshot or photo. For a perfect fit, make it 1920 by 1080 for a landscape video or 1080 by 1920 for a vertical one.
- Click Full Frame. The button changes to a ticked Full Frame and the Preview shows the image clean.
- Keep the slide's words short. They show as a caption at the bottom of the frame and are still narrated in full.
- To go back to a normal image slide, click Full Frame again. Clear takes the image off completely.
How a Full Frame slide looks:
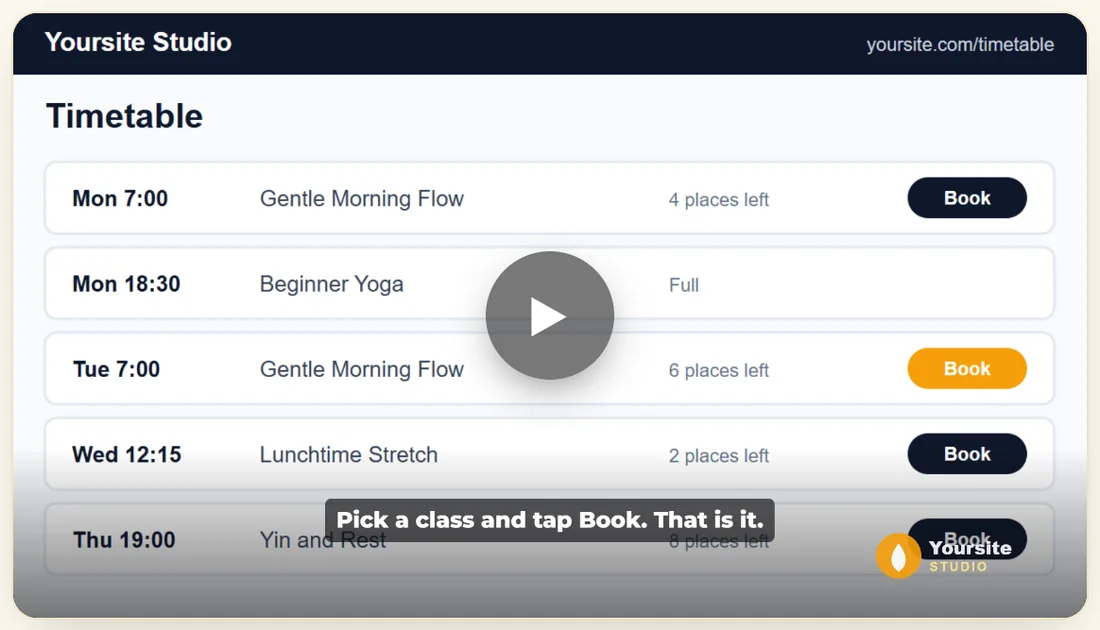
- The image fills the frame without the theme's colour wash.
- A soft shade at the bottom keeps the caption readable.
- The caption is centred, in your font, at a smaller size than normal slide text.
- Your Brand Kit logo still shows, if you use PRO.
A real example:
The Studio Welcome Explainer from Yoursite Studio shows people how to book a class. On slide 4, Pick a class and tap Book. That is it., the owner uploads a picture of the timetable page at yoursite.com/timetable and clicks Full Frame. Viewers see the real timetable, with the line as a caption, while the voice explains it.
Good uses for Full Frame:
- Tutorials: one screenshot per step, with the step as the caption. Click Settings, then Save.
- Proof: a photo of a happy class, a finished project, a real result you are allowed to share.
- Products: a clean photo of what people get, such as a printed planner.
- Before and after: two Full Frame slides in a row.
Making a screenshot that fits:
- Set your screen or browser window to a wide shape for landscape videos.
- Take the screenshot and crop it to the part that matters.
- If it is not 16:9, set Image fit to Fit with blurred edges so the whole picture shows.
- Upload it with Upload Image and click Full Frame.
Tips:
- Full Frame shows in the builder Preview and in the exported MP4.
- Use it for one or two key moments, then go back to normal slides to keep the rhythm.
- The image note and Regenerate stay available, so you can switch the slide to an AI image any time.
- For one image behind every slide instead, use Custom Background. See Themes, Colours, Accents And Restyle.