A deadline helps people decide. Engage has one countdown engine that you can switch on in almost any campaign, and the Countdown Bar, which is that same clock as its own bar. Every visitor counts down to the same real moment, wherever they are in the world.
Where to find it:
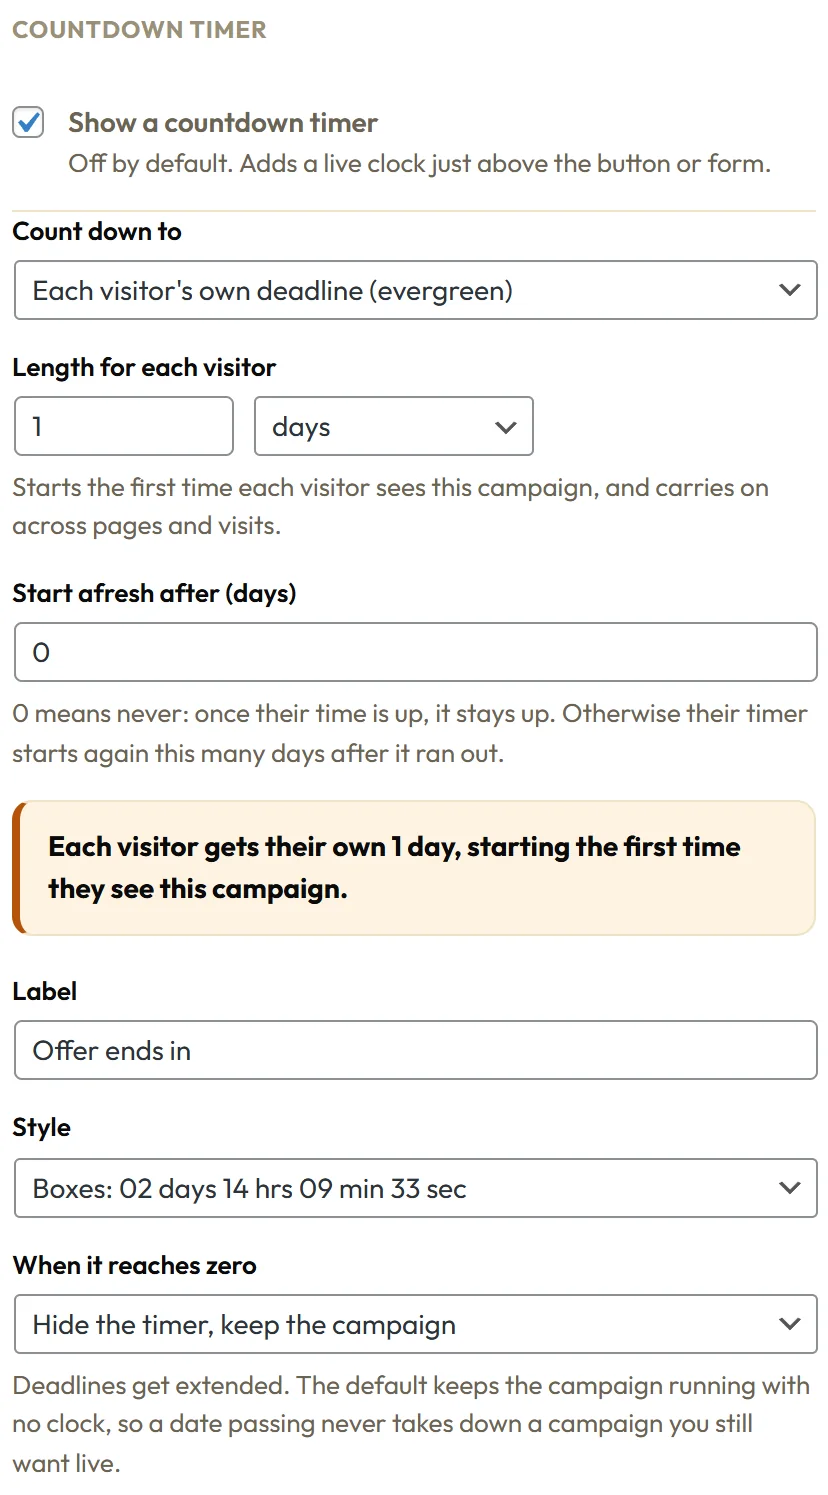
Open a campaign in the builder. On the Content tab, find the Countdown timer group and tick Show a countdown timer. On a Countdown Bar the group is called Countdown and is always on. The timer is available on every type except the Announcement Ticker and the Cookie Notice Bar.
Count down to:
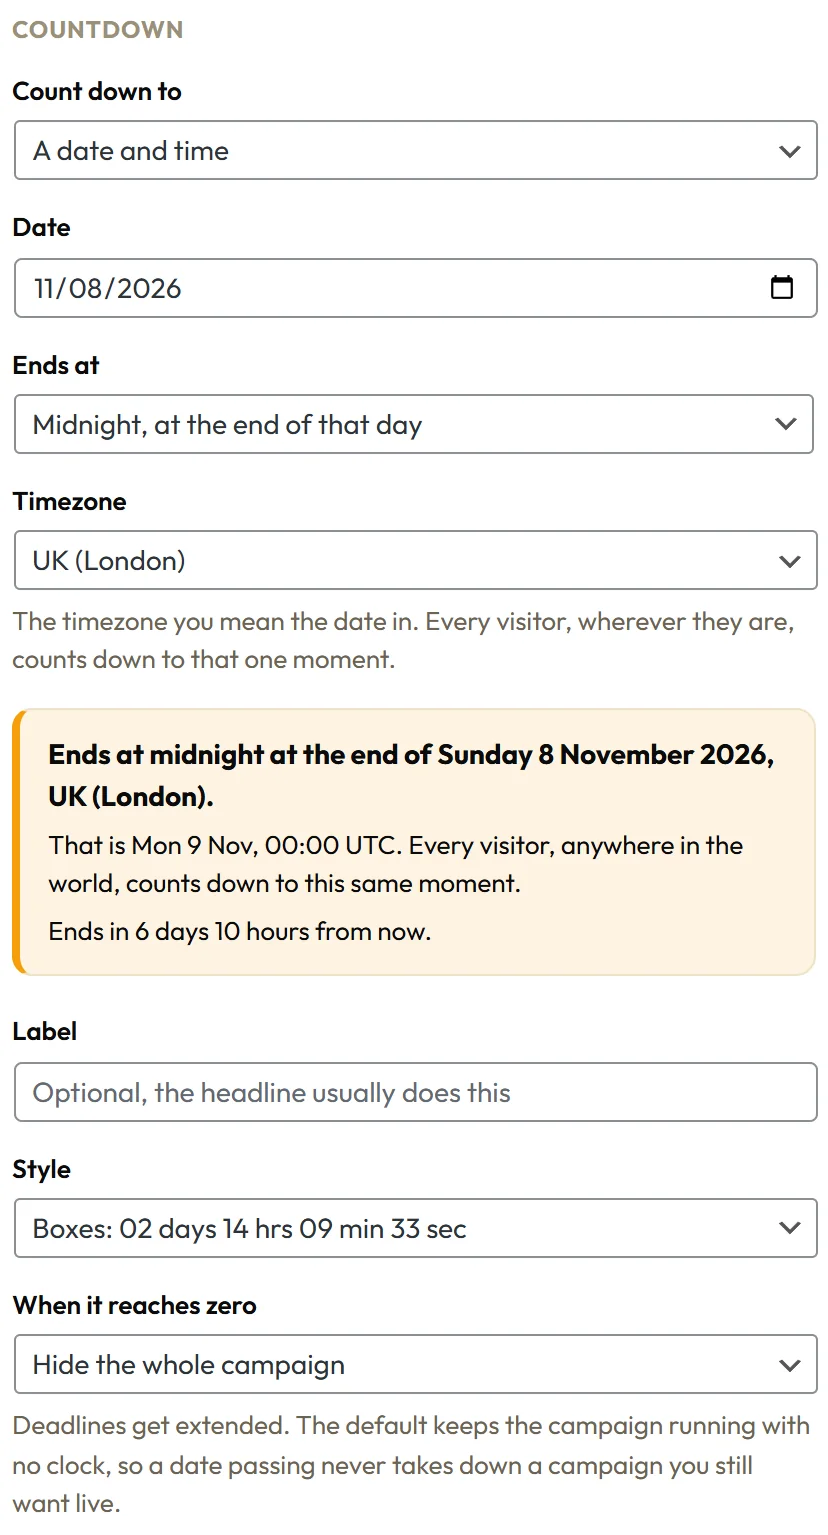
- A date and time: pick the Date, then Ends at, either Midnight, at the end of that day, or A specific time. Choose the Timezone you mean the date in.
- Each visitor's own deadline (evergreen): set Length for each visitor in minutes, hours or days. It starts the first time each visitor sees the campaign and carries on across pages and visits. Start afresh after (days) restarts it that many days after it ran out. 0 means never.
- The end date on the Targeting tab: counts down to the moment the campaign switches itself off. Change the End date and the timer follows.
The live check:
Under the settings, Engage tells you in plain words when the timer ends, in your chosen timezone and in UTC, and how long that is from now. Use it to confirm the deadline before you publish.
Look and ending:
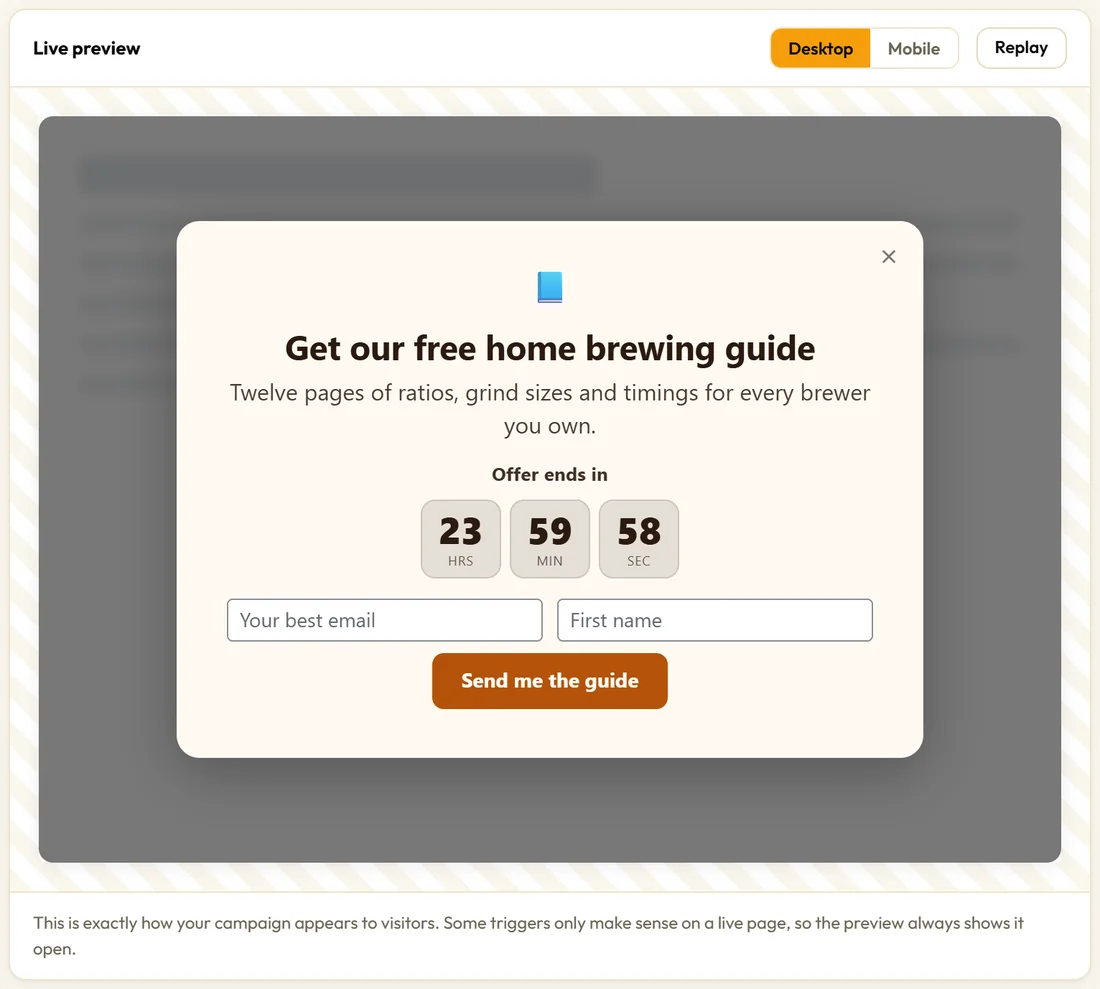
- Label: the words above the clock, for example Offer ends in. On a Countdown Bar the headline usually does this, so it is optional.
- Style: Boxes, with days, hours, minutes and seconds in separate boxes, or One line.
- When it reaches zero: Hide the timer, keep the campaign (the default), Show a short "offer has ended" line, or Hide the whole campaign.
- Ended message: the line shown when you pick the offer has ended option.
The default keeps the campaign running with no clock, so a date passing never takes down a campaign you still want live. Choose Hide the whole campaign when the offer truly ends.
In the Campaigns list:

A campaign with a timer shows a small clock note under its name, for example Timer ends at midnight, end of Sun 8 Nov GMT, so you can see every deadline without opening anything.
A real example:
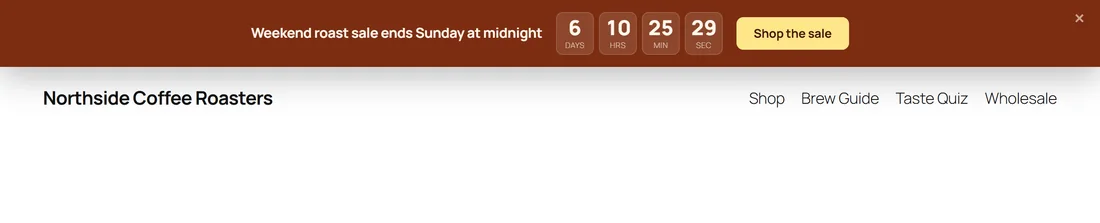
Northside runs a Weekend Roast Countdown bar: A date and time, Sunday, Midnight at the end of that day, Timezone UK (London), Style Boxes, and Hide the whole campaign at zero. For their Brew Guide Exit Popup they add an evergreen timer of 24 hours with the label Offer ends in, so each new reader gets a fair, personal deadline.
Evergreen timers in detail:
The evergreen clock starts the first time a visitor sees the campaign and is remembered in that visitor's browser, so it carries on across pages and visits. A different browser or device starts its own clock. With Start afresh after (days) set to 7, a visitor whose time ran out sees a fresh deadline a week later.
Choosing a timezone:
For A date and time, pick the timezone you think in. If your sale ends at midnight in London, choose UK (London); visitors in New York and Sydney count down to that same moment.
Common setups:
- Weekend sale: Countdown Bar, A date and time, Sunday, Midnight, Hide the whole campaign.
- New subscriber offer: popup with an evergreen 24 hour timer, Hide the timer, keep the campaign.
- Launch week: any campaign with The end date on the Targeting tab, and an End date on the launch's last day.
- Event sign ups: A date and time with A specific time, the moment the doors close.
Tips:
- Use A date and time for real sales, and evergreen for always on offers.
- Pair The end date on the Targeting tab with an End date, so the clock and the campaign stop together.
- Keep the Label short. The numbers do the talking.