The Setup Wizard walks you from a fresh install to a working desk in five short steps. It fills in what it can from your site, so most steps are a quick check and a click.
Where to find it:
A new install opens it for you. To run it again, open Help on the desk's menu bar and choose Setup Wizard, or press Run The Wizard under Help and your account on Settings, General. Running it again never undoes anything. A note at the top of each step reminds you, every step shows what is already saved, and Skip this step leaves a step exactly as it is.
Step 1, who the replies come from:
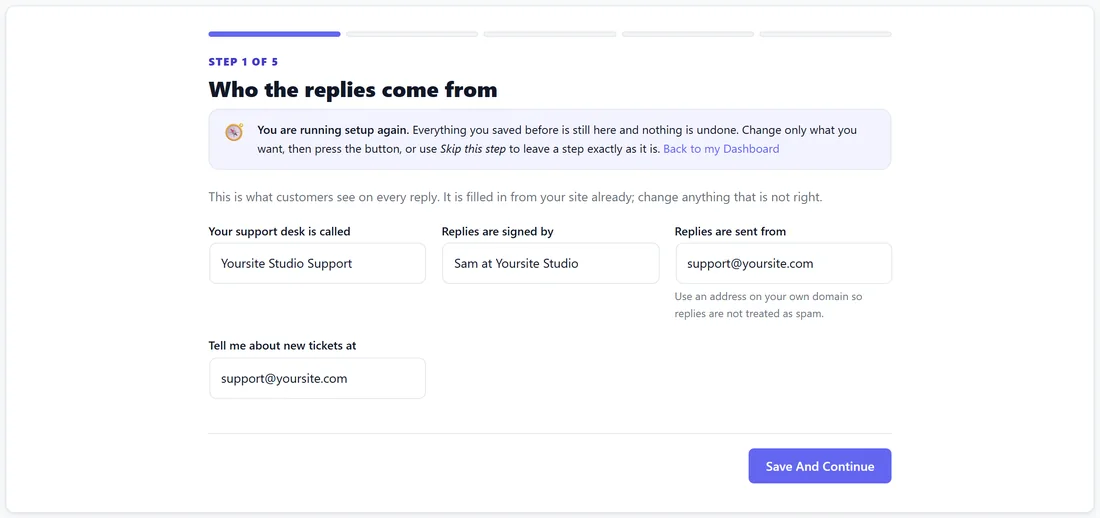
- Your support desk is called: the name customers see, for example Yoursite Studio Support.
- Replies are signed by: the name on every reply, for example Sam at Yoursite Studio.
- Replies are sent from: the address replies come from. Use an address on your own domain so replies are not treated as spam.
- Tell me about new tickets at: where your alerts go.
Press Save And Continue.
Step 2, switch on the AI:
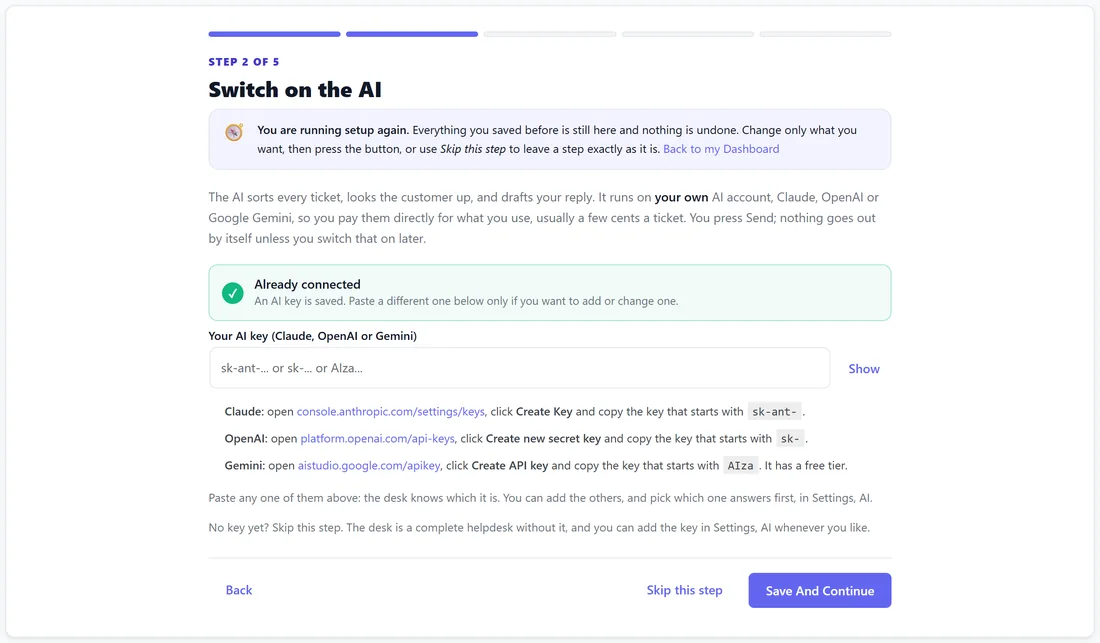
Paste one key from Claude, OpenAI or Google Gemini into Your AI key. The desk knows which service it belongs to. If a key is already saved, Already connected shows instead. If another ResultsAiX plugin on the site already holds a key, the step offers Use This Key, so there is nothing to paste. No key yet? Press Skip this step. The desk is a complete helpdesk without one.
Step 3, what we found on this site:
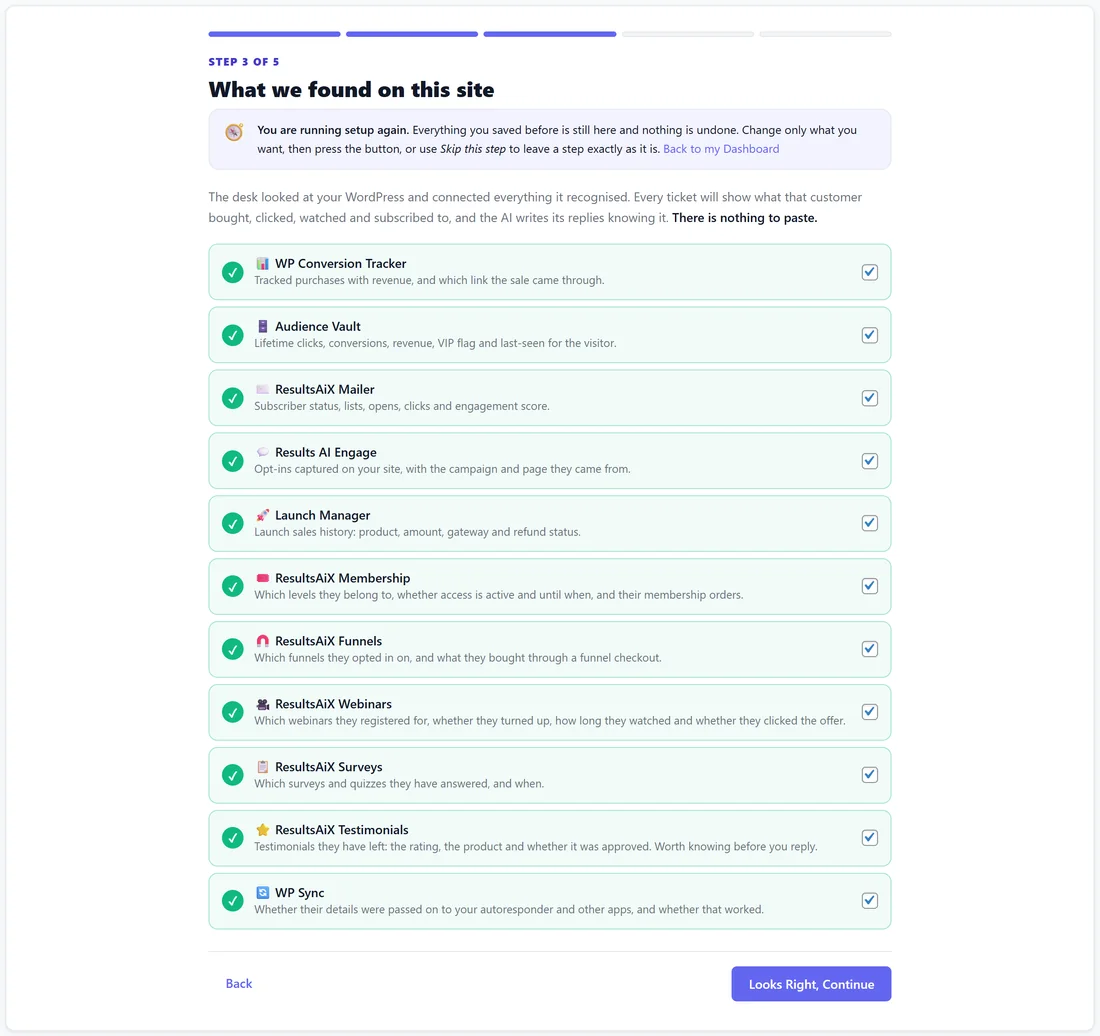
A list of everything the desk recognised on your WordPress, already switched on, such as WP Conversion Tracker, the ResultsAiX Mailer or ResultsAiX Membership. Each one adds what it knows about a customer to every ticket. Press Looks Right, Continue.
Step 4, where your customers go:
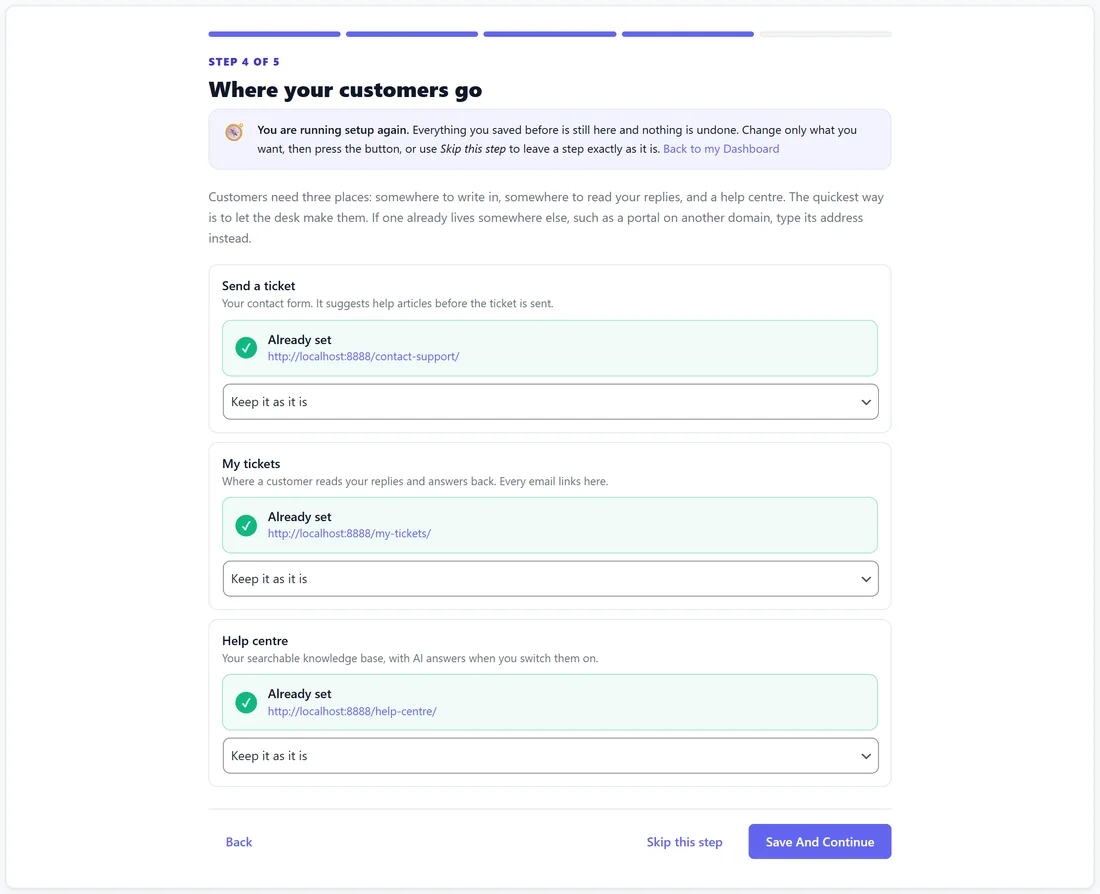
Three pages: Send a ticket (your contact form), My tickets (where customers read your replies) and Help centre. For each one, Keep it as it is, Use a page I already have, or It is somewhere else: I will type the address. On a new site the step offers to make the pages for you.
Step 5, see it work:
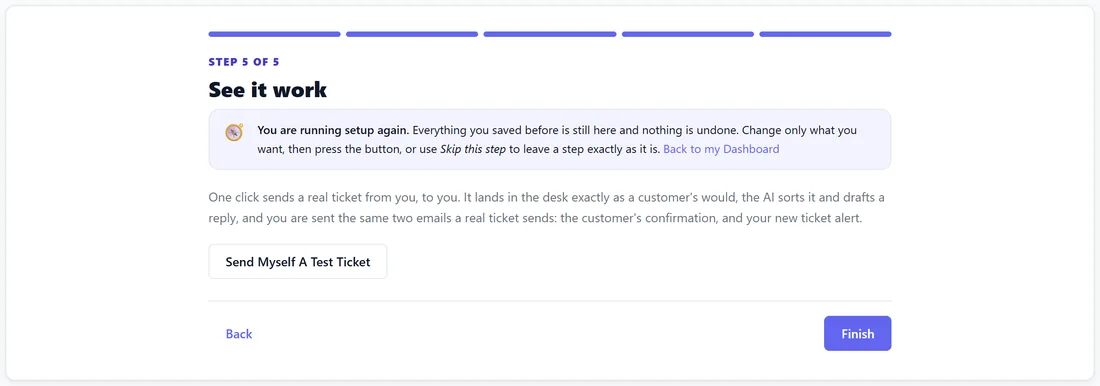
Press Send Myself A Test Ticket. A real ticket arrives from you, to you, the AI sorts it and drafts a reply, and you get the same two emails a real ticket sends: the customer's confirmation and your new ticket alert. The step tells you on the spot whether your site could send them. Press Finish.
Your desk is ready:
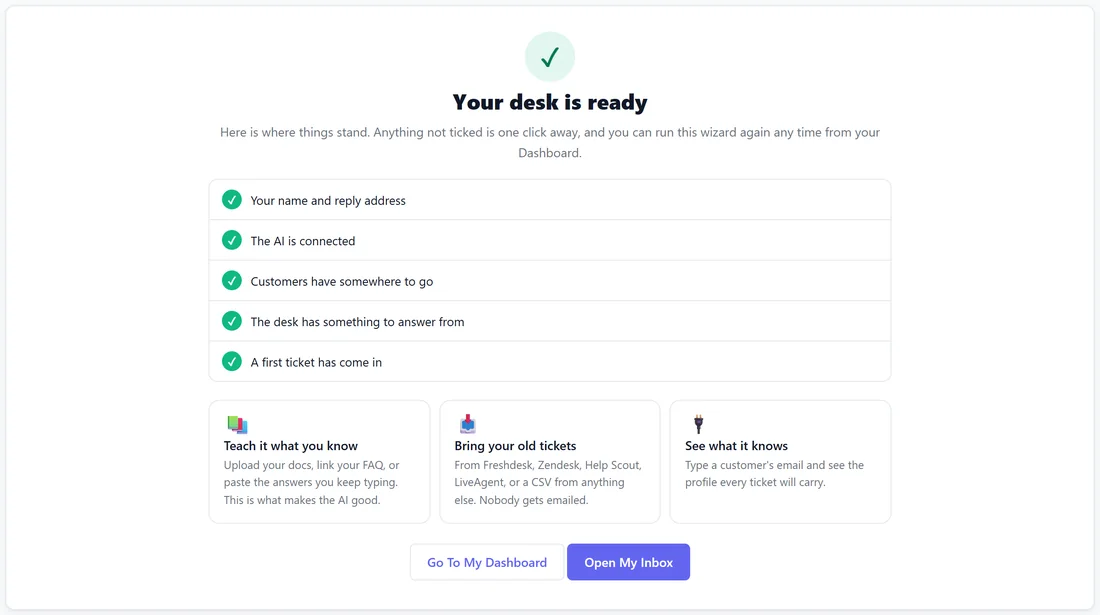
The last screen ticks off the five essentials and offers three next steps: Teach it what you know, Bring your old tickets and See what it knows. Go To My Dashboard and Open My Inbox finish the wizard.
What is picked up by itself:
ResultsAiX plugins on the same site connect themselves, with no keys: WP Conversion Tracker, Audience Vault, the Mailer, Engage, Launch Manager, Membership, Funnels, Webinars, Surveys, Testimonials and WP Sync. Each adds to the one customer profile shown on every ticket and handed to the AI.
From the Mailer the desk reads the emails sent to the person and what happened to each, why mail may not be reaching them, every list with its dates, their automations, tags and custom fields. That is what lets you, or the AI, answer "I never got the email".
WarriorPlus, JVZoo and ClickBank sales that already arrive through WP Conversion Tracker or Launch Manager are recognised too, so you are not asked to paste an address for a feed you already have.
The Integrations screen:
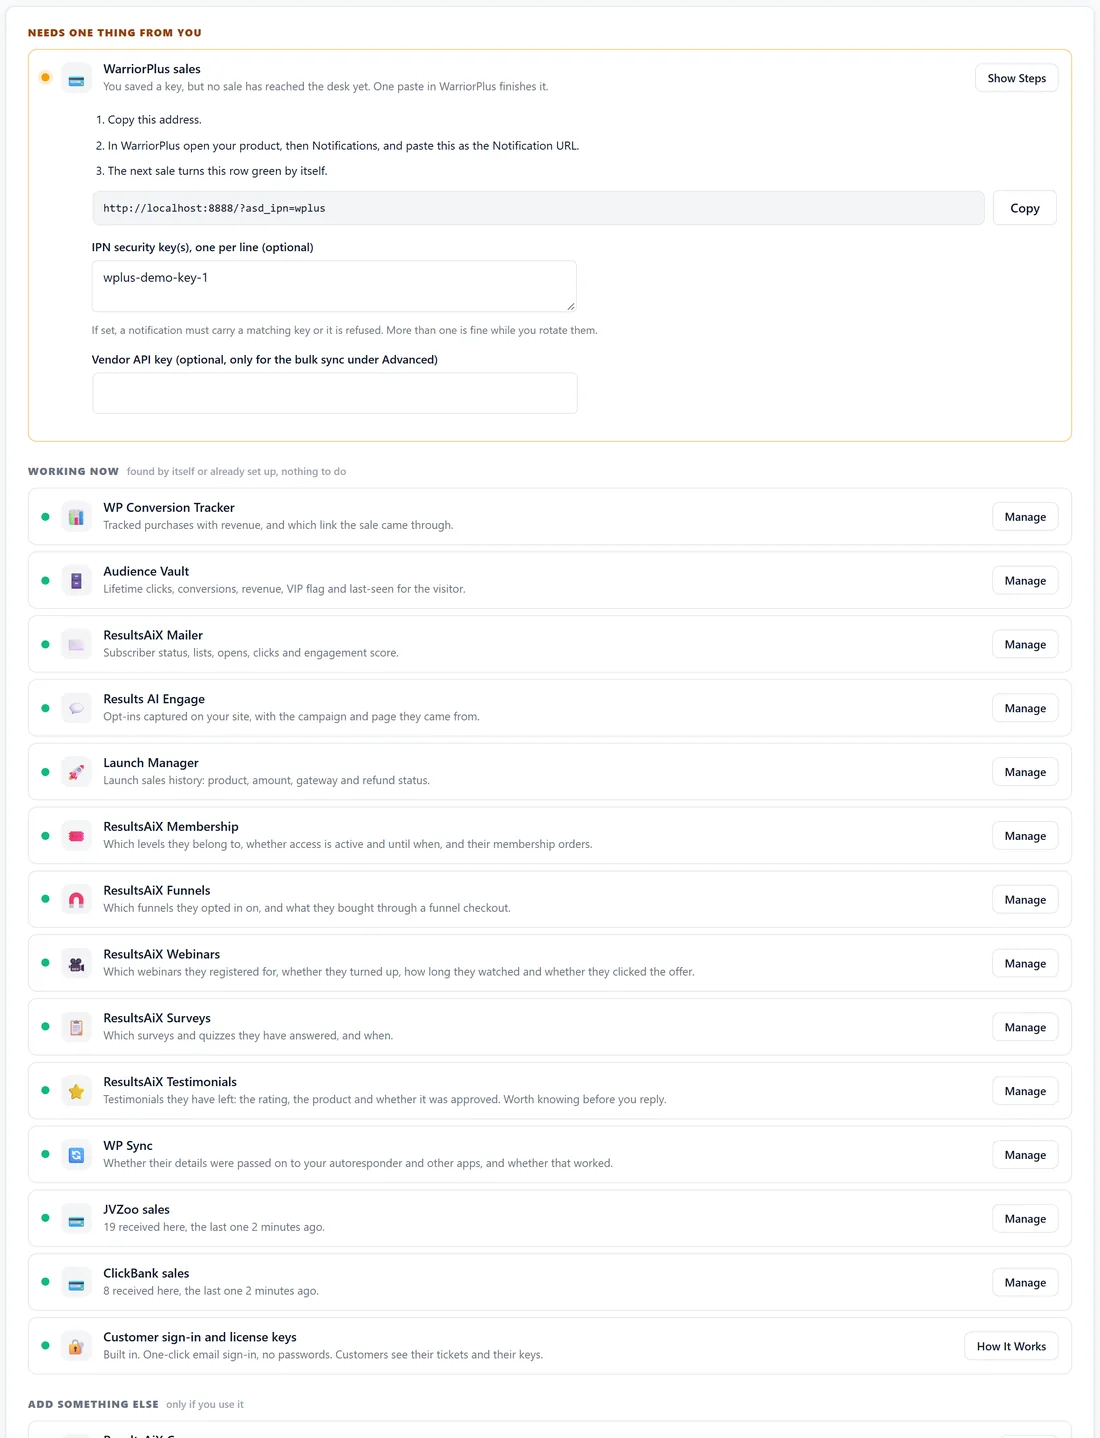
Open Settings, Integrations. The top card, What The Desk Knows About Your Customers, counts what is working, what needs you and what you could add. Below it:
- Needs one thing from you: a row with its steps open, usually one address to copy.
- Working now: what is connected, with nothing to do.
- Add something else: what you could connect, closed until you want it.
- For developers and special setups, at the bottom, which you can ignore.
One Save Integrations button saves every row.
Try it on a real customer, at the top, shows the profile the desk builds for any email address. If it looks right there, it is right on every ticket and in every AI reply.
Good values for step 1:
- Desk name: your business name and the word Support, so customers know at a glance who wrote.
- Signed by: a real first name and the business, such as Sam at Yoursite Studio. People reply more kindly to a person.
- Sent from: support@ on your own domain. Free email addresses are often refused by sending services.
- Alerts: the address you actually read during the day.
Good to know about step 4:
- Keep it as it is leaves a page you already set.
- Use a page I already have lists your pages; put the matching shortcode on it: [asd_submit_ticket], [asd_portal] or [asd_kb].
- It is somewhere else: I will type the address is for a portal or help centre on another domain. Every link the desk writes then uses that address.
What happens to the test ticket:
It arrives from your own address, as a customer's would. The AI sorts it and drafts a reply like any other ticket. Delete it from the ticket screen with Delete Ticket when you are done, or mark it Solved.
If the test emails do not arrive:
The step says on the spot whether your site could send them. If not, connect a sending service under Settings, Email, press Send A Test Email there, and run step 5 again.
The Integrations screen, step by step:
- Open Settings, Integrations.
- Look at the three counts at the top: working, needs you, you could add.
- Open any row under Needs one thing from you and follow its numbered steps.
- Press Save Integrations.
- Type a customer's email under Try it on a real customer and press Show Me What The Desk Sees.
A real example:
Sam runs the wizard on yoursite.com. Step 1 is already filled in from the site, so Sam only changes the sender name. Step 2 takes a Claude key. Step 3 finds the Mailer and WP Conversion Tracker. Step 4 creates the three pages. Step 5 sends a test ticket, which lands in the inbox sorted and with a draft.
Tips:
- Use a reply address on your own domain, such as support@yoursite.com.
- Next, connect a sending service so replies reach the inbox. See Your Emails: Sending Service, Branding And Alerts.
- Then teach the desk what you know. See Building The Knowledge Base.