A membership site runs on a handful of emails: password resets above all, then new account and payment notices. Out of the box, WordPress sends them from your web server, and many inboxes do not trust mail from a web server's own address. The Email sending card sends them through a proper sending service instead, so they reach the inbox.
You choose how mail leaves the site, add a backup connection if you like, and send a test to see it arrive. Every email is logged, so you can always check what went out.
Where to find it:
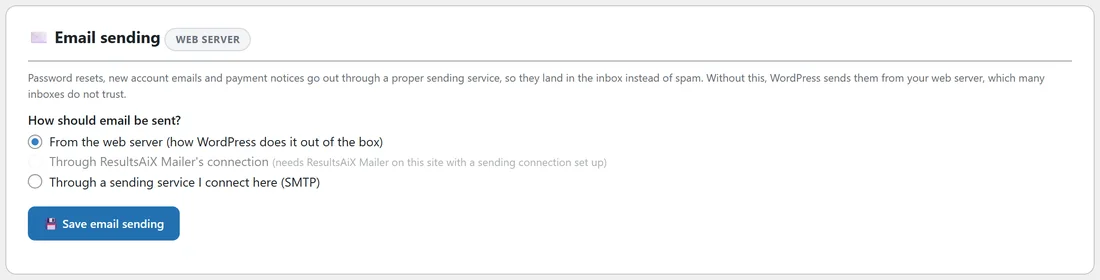
Open AiX Membership, then the Settings tab, and scroll to Email sending. The badge next to the title tells you where things stand: Web server while WordPress sends mail itself, On once a sending service is set up here, or Handled by followed by a plugin name when another mail plugin already runs the site's email.
If another mail plugin is in charge:
If WP Mail SMTP, FluentSMTP, Post SMTP, Easy WP SMTP, SMTP Mailer, Gmail SMTP or SureMail is active, or ResultsAiX Support Desk is set to send through its own service, this card says that plugin already sends the site's email and stays out of its way. Nothing here needs setting.
How should email be sent?
Pick one of three choices.
- From the web server (how WordPress does it out of the box): the default, so an update never changes anything on its own.
- Through ResultsAiX Mailer's connection: available when ResultsAiX Mailer is on this same site with a real sending connection. Member emails then use the Mailer's connection and its backups, with nothing to type twice. The line says ready on this site, or what it needs.
- Through a sending service I connect here (SMTP): connect any service that offers SMTP.
Connecting a sending service:
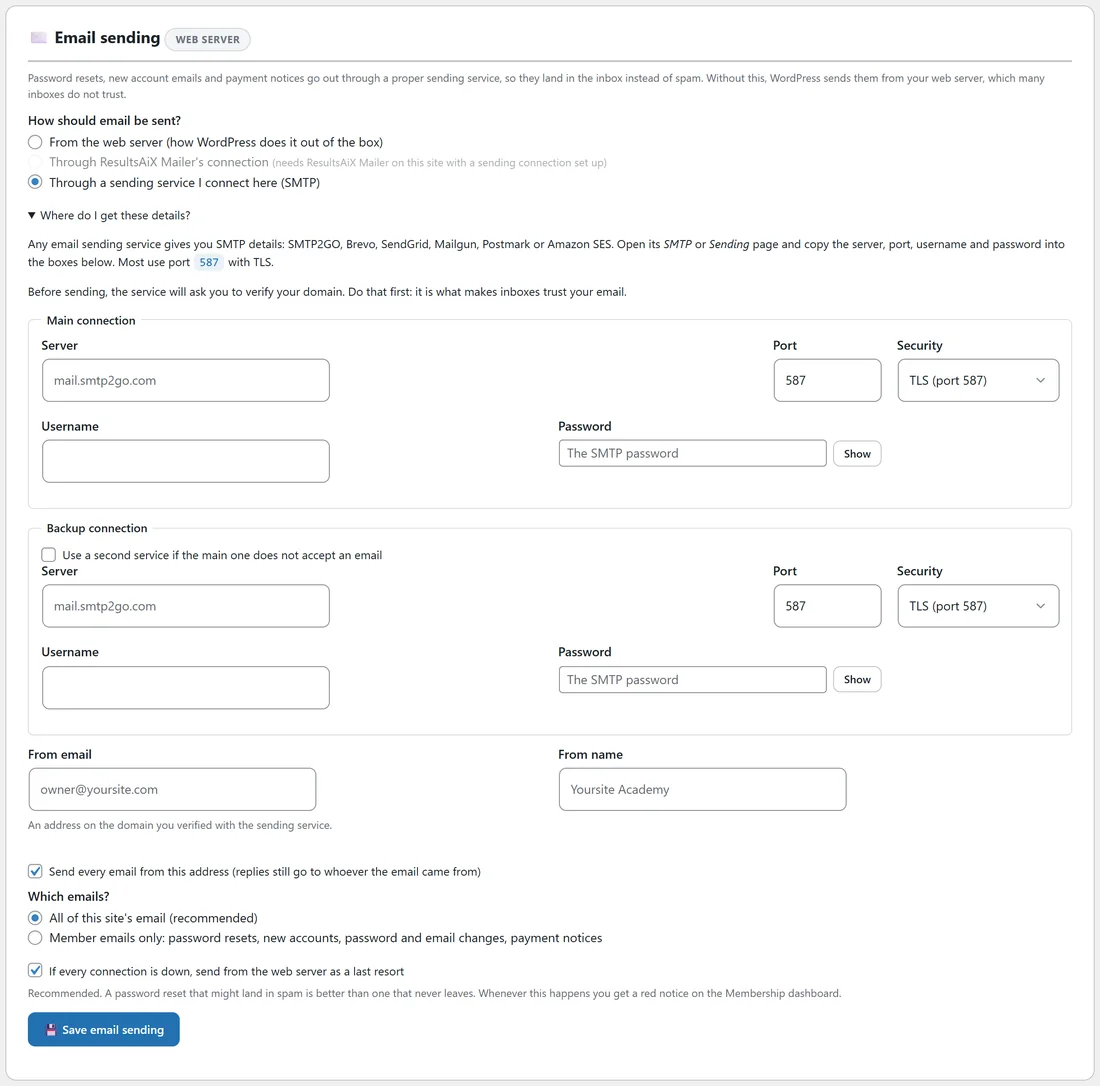
- Choose Through a sending service I connect here (SMTP). The connection boxes open.
- Open Where do I get these details? for a reminder. Any email sending service gives you SMTP details: SMTP2GO, Brevo, SendGrid, Mailgun, Postmark or Amazon SES. Open its SMTP or Sending page.
- Verify your domain with the service first. That is what makes inboxes trust your email.
- Under Main connection, fill in Server, Port and Security. Most services use port 587 with TLS (port 587). SSL (port 465) and None are also offered.
- Fill in Username and Password. The password is stored encrypted, and once saved the box reads "Saved. Type a new one to replace it." Leave it empty to keep the saved one.
- If you have a second service, tick Use a second service if the main one does not accept an email under Backup connection and fill in its details.
- Set From email to an address on the domain you verified, and From name to your business name.
- Press Save email sending.
The rest of the settings:
- Send every email from this address (replies still go to whoever the email came from): on by default. It keeps every email on your verified domain.
- Which emails?: All of this site's email (recommended), or Member emails only: password resets, new accounts, password and email changes, payment notices.
- If every connection is down, send from the web server as a last resort: on by default and recommended. A password reset that might land in spam is better than one that never leaves.
Every email tries the main connection first, then the backup, then the web server if you allowed it.
Sending a test:
Once a connection is saved, a Send a test box appears with your own email filled in. Press Send test email. It sends one test through each connection in turn, never through the web server, so a pass means the connection itself works.
Checking what was sent:
Open Recent emails under the card to see the latest messages: when, to whom, the subject, which connection it went through, and whether it was sent. A note explains anything that was not sent.
If the web server had to step in, or an email could not be sent at all, a red notice appears at the top of the Dashboard tab saying Email sending needs a look, with what happened. Press Open email sending to fix it, then I have looked at it to clear the notice.
A worked example:
Yoursite Academy uses SMTP2GO and has verified yoursite.com there.
- Choose Through a sending service I connect here (SMTP).
- Server: mail.smtp2go.com, Port: 587, Security: TLS (port 587).
- Username and Password: the SMTP user made in SMTP2GO.
- From email: owner@yoursite.com, From name: Yoursite Academy.
- Leave Send every email from this address, All of this site's email and the last resort box as they are.
- Press Save email sending, then Send test email, and check the inbox.
- Ask a test member to use Forgot your password? on the Log In page, and look for it in Recent emails.
Tips:
- Set up a backup connection with a second service if your members depend on password resets.
- If a test does not arrive, check the username, password and port first, then the domain verification at your sending service.
- Use the same From email the sending service verified, or some inboxes will still distrust it.
Related: Login, Registration And Account Pages, and Settings, Appearance And Diagnostics.