This guide takes you from a fresh install to a working members area in five steps. Nothing here needs Stripe, an import or any other plugin. When you finish, visitors see a polite locked message on your members-only pages, and members who log in see the content.
If you would rather be walked through it, the Setup Wizard does the same job with a few questions. See The Setup Wizard: A Members Area In Five Minutes.
Where to find it:
Everything below happens under AiX Membership in your WordPress admin, on the Levels, Members and Settings tabs, plus the Membership Protection box in the page editor.
Step 1, create a level:
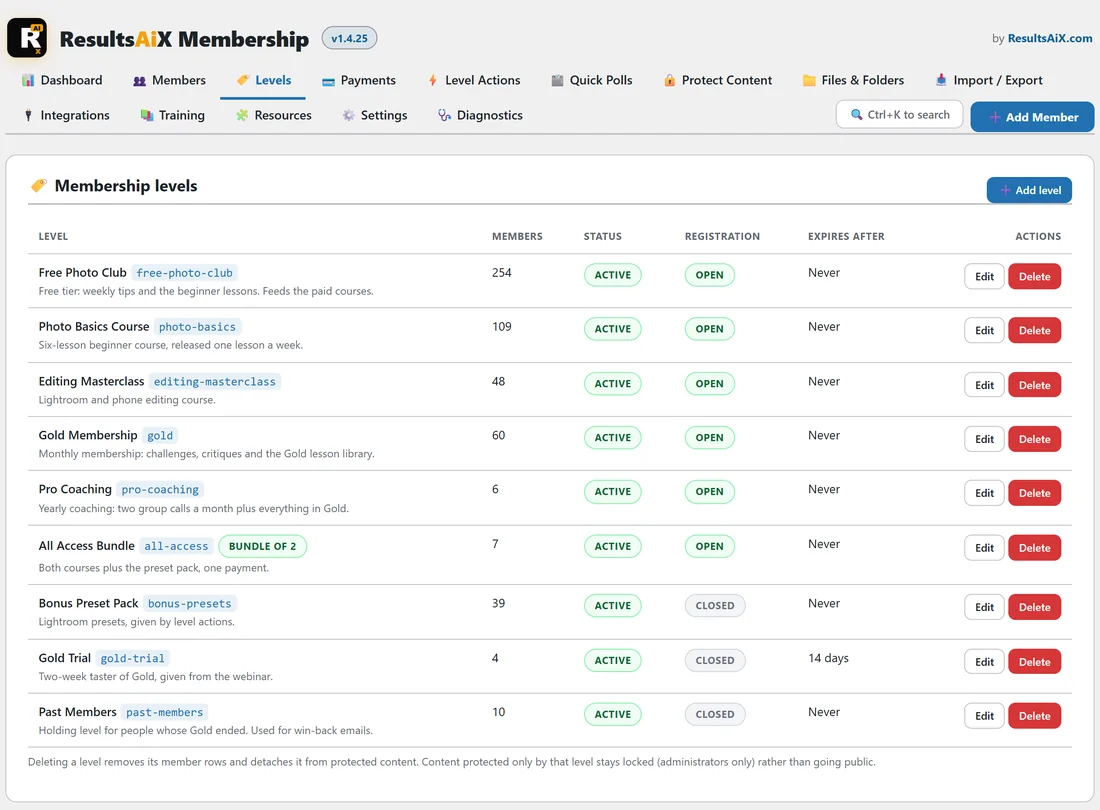
A level is the access group your members join. Start with one.
- Open AiX Membership, then the Levels tab.
- Click Add level.
- Type a Name, for example Gold Membership. Leave Slug empty and it is made from the name (gold-membership). You can type a shorter one such as gold.
- Leave Status on Active and Membership expires after empty, so the membership never ends on its own.
- Tick Allow free registration into this level only if you want people to be able to sign themselves up.
- Click Save level.
The level now appears in the Levels list with a member count of 0.
Step 2, protect some content:
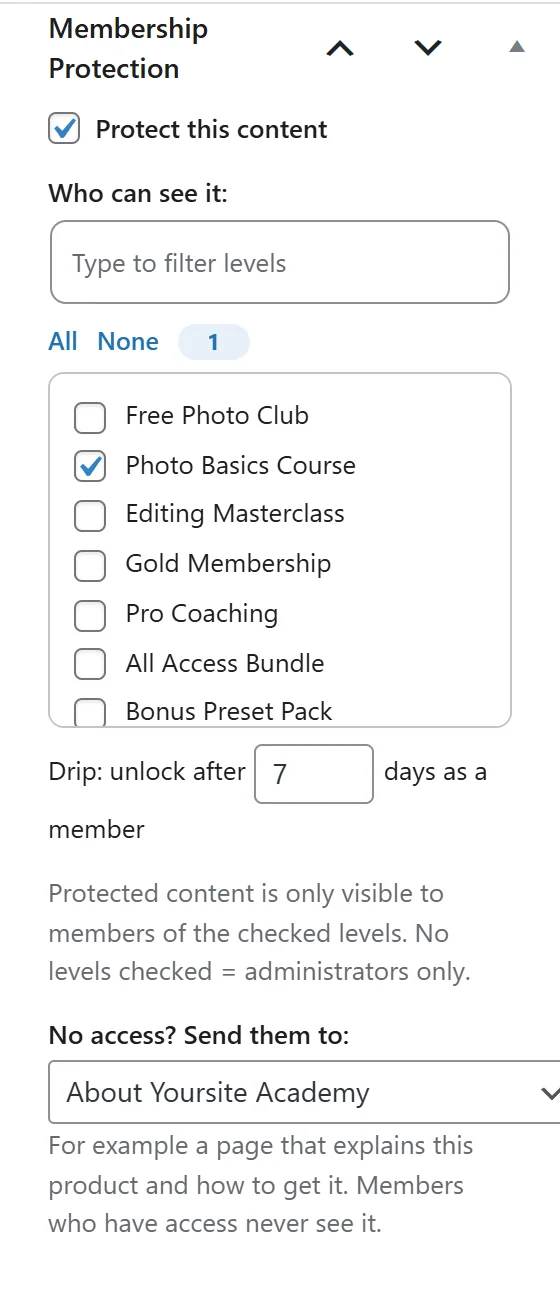
- Open any page or post in the WordPress editor.
- In the sidebar, find the Membership Protection box.
- Tick Protect this content.
- Under Who can see it, tick your new level.
- Click Update (or Publish).
The page is now members-only. For many pages at once, use the Bulk protect tool on the Protect Content tab, or protect a whole category there. See Protecting Pages, Posts And Categories.
Step 3, add a member:
- Click Add Member at the top right of any tab.
- Either type a name or email into Find an existing user and click the person, or fill in Or create new: email and Name.
- Leave Email the new user their login details ticked if you created a new account, so they get a link to set their password.
- Tick the level under Membership level(s).
- Click Save membership.
Whole lists come in faster through the Import / Export tab. See Managing Members.
Step 4, give members a login page:
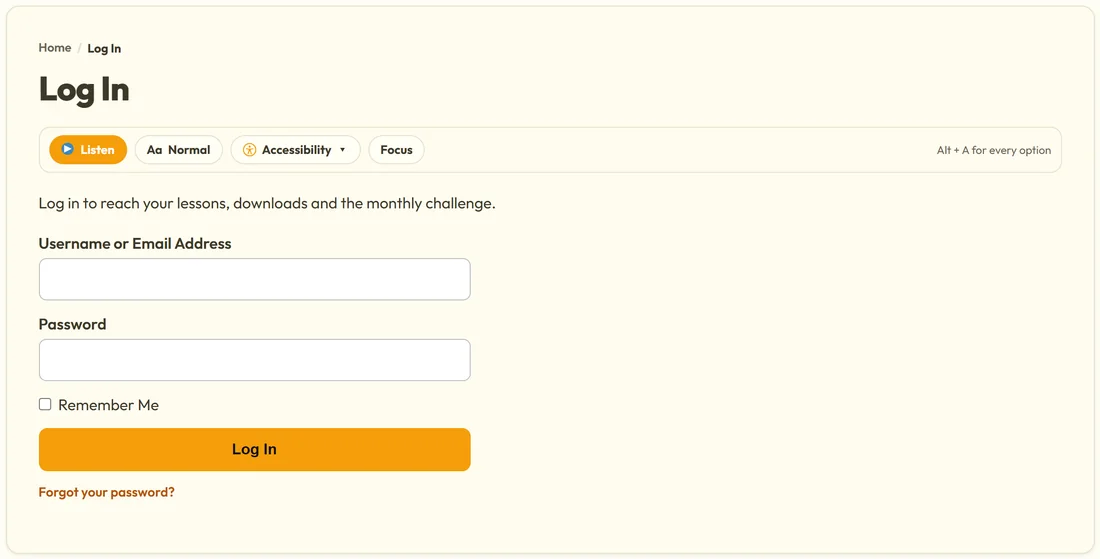
- Create a new WordPress page called Log In and put the shortcode [raxm_login] in it. Publish it.
- Create a page for members to land on, for example Members Home, and protect it for your level as in step 2.
- Open AiX Membership, then the Settings tab, then the Login & redirects section.
- In Your login page (optional), choose your Log In page.
- In After login (global fallback), choose your Members Home page.
- Click Save settings.
Visitors who need to sign in are now sent to your own login page instead of the WordPress one, and members land on Members Home.
Step 5, check it as a visitor:
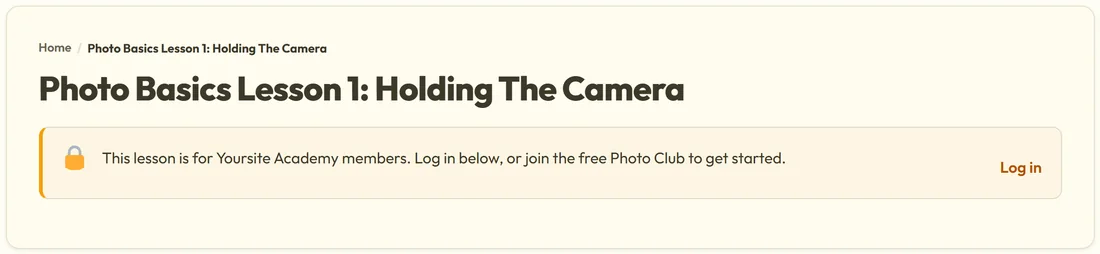
- Open a private or incognito browser window, where you are not logged in.
- Visit the page you protected.
- You should see your protection message with a Log in link instead of the content.
- Log in as your test member and the content appears.
Administrators see everything by default, so checking while you are logged in as yourself tells you nothing. The private window is the quick check, and the View as button on the Members tab shows you exactly what one particular member sees. See Look At The Site As One Of Your Members.
A real example:
Yoursite Academy wants its six Photo Basics lessons to be for course members only. The owner creates a level called Photo Basics Course with the slug photo-basics, opens Photo Basics Lesson 1: Holding The Camera in the editor, ticks Protect this content and the Photo Basics Course level, and repeats it for the other five lessons. A Log In page with [raxm_login] goes in the menu. In a private window, the lesson shows the protection message: This lesson is for Yoursite Academy members. Log in below, or join the free Photo Club to get started. That message is set on the Settings tab under When someone without access opens protected content.
Then, when you are ready:
- Add an account page. A page with [raxm_profile] gives members a full profile page: what they hold, everything they can open and their downloads. [raxm_account] is the simpler table of memberships with a log out link.
- Add a join page. A page with [raxm_register level="your-slug"] lets people sign up to a level that has registration open.
- Charge for a level. Connect Stripe on the Integrations tab and every level gets a price field. See Charging For Membership: Connecting Your Own Stripe Account.
- Move in from another plugin. If your members are in WishList Member or Paid Memberships Pro, the Import / Export tab brings them across with their join dates.
Tips:
- Keep the level name something you would happily show a member. It appears on their profile page and in their account table.
- Short slugs are easier to type into shortcodes. gold is easier than gold-membership-2026.
- Put your login page and members home in your menu, and use the menu rules so Log in shows to visitors and Members Home shows to members. See Menus That Change With Who Is Looking.