This guide covers how your surveys look, how the admin screens look, when you are emailed about new answers, how bots are kept out, and what happens to the data people give you.
Where to find it:
- Per survey: the builder's Thank-you & Look step, card Look & popup mode.
- Defaults and notifications: the Settings tab, cards Appearance and Notifications.
How each survey looks:
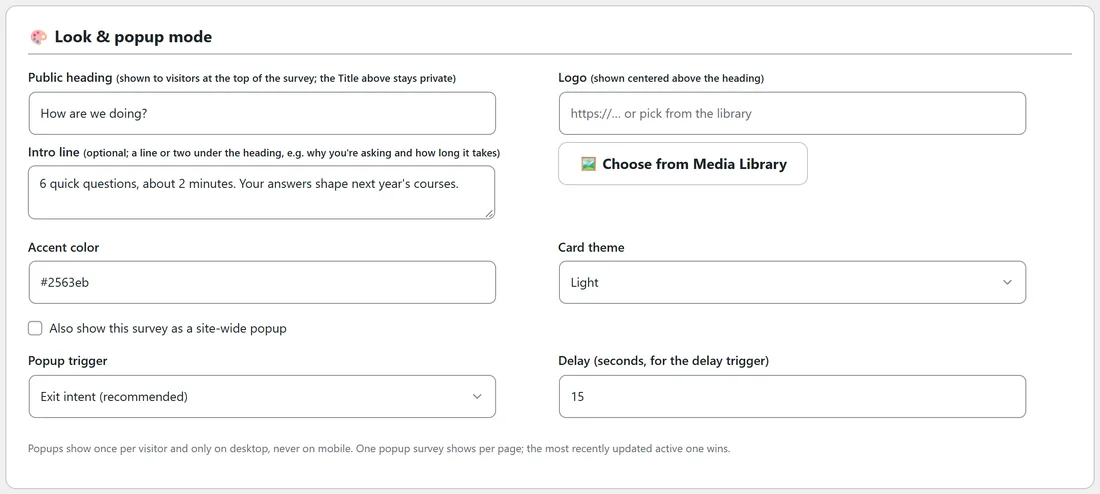
On Look & popup mode you set these.
- Public heading: what visitors see at the top of the card, for example "How are we doing?". The survey Title stays private to you.
- Intro line: optional, a line or two under the heading, such as why you are asking and how long it takes. Up to 400 characters.
- Logo: paste an image address or click Choose from Media Library. It shows centered above the heading. Remove logo takes it off.
- Accent color: one hex code, such as #2563eb. It colors the progress bar, the chosen answer, the buttons, the stars and the required star, so one code matches the survey to your brand. Pick a color that white text reads well on.
- Card theme: Light or Dark.
The heading, intro and logo show everywhere the survey appears: the shortcode, its own page, the popup, embeds on other sites and Preview. Click Preview to check the look before saving.
Defaults for new surveys:
On Settings, under Appearance, Default survey accent color and Default survey card theme set the starting look for every new survey. Each survey can change both on its own builder screen.
How the admin screens look:
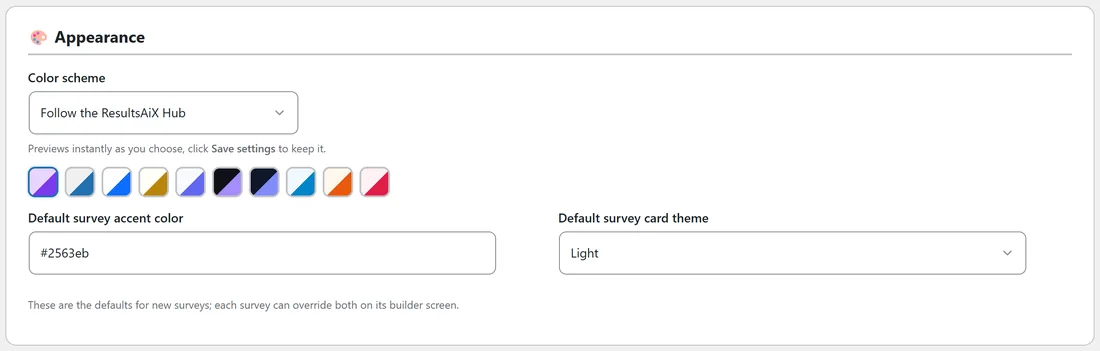
Also under Appearance, the Color scheme dropdown has ten choices: Follow the ResultsAiX Hub, WordPress Native, Clean White, Ivory Cream, Snow Light, Developer Dark, Midnight Blue, Ocean Blue, Sunset Warm and Rose Pink. Pick one and it previews instantly; click Save settings to keep it. Follow the ResultsAiX Hub, the default, uses the scheme you chose in the Hub, so all your ResultsAiX plugins match.
Notifications:
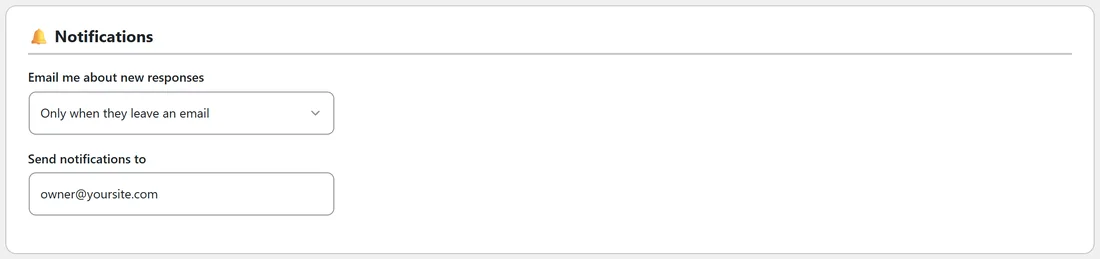
Under Notifications, choose one option in Email me about new responses.
- Never: no emails. Check the Responses tab when it suits you.
- Only when they leave an email: you hear about the responses that came with a subscriber attached.
- Every response: an email for each finished response, ideal while testing or for a low volume, high value survey.
Send notifications to is the address they go to. Leave it empty to use your WordPress admin email. Click Save settings.
What the notification looks like:
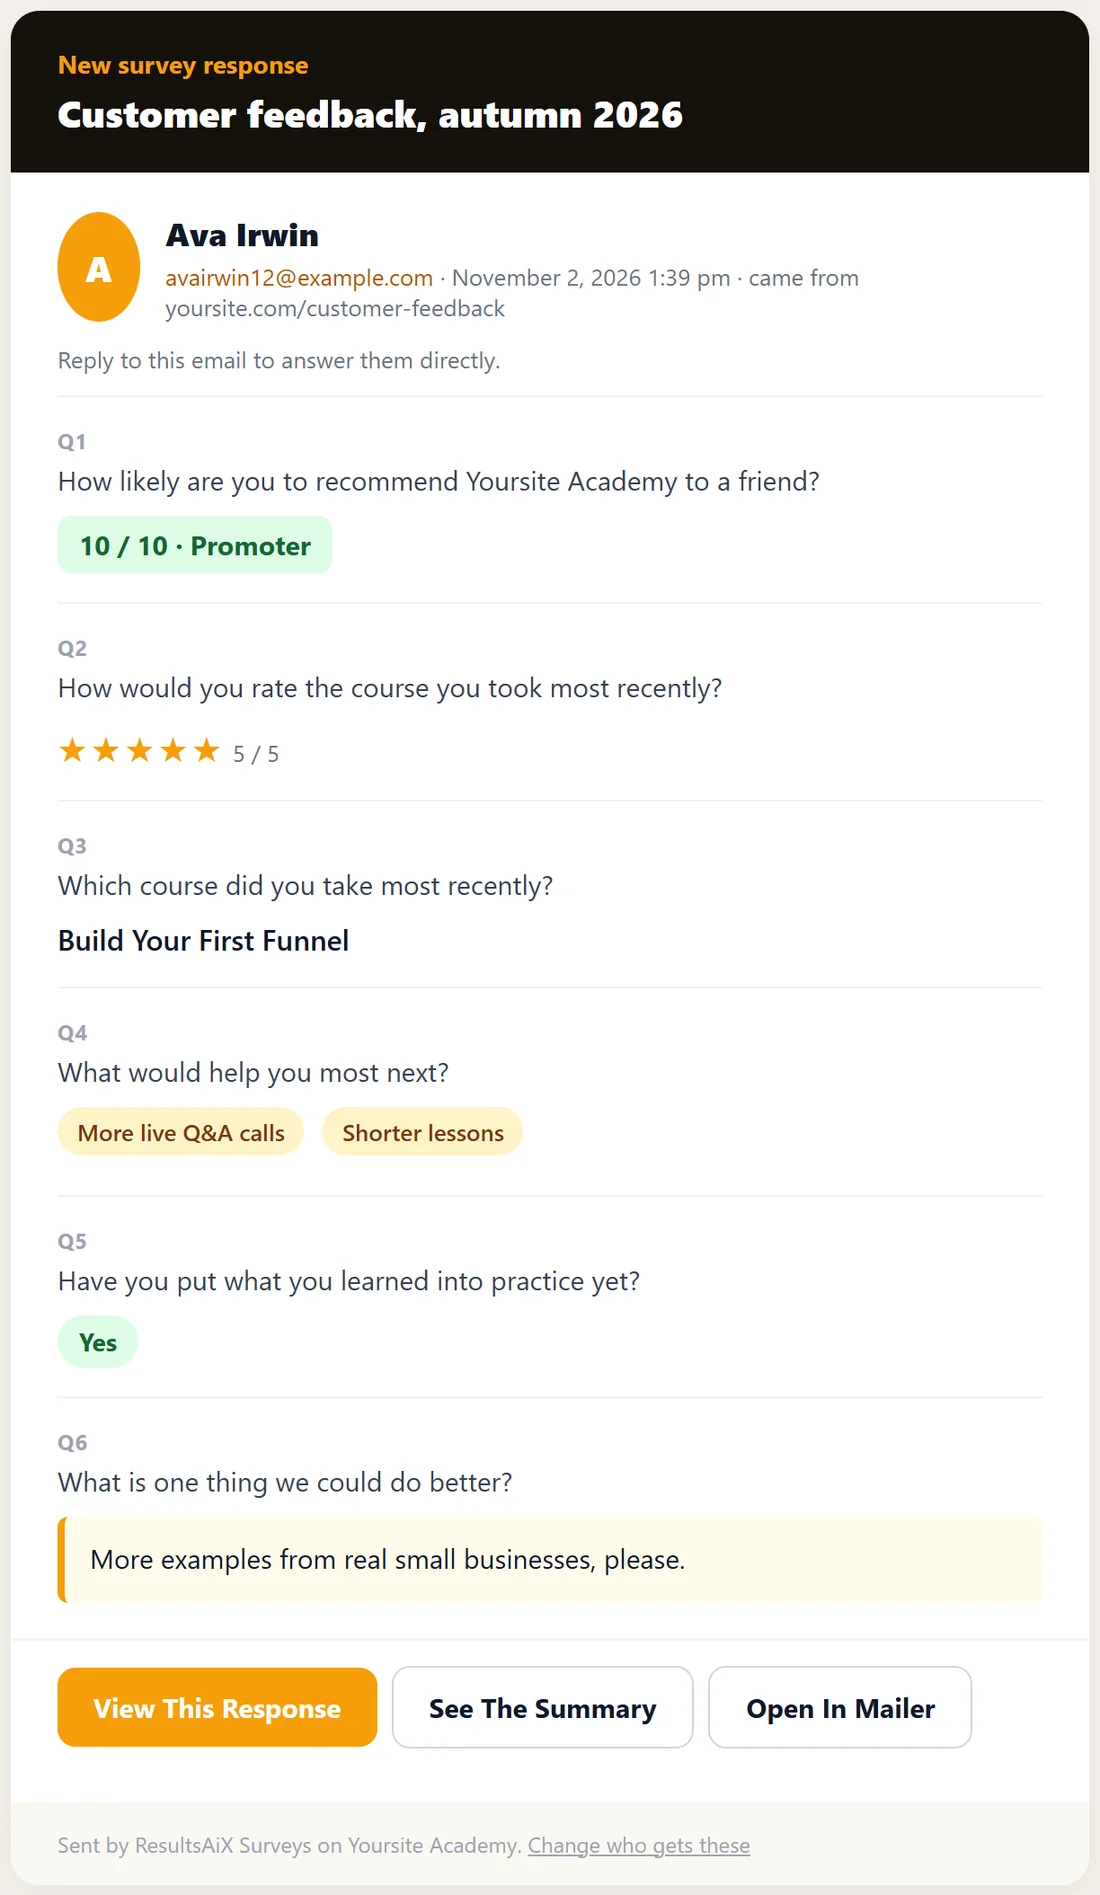
Each email is a clean card with the subject "New survey response from" the person's name and the survey title. It shows who answered, their email, when and where they came from, then every answer laid out properly: checkbox answers as chips, star ratings as stars, the 0 to 10 score as Promoter, Passive or Detractor, and long answers in a highlighted box. Buttons take you to View This Response, See The Summary and, when the person is a Mailer subscriber, Open In Mailer. The email is sent from your site's own domain, and when the person left an email, replying goes straight to them.
If notifications do not arrive, the cause is almost always your site's outgoing email rather than the plugin. An SMTP plugin fixes it for every plugin at once, and the Diagnostics tab shows the address notifications go to.
What keeps junk out:
- A hidden trap field that people never see and bots fill in. A submission with it filled in is refused.
- A minimum time: answers sent within three seconds of the survey loading are refused with "That was a little too fast. Please try again." A real person never sees it.
- Strict checking of every answer against your questions, so nothing unexpected can be written into your database.
- Each survey is identified by its own long random key, never by its number.
- No limit on real people: no cap on how many responses come in, or how many come from one address.
Submissions do not depend on a WordPress security token, because those expire behind page caches and would quietly break surveys on your busiest pages.
Privacy:
- Every answer, name and email lives in your own WordPress database. No outside survey service receives your audience's answers.
- With each response the plugin stores the page that sent the person to the survey and their browser's user agent, which is what lets you see where responses came from.
- When you click Read my results, only the survey title and goal, the answer counts and a sample of written answers go to your AI provider. Names and email addresses are not sent.
- Because the data is yours, honouring a deletion request is just deleting that response on the Responses tab.
- A survey's own page prints a short line under the card: "Your answers are private and only go to" your site name.
A real example:
Yoursite Academy gives its feedback survey the heading "How are we doing?", the intro "6 quick questions, about 2 minutes. Your answers shape next year's courses." and its brand blue, #2563eb. On Settings, notifications are set to Only when they leave an email and go to owner@yoursite.com, so the owner hears about every opt-in and can reply to them directly.
Brand a survey, step by step:
- Open the survey in the builder and go to Thank-you & Look.
- Type a Public heading that speaks to the visitor, for example "Find the right course for you".
- Add an Intro line that says why you are asking and how long it takes.
- Click Choose from Media Library and pick your logo, or paste its address.
- Type your brand color into Accent color as a hex code, such as #7c3aed.
- Pick Light or Dark under Card theme.
- Click Preview to see it, then Save survey.
Tips:
- Use Every response for the first week of a new survey, then switch to Only when they leave an email.
- A dark card theme suits a dark website; on a light site, keep Light.
- Set your brand color as the default accent once, and every new survey starts on brand.