Each email service asks for something a little different when you connect it. This guide goes service by service: where to find the key, what goes in each box, and what the service does with lists and tags. The same steps also appear on screen, right under the service picker.
Where to find it:
Open Integrations & AI, scroll to Your autoresponder, and pick your service in Your email service. The fields for that service appear below. After filling them in, click the Connect button, then use Send a test contact. The general steps are in Sending Survey Opt-Ins To AWeber, Mailchimp, ActiveCampaign And More, With Tags.
AWeber, the full connection:
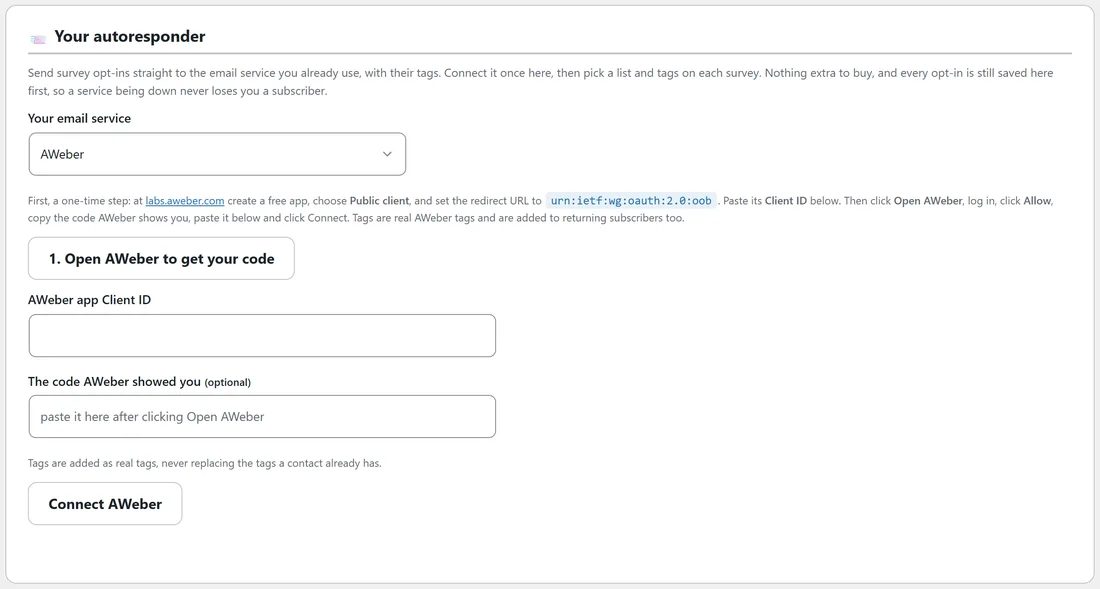
- First, a one time step: at labs.aweber.com create a free app, choose Public client, and set its redirect URL to the address shown on screen (urn:ietf:wg:oauth:2.0:oob). Paste the app's Client ID into AWeber app Client ID.
- Click 1. Open AWeber to get your code. AWeber opens in a new tab.
- Log in to AWeber and click Allow.
- Copy the code AWeber shows you and paste it into The code AWeber showed you.
- Click Connect AWeber.
Lists: pick one on each survey; AWeber needs a list for a new subscriber. Tags: real AWeber tags, added to returning subscribers too.
AWeber (simple, no login):
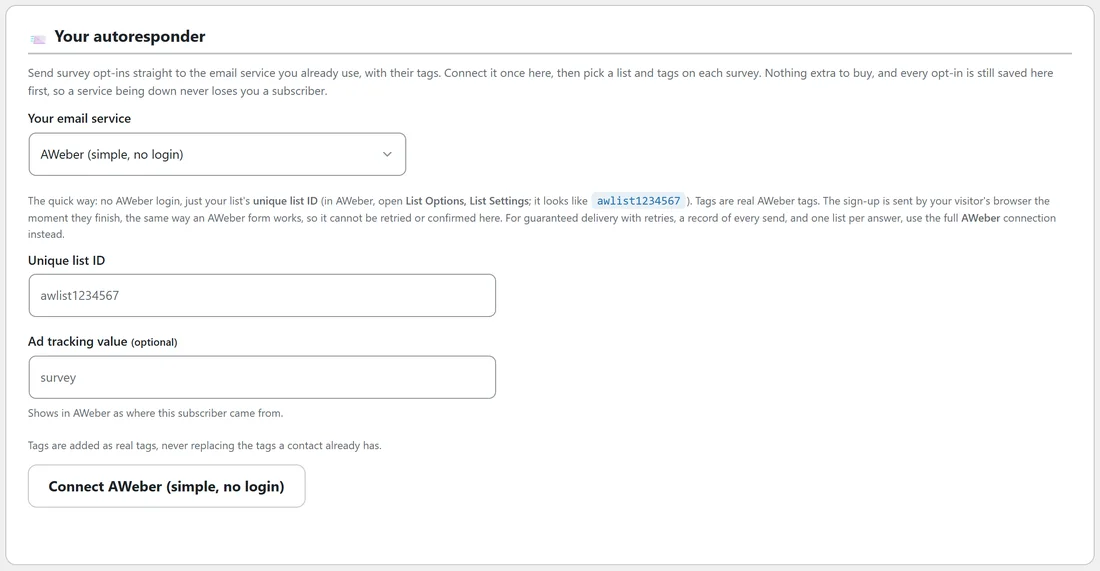
- In AWeber, open List Options, then List Settings, and copy the unique list ID. It looks like awlist1234567.
- Paste it into Unique list ID.
- Optional: an Ad tracking value, for example survey. It shows in AWeber as where the subscriber came from.
- Click Connect.
Tags are real AWeber tags. The sign-up is sent by your visitor's browser the moment they finish, the same way an AWeber form works, so it is not queued or retried and AWeber does not confirm it back. For retries, a record of every send and a list per answer, use the full AWeber connection instead.
Mailchimp:
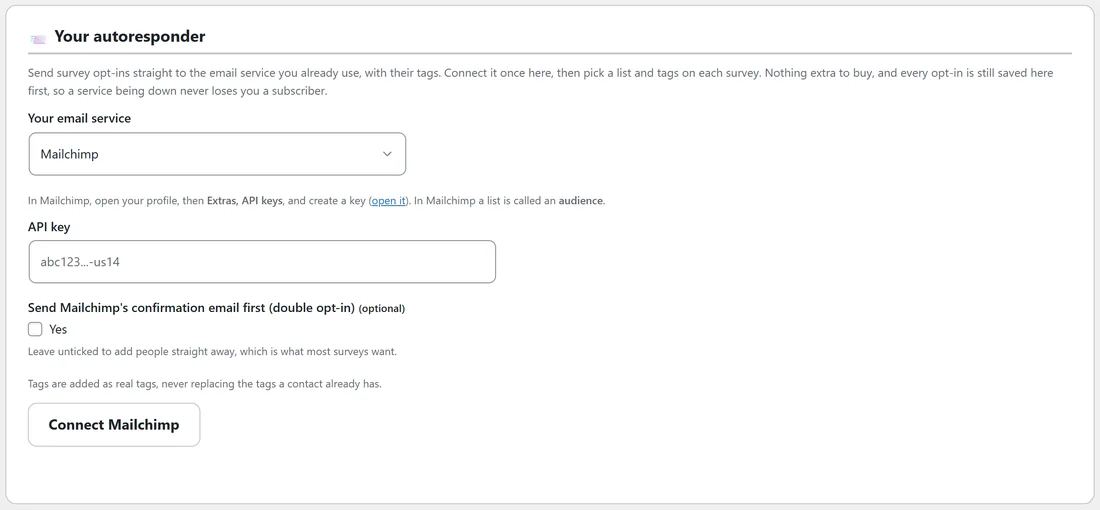
- In Mailchimp, open your profile, then Extras, then API keys, and create a key.
- Paste it into API key. It ends with a short data center code such as -us14.
- Leave Send Mailchimp's confirmation email first (double opt-in) unticked to add people straight away, which is what most surveys want, or tick it to send Mailchimp's confirmation email first.
- Click Connect Mailchimp.
In Mailchimp a list is called an audience; your audiences appear as the lists. A list is needed. Tags are real Mailchimp tags.
ActiveCampaign:
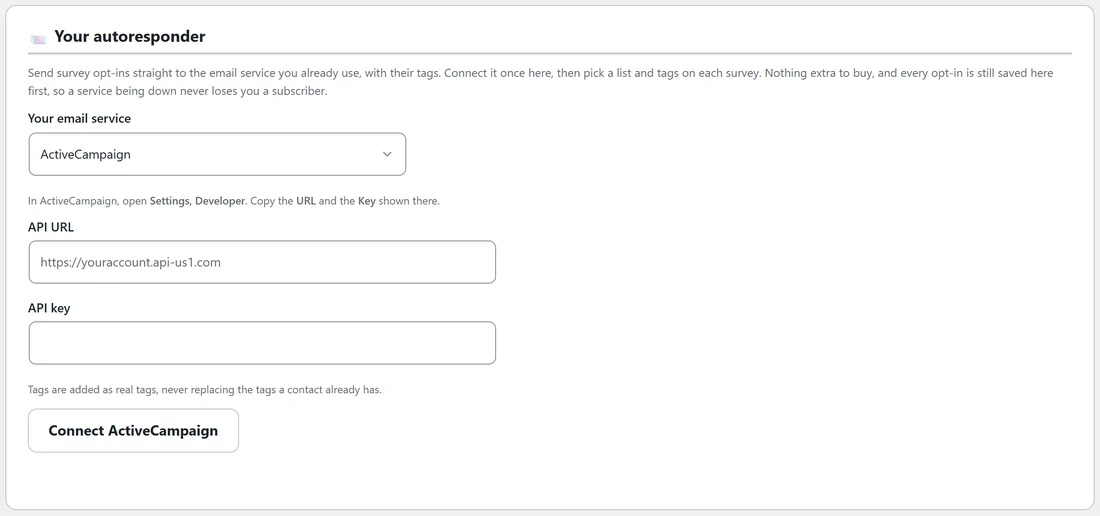
- In ActiveCampaign, open Settings, then Developer.
- Copy the URL shown there into API URL and the Key into API key.
- Click Connect ActiveCampaign.
A list is optional, so tags alone will do. Commas inside a tag name become spaces, because ActiveCampaign does not allow them.
Kit (ConvertKit):
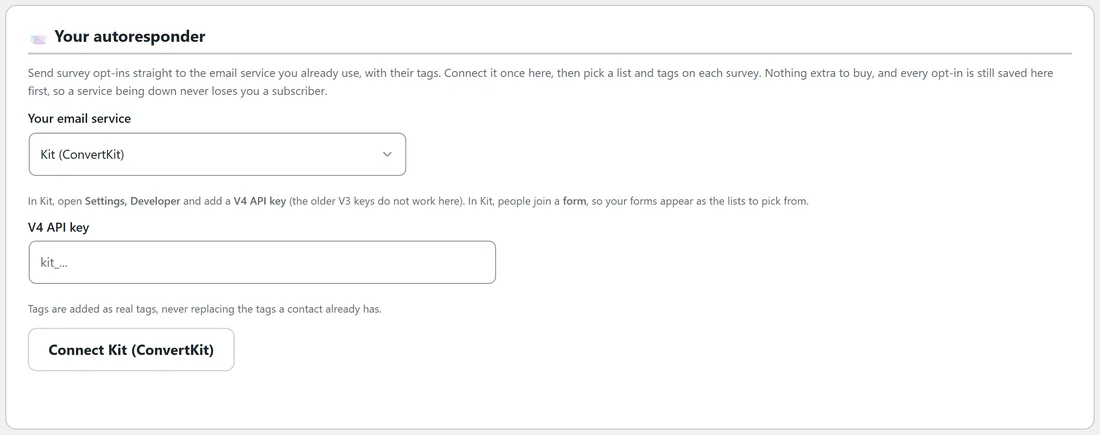
- In Kit, open Settings, then Developer, and add a V4 API key. The older V3 keys do not work here.
- Paste it into V4 API key.
- Click Connect Kit (ConvertKit).
In Kit people join a form, so your forms appear as the lists to pick from. A list is optional. Tags are real Kit tags.
GetResponse:
- In GetResponse, open Tools, then Integrations and API, then API, and generate an API key.
- Paste it into API key and click Connect GetResponse.
A list is needed. GetResponse tags can only hold letters, numbers and underscores, so spaces and dashes in your tags become underscores there. GetResponse switches off keys that are unused for 90 days, so if sending stops after a quiet spell, paste a fresh key.
Brevo:
- In Brevo, open your name at the top right, then SMTP & API, then API keys, and generate a key.
- Paste it into API key (it starts with xkeysib-) and click Connect Brevo.
Brevo has no tags, so each tag you set becomes a list called Tag: and your tag, kept in a folder called ResultsAiX Survey tags. The lists are created the first time a tag is used.
SendFox:
- In SendFox, open Settings, then API, and create a Personal Access Token. The SendFox API needs a Lifetime or Empire plan.
- Paste it into Personal Access Token and click Connect SendFox.
SendFox cannot tag a contact from outside, so each tag becomes a list called Tag: and your tag.
Systeme.io:
- In Systeme.io, open Profile settings, then Public API keys, and create a key.
- Paste it into API key and click Connect Systeme.io.
Systeme.io has no lists; it uses tags. Set the tags on each survey and start your Systeme.io automations from those tags.
HighLevel (GoHighLevel):
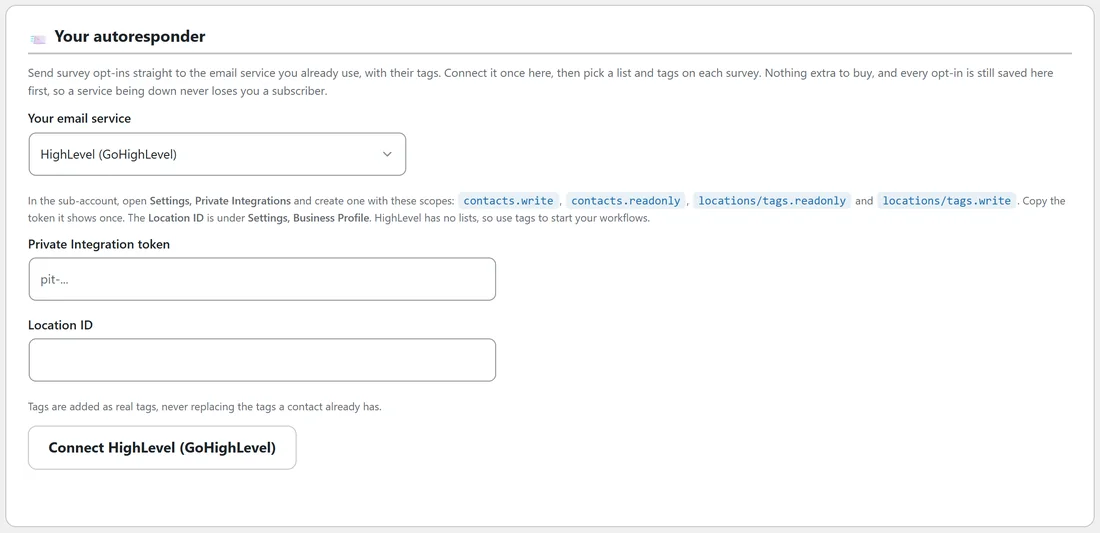
- In the sub-account, open Settings, then Private Integrations, and create one with these scopes: contacts.write, contacts.readonly, locations/tags.readonly and locations/tags.write.
- Copy the token it shows (it is shown only once) into Private Integration token.
- Find the Location ID under Settings, then Business Profile, and paste it into Location ID.
- Click Connect HighLevel (GoHighLevel).
HighLevel has no lists here, so use tags to start your workflows.
LeadsLeap (SendSteed):
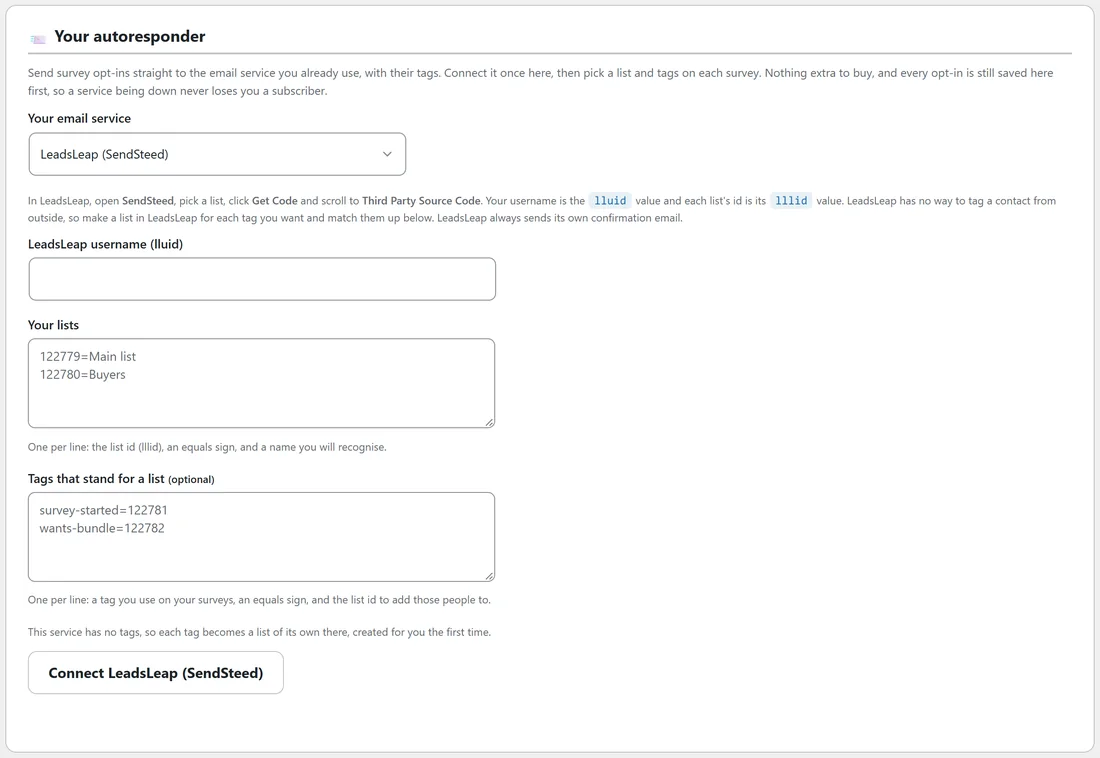
- In LeadsLeap, open SendSteed, pick a list, click Get Code and scroll to Third Party Source Code.
- Your username is the lluid value: paste it into LeadsLeap username (lluid).
- In Your lists, type one list per line: the list id (its lllid value), an equals sign, and a name you will recognise, for example 122779=Main list.
- LeadsLeap cannot tag a contact from outside, so make a list in LeadsLeap for each tag you want. In Tags that stand for a list, type one per line: the tag, an equals sign and the list id, for example survey-started=122781.
- Click Connect LeadsLeap (SendSteed).
LeadsLeap always sends its own confirmation email.
Any other service, through its sign-up form:
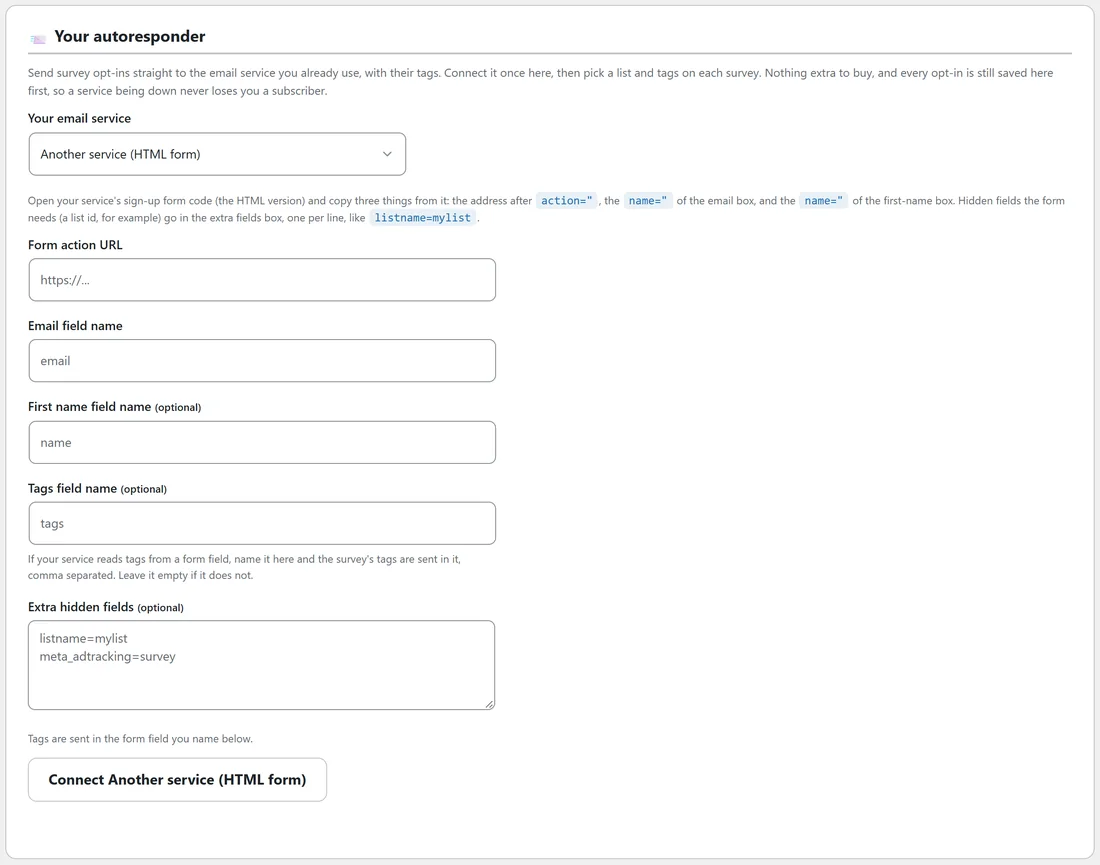
Pick Another service (HTML form). Open the HTML version of your service's sign-up form and copy:
- Form action URL: the address after action=".
- Email field name: the name=" of the email box.
- First name field name: the name=" of the first name box (optional).
- Tags field name: if your service reads tags from a form field, name it here and the survey's tags are sent in it, comma separated. Leave it empty if it does not.
- Extra hidden fields: any hidden fields the form needs, such as a list id, one per line, like listname=mylist.
- Click Connect.
A real example:
Yoursite Academy uses Mailchimp. The owner opens Extras, API keys in Mailchimp, creates a key named Surveys, pastes it, leaves double opt-in unticked and clicks Connect Mailchimp. The message says it is connected and that 4 lists were found. She sends a test contact to her own address with the tag survey-test, sees it arrive in the Course Buyers audience, and then picks lists on her surveys.
Lists and tags at a glance:
- AWeber (full): needs a list, real tags.
- AWeber (simple): the list is the one in its unique list ID, real tags, sent by the visitor's browser.
- Mailchimp: needs an audience, real tags, optional double opt-in.
- ActiveCampaign: list optional, real tags (commas become spaces).
- Kit: forms act as lists, optional, real tags.
- GetResponse: needs a list, tags with letters, numbers and underscores only.
- Brevo and SendFox: lists, and each tag becomes a list called Tag: and your tag.
- Systeme.io and HighLevel: no lists, real tags.
- LeadsLeap: your typed lists, and tags that stand for lists. Always sends its own confirmation.
- HTML form: no lists to pick; tags go in the field you name, and any fixed list goes in the extra hidden fields.
After connecting, every time:
- Click Send a test contact with your own address, a list and a tag.
- Open your service and find the contact. Check the list and the tags.
- Open each survey that should send to the service and pick its list and tags on Opt-ins & Routing.
- Answer one survey yourself with a real address of yours and check it arrives too.
Tips:
- Whatever the service, always use Send a test contact once and check the list and tags in the service itself.
- Keep tag names simple: lowercase words and dashes work everywhere, apart from GetResponse, which turns dashes into underscores.
- Connected the wrong account? Click Disconnect twice, pick the service again and connect the right one.