This is the shortest path from a blank screen to a signed agreement. It takes a couple of minutes, and once you have done it once the rest of the plugin makes sense.
The example below follows Sam at Oakridge Web Studio sending a website agreement to a new client, Mia Thornton.
Before you start:
- The plugin is installed and your licence is active (see Installing The Plugin And Activating Your License).
- Your sender name and email are set on the Settings tab, in the Sending section. If they are blank, the emails go out under your site name.
Step 1: pick a starting point:
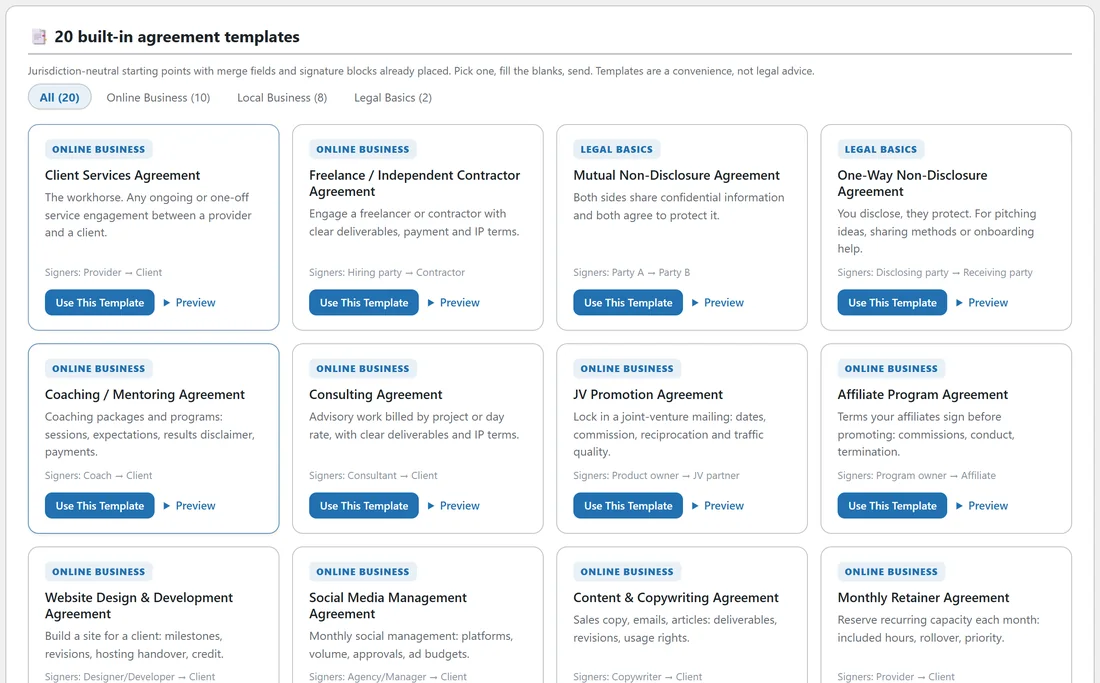
Click AiX Sign in your WordPress sidebar, then open the Templates tab. Find Website Design & Development Agreement and click Use This Template. The editor opens with the full agreement already loaded and the title filled in.
You can also click New Document and choose Write It Here to type your own text, or Upload a PDF to send a file you already have. See Three Ways To Create A Document.
Step 2: fill the merge fields:
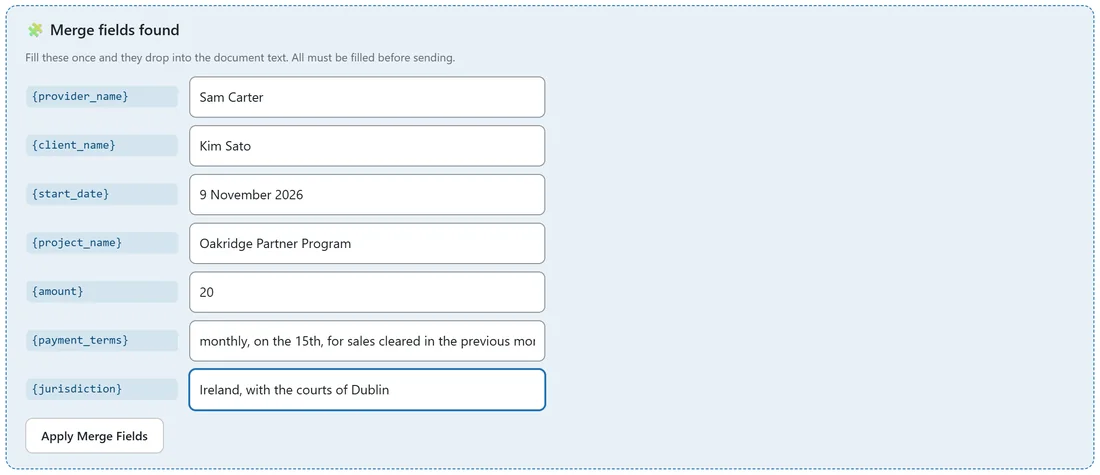
Below the editor, the Merge fields found panel lists every blank in the document, such as {client_name}, {amount} and {jurisdiction}. Type a value into each box. For Mia's agreement Sam types Mia Thornton, 3,200, EUR, a six page website with online booking, and Ireland, with the courts of Dublin.
Click Apply Merge Fields. The values drop into the text and the panel disappears once nothing is left to fill. See Merge Fields: The Blanks You Fill In.
Step 3: add your signers:
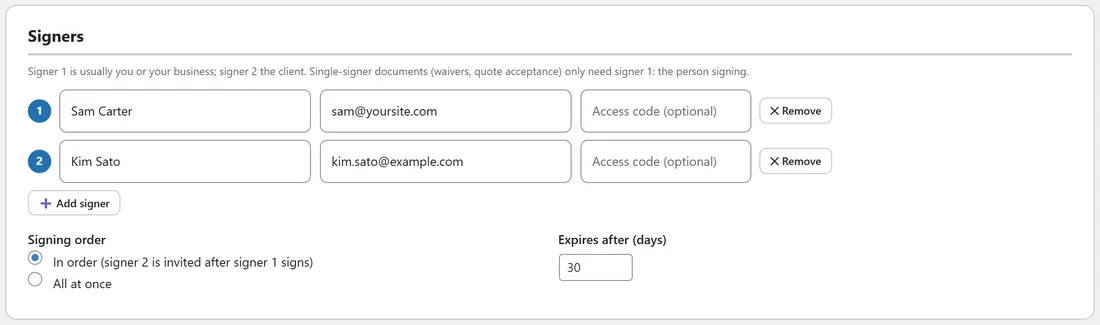
In the Signers section, signer 1 is usually you. Type your name and email in the first row. Click Add signer and type the client's name and email in row 2.
Choose the Signing order. In order means signer 2 is invited after signer 1 signs. All at once emails everyone straight away. Leave Expires after (days) at 30 unless you need a different deadline.
Step 4: send it:
Add a short Personal message in the Invitation section if you like, for example "Hi Mia, here is the agreement for the new website we talked about on Tuesday." Then click Send for Signature at the bottom of the screen.
A small box asks you to confirm the email addresses. Click OK. The plugin runs its checks, emails the first signer and opens the document's status page with the note Sent!
Step 5: watch it complete:
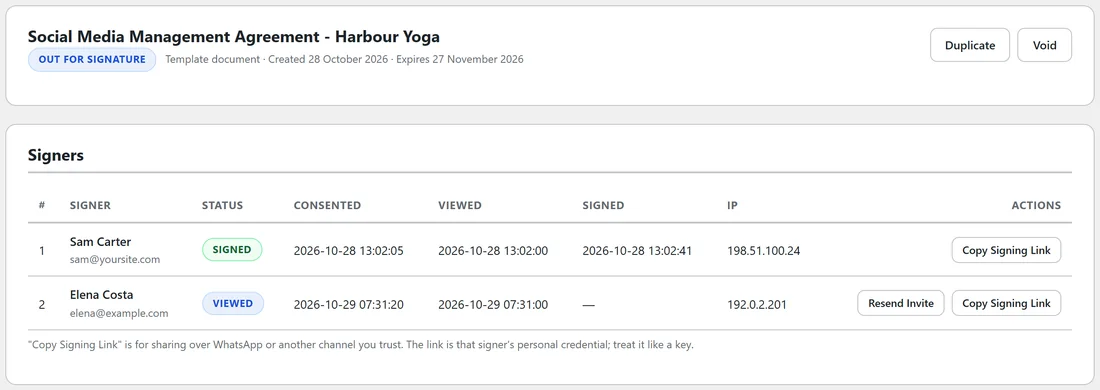
The status page shows a row for each signer with their status: Waiting, Invited, Viewed, Signed or Declined, plus the time they consented, viewed and signed and their IP address. Below that is the audit trail.
When the last person signs, the document turns Completed. The sealed PDF with its Certificate of Completion is emailed to every signer, to you and to anyone on the CC list. You can also download it with the Signed PDF button.
A useful first test:
Send your very first document to a second email address of your own as signer 2. You see the whole journey exactly as a client does: the invitation email, the signing page, the confirmation and the final PDF.
If the send does not go through:
The plugin checks the document before anything leaves. If something is missing it stays a draft and a message names the exact problem, for example that a signer has no signature field or that a merge field is still empty. Fix that one thing and click Send for Signature again. See Sending A Document And The Checks Before It Goes.
Tips:
- Save Draft keeps your work without sending, so you can come back later from the Documents tab.
- Once a document is sent its text is locked. To change it, Void it, click Duplicate, edit the copy and send again.
- Next, read What Your Signer Sees so you know what your client will look at.