The bridge builder is a full page wizard. Each step opens in turn and collapses to a one line summary when you click Continue, so you always see the whole bridge at a glance. This article builds yoursite.com's most important bridge, Stripe buyers to Customers, from scratch.
Before you start:
Connect at least one app that can be a source and one that can be a destination on the Connections tab. The builder opens once both exist. Until then, the Bridges tab shows a Connect at least 2 apps first message with a button to the Connections tab.
Open the builder:
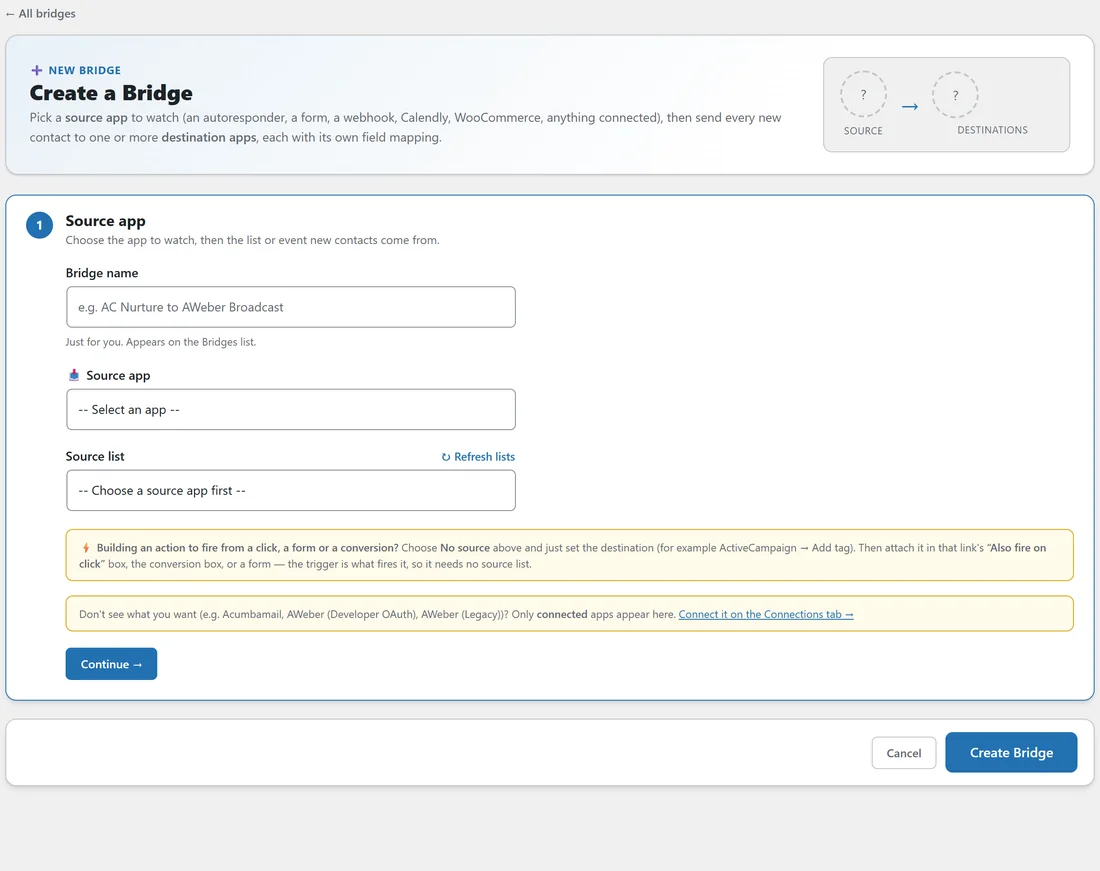
Click Create Bridge on the right of the tab bar, or on the Bridges tab. The page shows a hero with a flow preview: a source circle, an arrow and a destinations circle. They fill in as you build.
Step 1, the source:
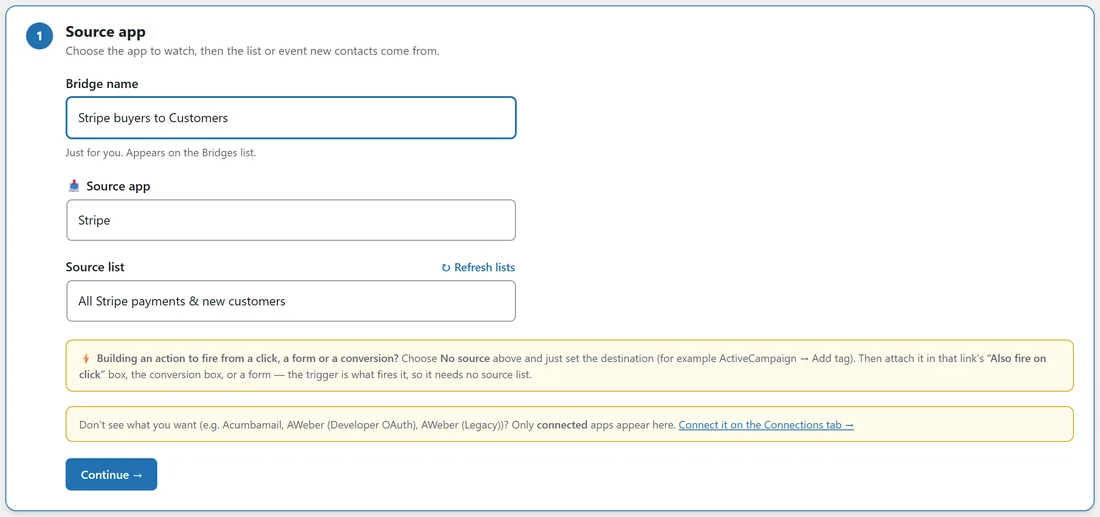
- Type a Bridge name. It is only for you and appears on the Bridges list. Stripe buyers to Customers beats Bridge 4.
- Choose the Source app. Only connected source apps are listed, plus No source for bridges you trigger yourself.
- Choose the Source list, or the event to watch. For Stripe that is All Stripe payments and new customers. On long lists a Type to filter box appears above the dropdown, and Refresh lists re-reads the app.
- If the app offers more than one trigger, a Trigger box appears, for example New subscriber or Unsubscribed for ActiveCampaign. Zoom shows What to watch with Registrants or Attendees.
- Click Continue.
Step 2, the destination:
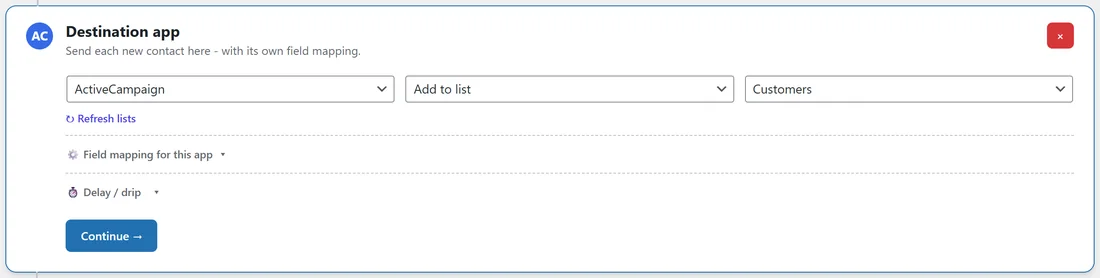
The first Destination app step opens by itself.
- Choose the destination app, for example ActiveCampaign.
- If the app can do more than add a contact, an action box appears. Leave it on Add to list for now.
- Choose the list, for example Customers.
- Open Field mapping for this app if you want custom fields or tags. See Field Mapping Per Destination.
- Open Delay / drip if this destination should wait or be paced.
- Click Continue.
Step 3, more destinations and filters:
Click Add a destination app to add Slack, #sales, and again for Google Sheets Connect, Sales log. Once the first destination is done, the Filters and options step appears. Click Add condition to set a filter, such as Email does not contain @yoursite.com. See Filters And Conditions.
Step 4, save:
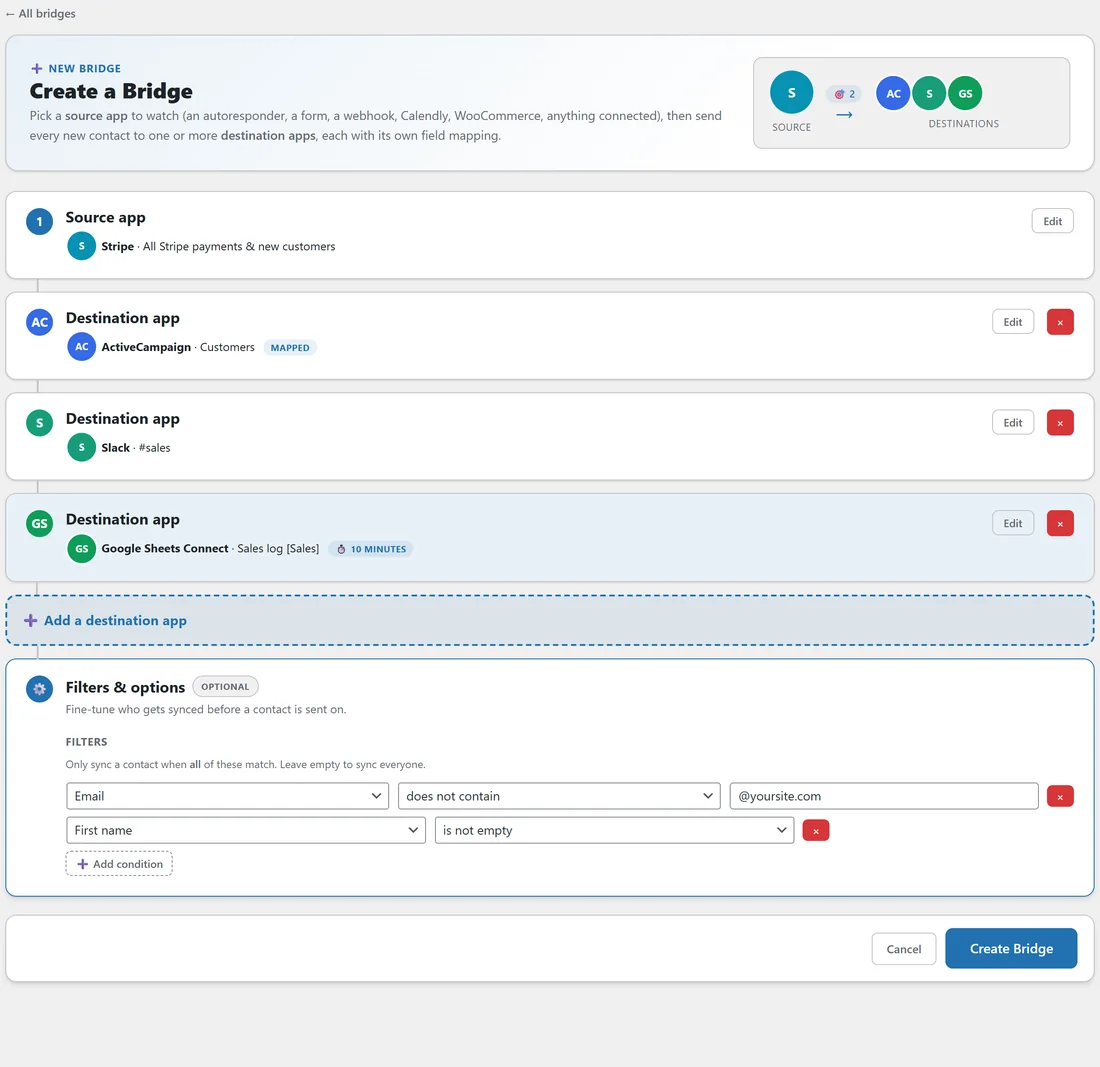
Click Create Bridge in the bar at the bottom. You return to the Bridges tab, where the new bridge is enabled and shown at the top of the list once.
What happens next:
The bridge only relays contacts who arrive after it was created. Nobody already on the source list is swept in. To catch them up, use Backfill or Migrate.
Check it works:
- Click Test on the new row for a no-write preview.
- Make a real test purchase, or add a test contact in the source app.
- For a polled source, click Run Sync Now instead of waiting five minutes.
- Open History on the row, or the Activity Log, and read the result for each destination.
If something needs fixing before saving:
If a destination still needs a list or a tag, clicking Create Bridge shows a short message naming that destination, and nothing is saved until it is complete. Click Edit on the step, finish it, and save again.
Editing later:
Click Edit on the bridge row. The builder opens with every step filled in and the button reads Update Bridge.
The source picker explained:
- The first option, Select an app, leaves the bridge unfinished.
- No source, with the note I'll trigger it (a click, form or conversion), builds a bridge that only runs when something you attach it to fires it.
- Every other option is one of your connected source apps, with BETA after the name where it applies.
Under the picker, a short note names a few apps you have not connected yet, with a link to the Connections tab.
Tips:
- Start with one destination, test it, then add the rest.
- Next read Multi Step Bridges And Fan Out.