There are two ways to feed a bridge from a form, depending on how the form was built. Both deliver every submission to the bridge's destinations straight away.
The easy way, Forms Connect:
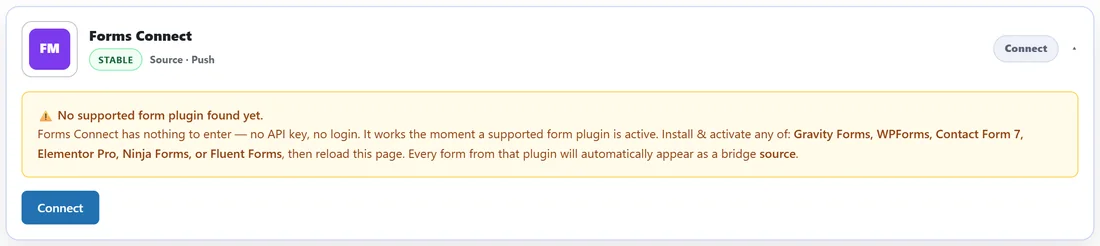
If your form was built with a WordPress form plugin, use Forms Connect from the Pro Pack. There is no code at all.
- Supported: Gravity Forms, WPForms, Contact Form 7, Elementor Pro, Ninja Forms and Fluent Forms.
- The card connects itself when one of those plugins is active on the same site.
- In the bridge builder, choose Forms Connect as the source and pick the form from the list.
- Submissions fire instantly.
With a Forms Connect source, the Filters and options step also shows Form redirect, with a Redirect URL after a form submit box, so the visitor lands on your thank you page.
The direct way, a hand coded HTML form:
For a squeeze page you wrote yourself, post the form straight to WP Sync.
- Build the bridge first, for example with No source and a Kit destination.
- Open the bridge with Edit and copy the ID from the page address. It is the part after edit=.
- Point your form at your site's admin-post.php file with the post method.
- Add a hidden field named action with the value ws_optin.
- Add a hidden field named rule with the bridge ID.
- Add the visitor's email and name fields.
The fields it accepts:
- email is required. The alternative names e and Email work too.
- first_name is optional. firstname, firstName and fname work too.
- last_name is optional. lastname, lastName and lname work too.
- A single field named name is split into first and last name.
- redirect sets where the visitor lands afterwards. Without it they go to your home page.
- redirect_fail sets where they land if no email was entered.
Which redirect wins:
A redirect saved on the bridge wins over one sent by the form.
AWeber Legacy:
When a destination on the bridge is AWeber (Legacy), WP Sync returns a small page that completes the AWeber sign up in the visitor's own browser, and the redirect runs straight after.
A real example:
yoursite.com's free guide page has a two field form. It posts to admin-post.php with action set to ws_optin and rule set to the ID of the Free guide squeeze page bridge. That bridge adds each visitor to the Kit form Free Guide, with Friend as the first name fallback, and records them in the Lead tracker sheet. 161 people have signed up since the page went live.
Checking it worked:
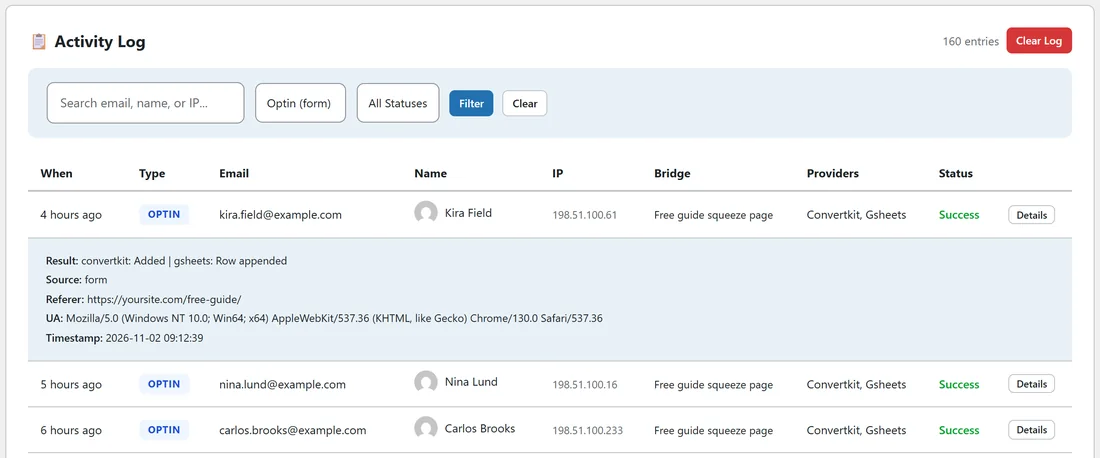
Opt ins are recorded in the Activity Log with the type OPTIN, the visitor's IP, the page they came from and their browser, under Details. A submission with no email shows as Failed with the note No email in payload.
A minimal form, described:
- A form with method post and its action set to your site's address followed by /wp-admin/admin-post.php.
- A hidden input named action with the value ws_optin.
- A hidden input named rule with your bridge ID.
- A hidden input named redirect with your thank you page, such as https://yoursite.com/thank-you/.
- A text input named first_name.
- An email input named email.
- A submit button.
Which way to choose:
- Built with a form plugin: Forms Connect.
- A page builder form that can post to a webhook: Webhook Connect.
- A hand coded page: the direct opt in method above.
Testing the form:
- Open your squeeze page in a private browser window.
- Enter your own email and submit.
- Check you land on the thank you page.
- Open the Activity Log, choose Optin (form) and click Filter. Your entry is at the top.
Tips:
- Filters work on opt ins too, for example to skip your team's test entries.
- Send yourself through the form once before sharing the page.