
Every WP Sync screen sits under one WordPress admin menu item, split into ten tabs. The tab bar is the same on every screen, so you are always one click from anywhere. On the right sits a Create Bridge button that opens the bridge builder from any tab.
Dashboard:
The at a glance view. Four stat cards show Active Bridges, Connected, Total Syncs and Failed. Under them is the Analytics block with trend cards, the daily chart, three health rings and two ranked lists. Then come Connected Integrations, your first five Active Bridges and the ten newest rows of Recent Activity. See Dashboard Analytics And Sync Health.
Bridges:

Every bridge you have built, one row each, with Run Sync Now and Create Bridge at the top. Each row has Test, History, Pause or Enable, Edit, Clone and Delete, and Backfill and Migrate where the source supports them. See Managing Your Bridge List.
Connections:
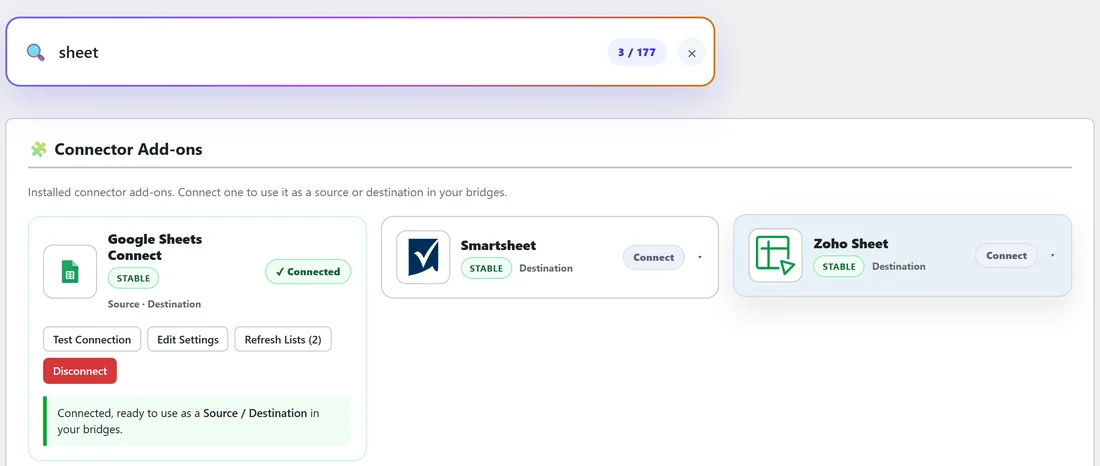
Where every app is connected. A search box sits at the top. Below it come the ResultsAiX Connections section, then Autoresponder Integrations, then Connector Add-ons when a pack is active. See Connecting Your First Autoresponder.
Add-ons:
Where the Pro Pack and Connect Pack keys are entered and where you see what each pack contains. A counter shows how many integrations are active on this site.
Activity Log:
Every contact WP Sync has moved, newest first, 25 to a page, with search, a type filter, a status filter and a Details button on each row. See Reading The Activity Log.
Training:
The built in guide, with a quick start, the full capability matrix and topic sections that open and close. See The Training Tab Inside The Plugin.
Diagnostics:
The debug log, the Copy Report for Support button, versions, cron status, the state of every connection and your server environment. See Diagnostics And The Support Report.
Settings:
The License panel, help and account links, the Appearance colour scheme and the Danger Zone. See Settings, Appearance And Clearing The Log.
Resources:
Other ResultsAiX tools that work with WP Sync. Anything already installed on your site is marked Installed.
Hub:
Information about the free ResultsAiX Hub plugin. When the Hub is installed, this tab takes you straight to the Hub's own dashboard.
The sidebar menu:
The WordPress sidebar lists the same screens in the same order: Dashboard, Create Bridge, Bridges, Connections, Add-ons, Activity Log, Training, Diagnostics, Settings and Resources. If WP Conversion Tracker or the ResultsAiX Hub is installed, each gets a shortcut in the same menu.
Which tab to open when:
- Something did not arrive: Activity Log first, then the bridge's History.
- You want to add an app: Connections.
- You want to change who goes where: Bridges, then Edit.
- Support asks for details: Diagnostics, then Copy Report for Support.
The Create Bridge button:
Create Bridge sits at the right end of the tab bar on every tab, and in the sidebar menu. It opens the full page bridge builder. When fewer than one source and one destination are connected, the Bridges tab explains what to connect first.
A first visit, tab by tab:
- Connections: link the apps you use.
- Add-ons: activate any packs you own.
- Bridges: click Create Bridge and build your first one.
- Activity Log: watch the first contacts arrive.
- Dashboard: come back after a few days to see the trends.
- Settings: pick a colour scheme you like.
How the tabs remember things:
- The Dashboard remembers your chosen range and whether charts are hidden, for your WordPress user.
- The Bridges tab remembers your sort order in your browser.
- The Activity Log keeps your search and filters in the page address, so you can bookmark a filtered view.