Pixels report conversions from the visitor's browser. They are the right tool for opt-ins and registrations, and a good option for carts that cannot send a server notification. For WarriorPlus, JVZoo, ClickBank, PayPal and Stripe sales, use their server notifications instead, and keep a pixel as a backup at most.
Where To Find Them:
Click 🔌 Connections, then 🎯 Tracking Setup, and scroll to 🖼 Method 2: HTML Pixel (browser-based). Each snippet already contains your site address. Use the 📋 Copy Lead Pixel, 📋 Copy Sale Pixel and 📋 Copy Simple Pixel buttons, so there are no typing slips.
The Lead Pixel:
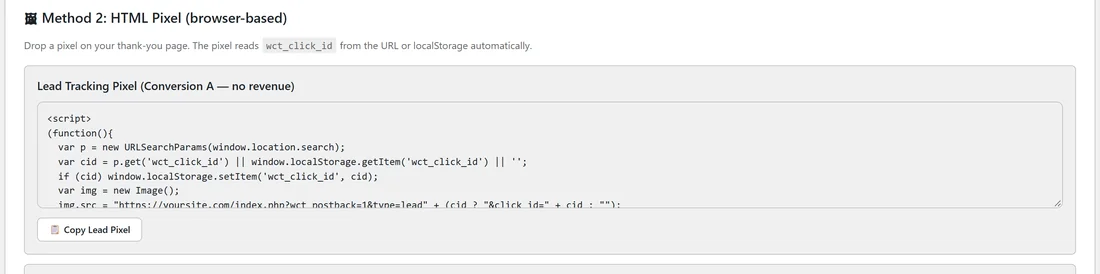
Put this on your opt-in thank you page. It reads wct_click_id from the address, keeps it in the browser for later pages, and reports a lead (Conversion A). It works across domains. <script> (function(){ var p = new URLSearchParams(window.location.search); var cid = p.get('wct_click_id') || window.localStorage.getItem('wct_click_id') || ''; if (cid) window.localStorage.setItem('wct_click_id', cid); var img = new Image(); img.src = "https://yoursite.com/index.php?wct_postback=1&type=lead" + (cid ? "&click_id=" + cid : ""); img.style.display = "none"; (document.body || document.documentElement).appendChild(img); })(); </script>
The Sale Pixel:
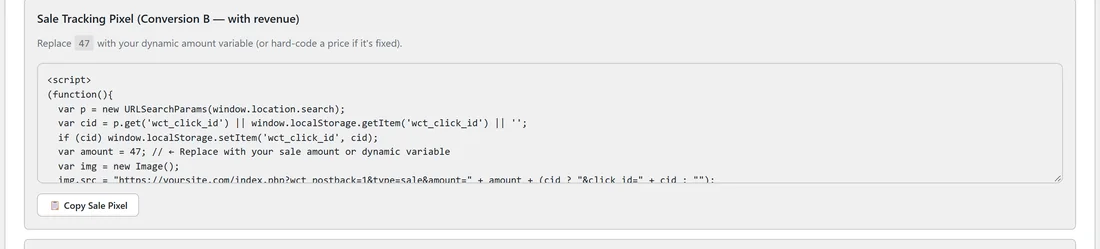
Use this for carts with no server notification of their own. It reports a sale (Conversion B) with an amount. Replace 47 with your price or your platform's amount variable. <script> (function(){ var p = new URLSearchParams(window.location.search); var cid = p.get('wct_click_id') || window.localStorage.getItem('wct_click_id') || ''; if (cid) window.localStorage.setItem('wct_click_id', cid); var amount = 47; var img = new Image(); img.src = "https://yoursite.com/index.php?wct_postback=1&type=sale&amount=" + amount + (cid ? "&click_id=" + cid : ""); img.style.display = "none"; (document.body || document.documentElement).appendChild(img); })(); </script>
Dynamic Amount Tokens:
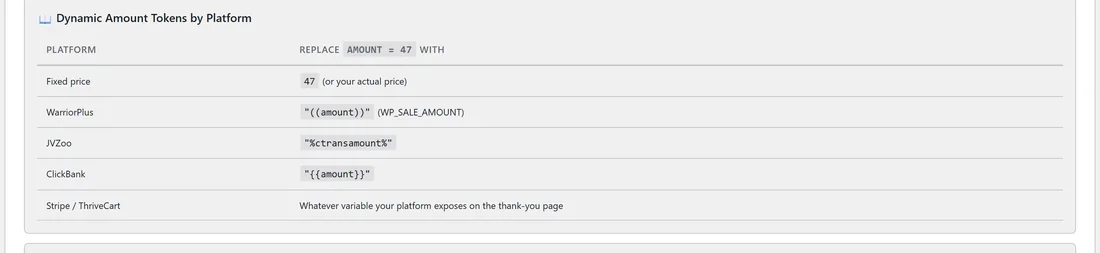
The 📖 Dynamic Amount Tokens by Platform table shows what to put in place of 47:
- Fixed price: the number itself, for example 47.
- WarriorPlus: "((amount))".
- JVZoo: "%ctransamount%".
- ClickBank: "{{amount}}".
- Stripe and ThriveCart: whatever variable your platform shows on the thank you page.
The Simple Pixel For One Domain:
When the tracking link and the thank you page are on the same domain, the browser's cookie already holds the click ID, so one image tag is enough: <img src="https://yoursite.com/index.php?wct_postback=1&type=lead" width="1" height="1" style="display:none;" alt="" /> It is the easiest to maintain, but it does not work across domains.
Adding A Pixel Step By Step:
- Copy the right pixel from Tracking Setup.
- Open your thank you page in your page builder or editor.
- Add a custom HTML or code block and paste the pixel.
- Save the page.
- Test: open your tracking link in a private window, complete the opt-in, and check 💰 Conversions.
The Optional JavaScript Library:
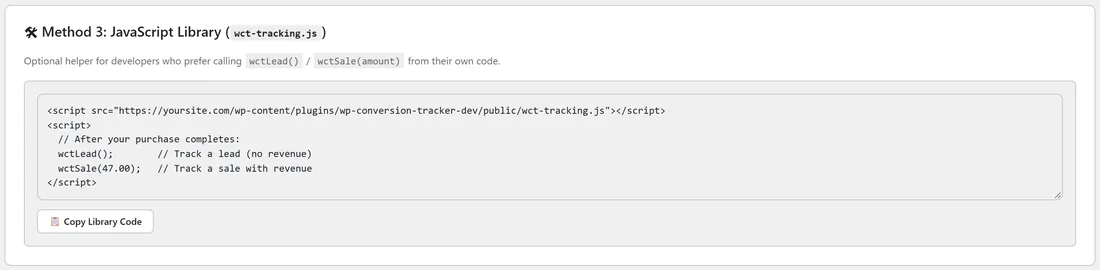
🛠 Method 3: JavaScript Library (wct-tracking.js) is a small helper for developers. Load it, then call the functions from your own code: <script src="https://yoursite.com/wp-content/plugins/wp-conversion-tracker/public/wct-tracking.js"></script> <script> wctLead(); wctSale(47.00); </script> The library is optional. The HTML pixels above work on their own.
Why The Address Contains index.php:
The pixels and postbacks use the /index.php form of your address. That form always reaches WordPress, even when your bare domain forwards visitors to a funnel or sales page. Pixels you installed earlier in the shorter form keep working.
A Real Example:
yoursite.com gives away the Free Starter Guide. The lead pixel sits on yoursite.com/free-starter-guide/thank-you/. A reader clicks yoursite.com/starter-guide/email-oct06, opts in, lands on the thank you page, and the pixel reports a lead joined to that click. The link's Stats page now shows the lead under the email-oct06 Sub-ID.
Adding A Pixel In Common Editors:
- WordPress block editor: add a Custom HTML block to the thank you page and paste the pixel.
- Page builders: use the builder's HTML or code element on the thank you page.
- Funnel tools outside WordPress: paste the pixel into the page's custom code or tracking code area for that step.
- Forms that show a thank you message on the same page: send people to a separate thank you page instead, so the pixel runs once per opt-in.
Tips:
- Each page needs the pixel once. Two copies report two conversions.
- If your funnel has several pages before the thank you page, the recommended pixels still find the click ID they stored earlier. See Cross-Domain Tracking.
- The Tracking Pixel / Code box in a link's ⚙️ Advanced Options is different: it fires a third party pixel when the link is clicked. It does not report conversions.