Add utm_source, utm_campaign or any parameter of your own to a tracking link and WP Conversion Tracker AI records it with the click. You then see clicks, leads, sales and earnings grouped by those tags, and the tags can be passed on to your landing page so your other tools see them too.
How It Works:
- Share a tracking link with parameters, for example yoursite.com/fb-spring?utm_source=facebook&utm_medium=cpc&utm_campaign=spring-course.
- The click is recorded, and each parameter is stored with it.
- If passing on is switched on, the visitor arrives at the destination with the same parameters added.
Sub-IDs and UTM tags work side by side. Use the Sub-ID for the exact placement and UTM tags for the wider source and campaign.
What Is Recorded:
- UTM tags such as utm_source, utm_medium, utm_campaign, utm_content and utm_term.
- Ad click IDs such as gclid and fbclid.
- Any custom parameter of your own, such as ?partner=anna.
The tracker's own wct_ parameters are left out, email addresses in parameters are handled as identity rather than stored as tags, and placeholders a platform never filled in, such as {keyword}, are skipped.
Where You See The Numbers:
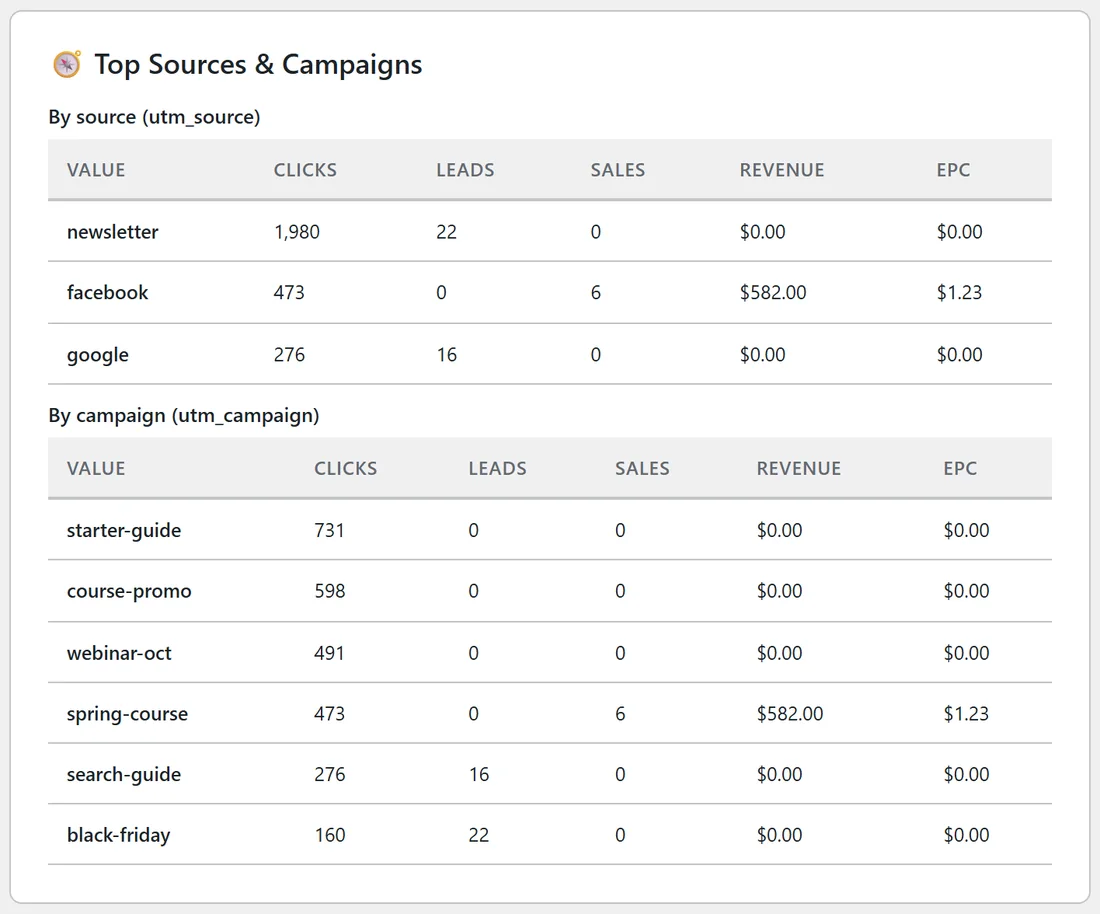
- 📊 Dashboard: 🧭 Top Sources & Campaigns lists clicks, leads, sales, revenue and EPC By source (utm_source) and By campaign (utm_campaign).
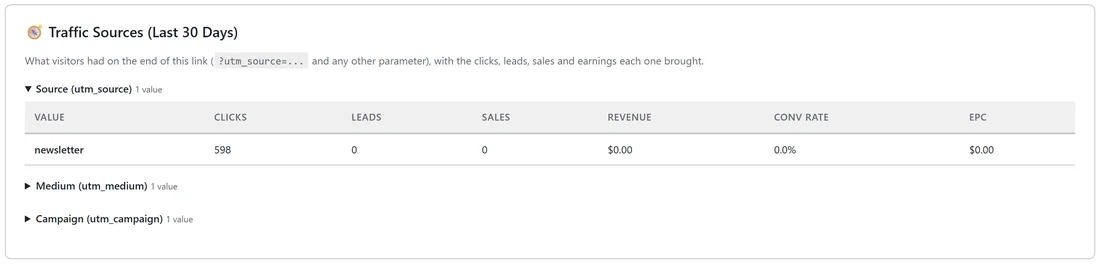
- A link's Stats page: 🧭 Traffic Sources groups that link's clicks by Source (utm_source), Medium (utm_medium) and Campaign (utm_campaign).
- 💰 Conversions: the Traffic Source column shows the tags each conversion arrived with.
Passing Parameters On:
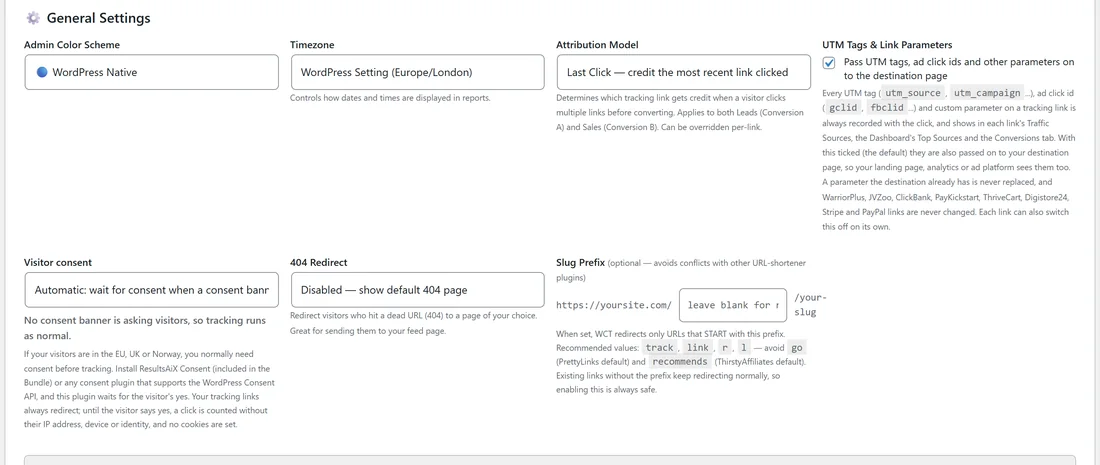
In ⚙️ Settings, ⚙️ General Settings, UTM Tags & Link Parameters has the box Pass UTM tags, ad click ids and other parameters on to the destination page. It is ticked by default. Each link also has its own Pass UTM tags and other parameters to the destination page box in its ⚙️ Advanced Options panel, so you can switch passing off for a single link.
- Parameters are always recorded for your stats, whether or not they are passed on.
- A parameter the destination address already has is never replaced.
- Nothing is ever added to WarriorPlus, JVZoo, ClickBank, PayKickstart, ThriveCart, Digistore24, Stripe or PayPal links, so their own tracking stays intact.
Fixed Parameters On Every Click:
To add the same parameters to every visit, use the link's Tracking Parameters field, for example utm_source=youtube&utm_medium=video. They are added to the destination each time.
Setting Up A Campaign Step By Step:
- Decide your names, for example utm_source=newsletter, utm_medium=email and utm_campaign=black-friday.
- Add them to the tracking link you share, together with a Sub-ID if you like: yoursite.com/black-friday/email-oct27?utm_source=newsletter&utm_medium=email&utm_campaign=black-friday.
- Send the email or launch the ad.
- Open the 📊 Dashboard and read 🧭 Top Sources & Campaigns.
A Real Example:
yoursite.com tags every newsletter link with utm_source=newsletter and a campaign name, and every Facebook ad with utm_source=facebook. Over 30 days, Top Sources & Campaigns shows the newsletter bringing nearly 2,000 clicks and 22 leads, while facebook brings fewer clicks but six course sales at $1.23 EPC. The landing pages receive the same tags, so the site's analytics tool tells the same story.
Tips:
- Keep tag values lowercase and consistent, because newsletter and Newsletter are two different values.
- Use the Sub-ID for the exact placement, such as email-oct27, and the campaign tag for the bigger picture, such as black-friday.
- See Dynamic Sub-IDs For Paid Ad Platforms for ad platform placeholders.