The Setup Wizard gets a new site tracking in a few minutes. It walks you through six short steps, and every step after the first is optional, so you can skip anything that does not apply to you and come back later.
New installs open the wizard by themselves the first time the plugin is activated with a valid licence. You can run it again at any time, and running it again never deletes anything.
Where To Find It:
- First install: activate the plugin and your licence. WordPress sends you to the wizard once. Until setup is finished, a blue Welcome to WP Conversion Tracker notice sits at the top of the plugin's screens with a 🪄 Run Setup Wizard button.
- Any time after: click ⚙️ Settings, then ⚙️ Settings in the menu, and use 🪄 Re-run Setup Wizard in the 🛠 Tools card at the top.
- Direct address: wp-admin/admin.php?page=wct-dashboard&tab=setup-wizard&wizard_step=1
The progress bar across the top shows the six steps: Welcome, First Link, Attribution, WarriorPlus, JVZoo and Done. A tick marks each step you have passed.
Step 1, Welcome:
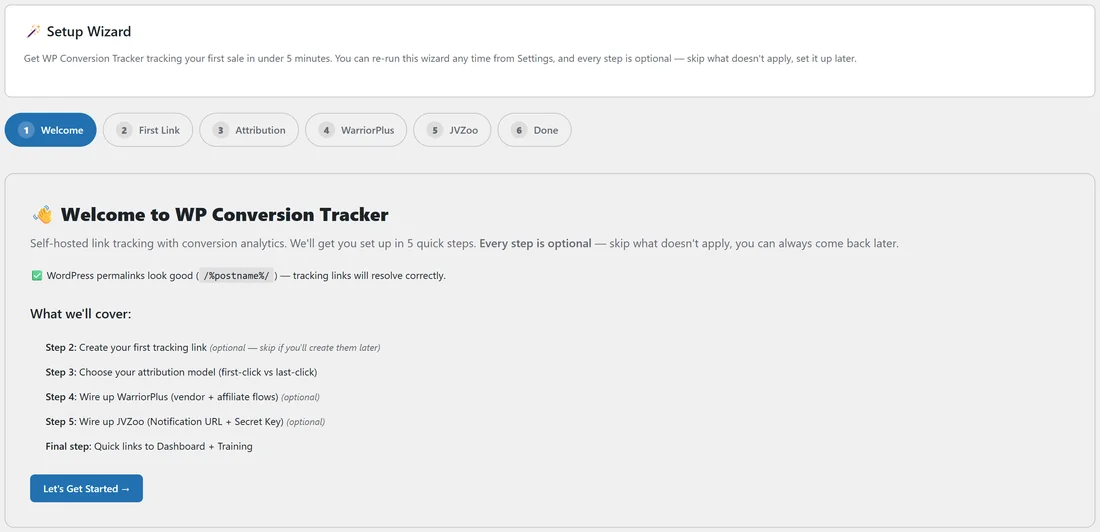
The wizard checks two things for you.
- Permalinks. Tracking links need pretty permalinks. When they are fine you see a green line such as WordPress permalinks look good (/%postname%/).
- Link plugins that compete for the same addresses. The wizard looks for PrettyLinks, PrettyLinks Pro, ThirstyAffiliates, YOURLS Link Creator, Link Whisper, Redirection and Simple 301 Redirects. If one is active it lists it and helps you set a Slug Prefix so both plugins can live side by side. See Slug Prefix To Avoid Link Plugin Conflicts.
Click Let's Get Started → to move on.
Step 2, First Link:
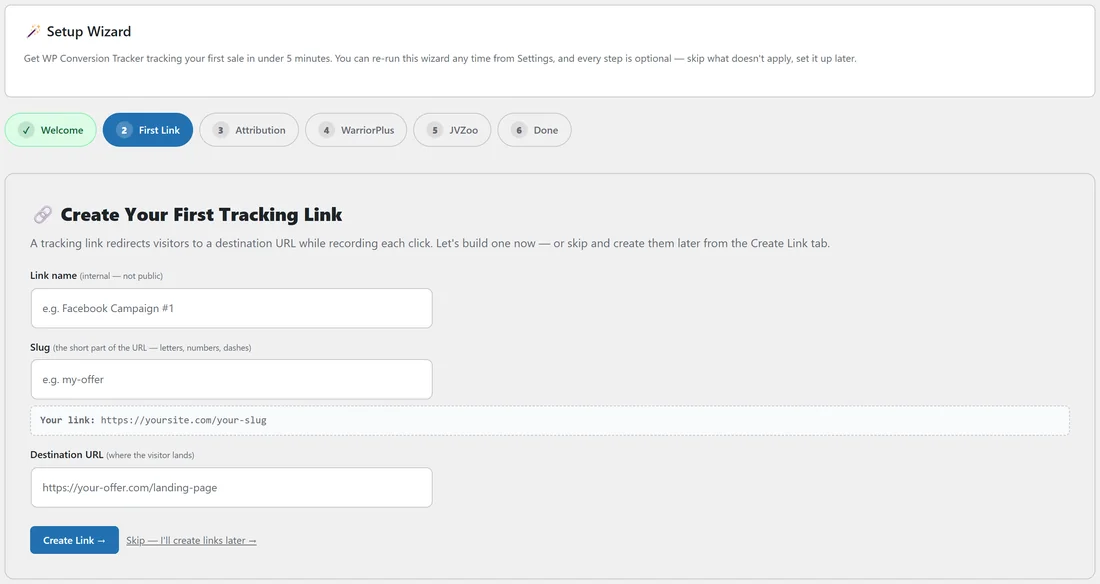
A short form builds your first tracking link.
- Link name: a private label, for example Free Starter Guide opt-in.
- Slug: the short part of the address, using letters, numbers and dashes, for example starter-guide.
- Watch the Your link line update as you type, for example yoursite.com/starter-guide.
- Destination URL: the page visitors land on, for example https://yoursite.com/free-starter-guide/.
- Click Create Link →, or Skip, I'll create links later → if you would rather do it from ➕ Create Link.
Step 3, Attribution:
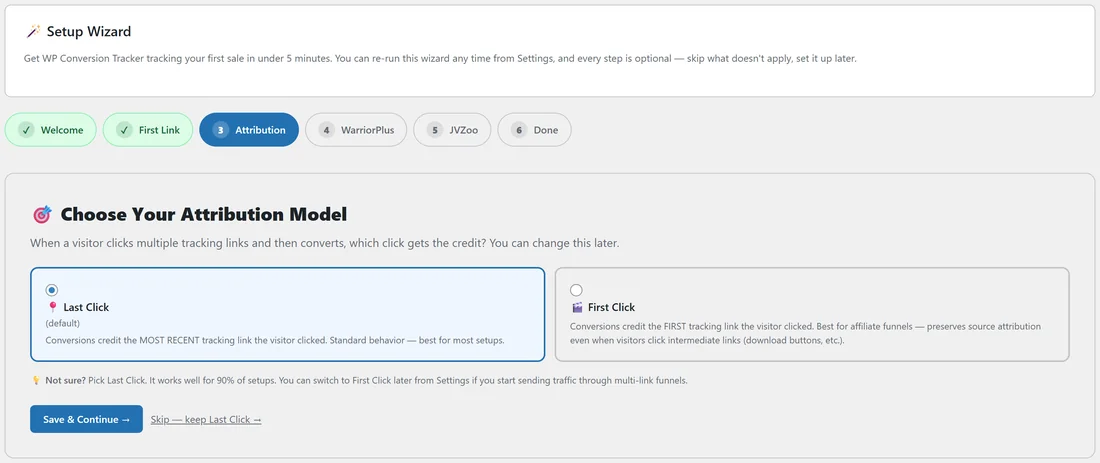
Two cards decide which click gets the credit when a visitor clicks several of your links before converting.
- 📍 Last Click, the default. The most recent tracking link gets the credit. The wizard suggests it for most setups.
- 🎬 First Click. The first tracking link gets the credit, which suits affiliate funnels with download buttons and other in-between links.
Click a card, then Save & Continue →. You can change this later in Settings, and each link can override it. See Attribution Models And Navigation-Only Links.
Step 4, WarriorPlus:
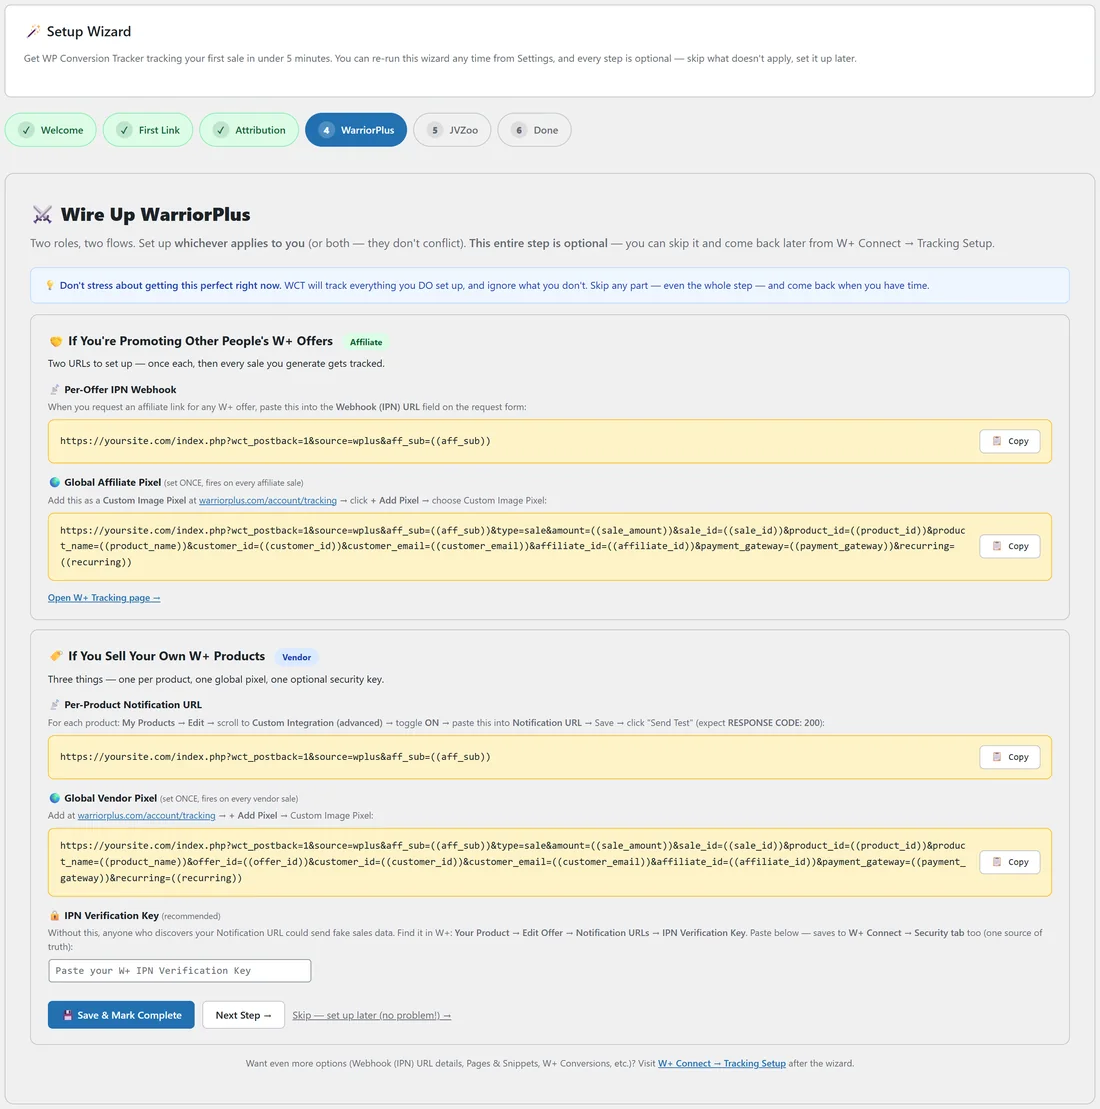
This step appears when the W+ Connect add-on is installed. It shows both WarriorPlus roles side by side, each URL already filled in with your own site address and a 📋 Copy button.
- If You're Promoting Other People's W+ Offers: the Per-Offer IPN Webhook URL for each affiliate link request, and the Global Affiliate Pixel you add once on your WarriorPlus account's Tracking page.
- If You Sell Your Own W+ Products: the Per-Product Notification URL, the Global Vendor Pixel, and a box for your IPN Verification Key.
Paste the key, then click 💾 Save & Mark Complete, or use Next Step → or the skip link.
Step 5, JVZoo:
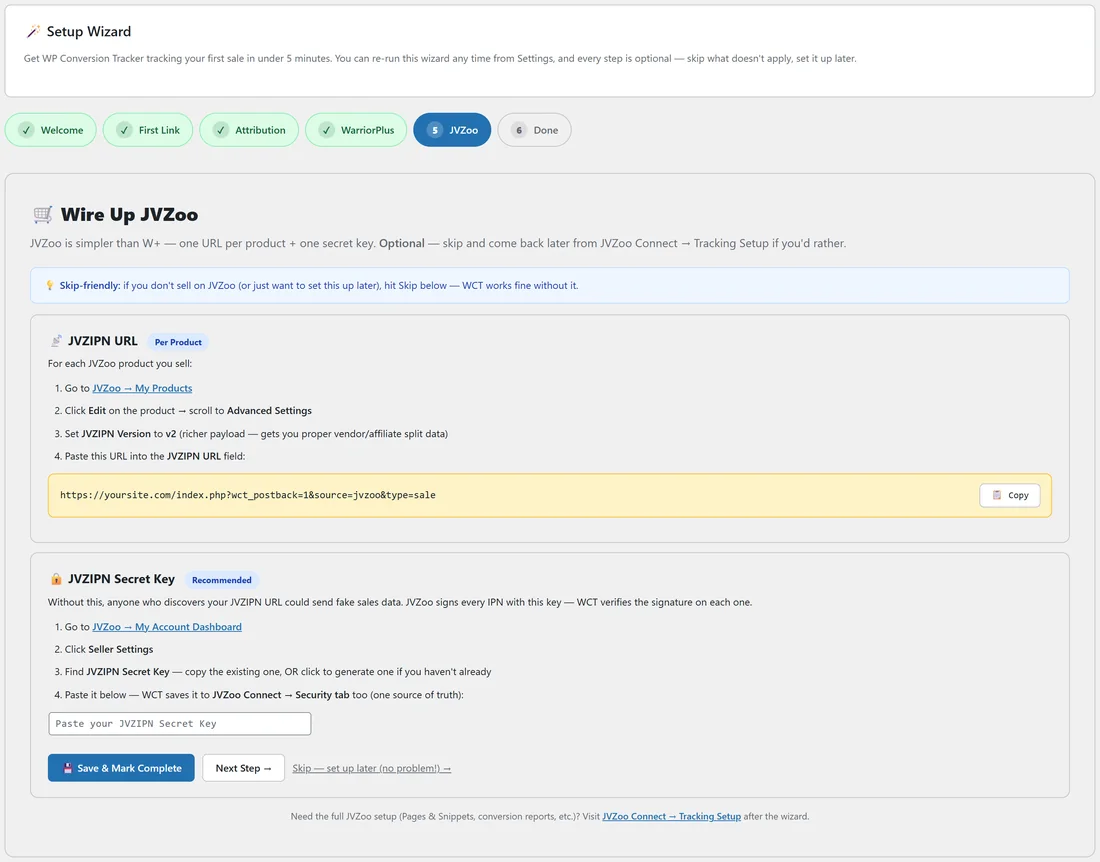
This step appears when the JVZoo Connect add-on is installed.
- In JVZoo go to My Products, click Edit on the product and scroll to Advanced Settings.
- Set JVZIPN Version to v2.
- Copy the JVZIPN URL from the wizard and paste it into the JVZIPN URL field.
- In JVZoo, go to My Account Dashboard, then Seller Settings, and copy your JVZIPN Secret Key.
- Paste the key into the wizard and click 💾 Save & Mark Complete.
Step 6, Done:
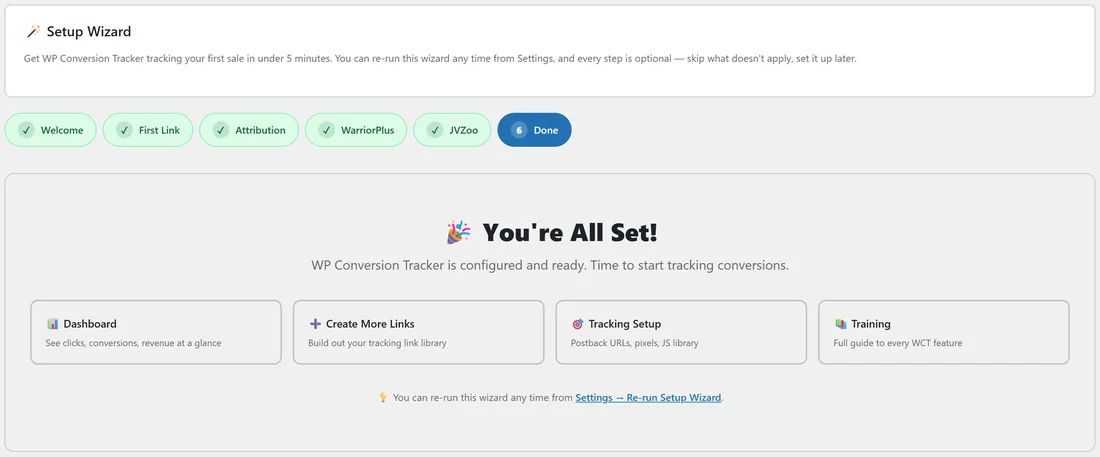
You're All Set! shows four quick links: 📊 Dashboard, ➕ Create More Links, 🎯 Tracking Setup and 📚 Training.
Keys Entered Here Are Saved Once:
The WarriorPlus IPN Verification Key and the JVZIPN Secret Key you type in the wizard are saved to the same place as the Security tabs in W+ Connect and JVZ Connect. Enter a key in either place and it shows in both. Keys are shown as dots, with buttons to show, copy or change them, so they stay hidden while you record your screen.
A Real Example:
The owner of yoursite.com sells the Traffic Toolkit on WarriorPlus and promotes other people's JVZoo products. On step 2 they create starter-guide, on step 3 they keep Last Click, on step 4 they copy the Per-Product Notification URL into the Traffic Toolkit product and paste the IPN Verification Key, and on step 5 they skip the vendor part because they only promote JVZoo products as an affiliate. JVZoo affiliate tracking is set up later in JVZ Connect.
Running The Wizard Again Later:
Re-running the wizard is safe at any time. It opens on the Welcome step, shows your current setup, and each step can be skipped. Typical reasons to run it again:
- You start selling on WarriorPlus or JVZoo and want the URLs with Copy buttons in one place.
- A new team member is helping and you want them to see the setup in order.
- You installed a link plugin such as Redirection and want the Welcome step to check for clashes.
Once you finish, the blue welcome notice no longer appears, and the 🛠 Tools card in Settings shows that setup is complete.
Tips:
- Skipping is fine. The plugin tracks whatever you set up and ignores the rest.
- After the wizard, open 🔌 Connections, then 🎯 Tracking Setup, to see every other way to report leads and sales.
- To hide the blue welcome notice without finishing, click Dismiss this notice. The wizard stays available in Settings.