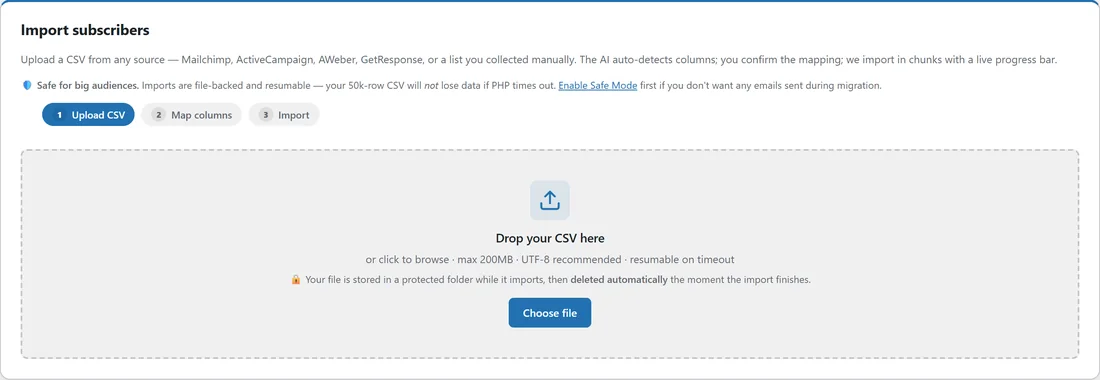
The Imports screen takes a CSV file from any other email tool, or a spreadsheet you kept yourself, and turns every row into a subscriber. You check where each column goes before anything is written, and the import then runs in small pieces, so a big file finishes even on a modest host.
People you import are never sent a welcome email, a confirmation email or put into an automation by the import itself. They can receive broadcasts you choose to send them. That protection is explained in The Silent Import Lock.
Where to find it:
Audience, then Imports. You can also press Import at the top right of the Subscribers screen.
Before you start:
- Export your list from the old tool as a CSV. Most tools call this Export contacts or Download subscribers.
- Keep the heading row. The Mailer reads the headings to suggest where each column belongs.
- If you are moving a live list, read Safe Mode: Moving A Real List Without Accidents first. Turning Safe Mode on blocks every outgoing email while you set things up.
Step 1, upload the file:
- Open Audience, then Imports.
- Drag the CSV onto the box that says Drop your CSV here, or press Choose file.
- Wait for the progress bar inside the box. Large files go up in 2MB pieces, so a file bigger than your host's upload limit still arrives.
The box accepts .csv and .txt files up to 200MB. Commas, semicolons, tabs and the | character all work as separators, and the Mailer works out which one your file uses from the heading row. Files saved as CSV UTF-8 from Excel or Google Sheets import normally.
Step 2, map the columns:
After the upload the screen moves to Map columns. At the top it shows how many rows were found and the file size. Below that, every column in your file has its own row: the heading from your file, a dropdown with where it will go, and the first few values from that column so you can see what is in it.
The Mailer fills in each dropdown for you. A column headed Email, E-mail or Email Address goes to Email. First Name, Last Name and Name go to the name fields. Country, Tags, Status, Signup Date, Unsubscribe Date, IP Address and Source are recognised too, using the names AWeber, ActiveCampaign, GetResponse and Mailchimp put in their exports. Any column it does not recognise becomes a custom field with the same name, so nothing in your file is thrown away unless you choose to.
What each choice in the dropdown does:
- Email: the address. This is the only column you must map. Addresses are stored in lower case.
- First name and Last name: stored as they are in the file.
- Full name (split into first/last): for files with one Name column. The first word becomes the first name and the rest the last name.
- Country (name or ISO2): accepts a two letter code such as US or a full name such as United Kingdom. A name it cannot match is kept in a custom field called country_name instead of being guessed.
- Tags (comma-separated, splits automatically): a cell like vegetables, webinar-2026 gives that person both tags. There is no limit on how many tags one person can have.
- Status (Subscribed / Unsubscribed / Bounced): words containing unsub mark the person unsubscribed, bounce or undeliverable mark them bounced, unconfirmed or pending mark them pending, and subscribed, active or confirmed mark them active.
- Signup date (becomes First contact): their real sign-up date from the old tool. It shows as First contact on the Subscribers screen.
- Unsubscribe date (marks them unsubscribed): anyone with a date here is imported as unsubscribed, whatever the status column says.
- IP address: kept only when it is a valid IP address.
- Signup URL (the page they opted in on) and Source (where they came from): kept on the subscriber so you can see where they first joined.
- Custom field: any of your custom fields. Five are always offered (product, source, notes, phone and company), plus every field you have created before.
- ignore this column: the column is skipped.
- Add a custom field: opens a small box where you name a new field, for example garden_size. The new field is added to every dropdown on the screen at once and is offered on every future import.
Step 3, choose a list and tags:
Under Add to a list, pick where these people go.
- None, just import the people: they are added to your audience without joining a list.
- Create a new list: type a name in New list name. The list is created when the import starts, as a single opt-in list.
- Any existing list, shown with how many people are on it now.
Tags to apply adds the same tags to everyone in the file, on top of any tags column. Use something you will recognise later, for example imported-2026-11. A tag like that makes the group easy to find, segment or score.
Step 4, start the import:
- Look down the mapping one last time. Make sure exactly one column says Email.
- Press Start import.
- Watch the live counters: Processed, New people, Already on your list, Suppressed and Errors.
- When Import complete appears, the people are in your audience. The screen offers Create a broadcast if you want to email them.
What the counters mean:
- New people: addresses that were not in your audience before this file.
- Already on your list: addresses you already had. Their details are refreshed and their tags are merged with the tags they already had, so a second import never wipes tags or scores you added since. Nobody is ever added twice.
- Suppressed: addresses on your do-not-mail list because they bounced, complained or unsubscribed. They are skipped on purpose and never count as errors. See The Suppression List.
- Errors: rows that could not be read, usually because the email address is not a real address.
Big files and closed tabs:
The browser sends the file through in batches while the tab is open. If you close the tab or your connection drops, the import keeps its place. WordPress cron picks up a running import whose last sign of life is more than 90 seconds old and carries on from the exact row it reached, one batch at a time. A box called Import jobs in progress then appears at the top of the Imports screen. Press Speed up from this tab and keep the tab open to run it at full speed again.
If 50 rows in a row fail, the import pauses itself and shows the reason, because that nearly always means a column is pointing at the wrong field. Check the mapping and press Resume.
If a job shows as pending, the file was uploaded but Start import was never pressed. Start now runs it with the suggested mapping and no list or tags. To choose a list or tags, press Discard and upload the file again.
Your uploaded file:

The CSV is stored in a protected folder only while the import needs it and is deleted the moment the import finishes. A daily clean-up removes any file left behind from an upload that was never started, after 48 hours. The Uploaded files on this server box shows whether anything is stored right now, and 🧹 Delete staged files now removes every file no import still needs.
Recent imports:

The Recent imports box at the bottom lists every finished import with when it ran, the file name, the list it filled, and how many people were new, updated or had errors. The same history, with a Roll back button, is on the Safety screen. See Rolling Back An Import.
A real example:
Leafwise Gardening moved from an old autoresponder. Anna exported old-autoresponder-export.csv with the columns Email, First Name, Last Name, Country, Tags, Status and Date Added.
- She turned Safe Mode on.
- She uploaded the file. Every column mapped itself, and Date Added went to Signup date.
- Under Add to a list she chose Create a new list and typed Imported from old autoresponder.
- In Tags to apply she typed migrated.
- She pressed Start import. The import finished with 320 new people, 14 already on the list and 3 errors, which were rows with a broken email address.
Those 320 people now show their real sign-up dates as First contact, and none of them was sent anything.
Tips:
- Run a small test file of ten rows first if you are unsure about a mapping. You can roll it back afterwards.
- Run Verify Leads on the new list before your first send to it. See Verify Leads: Clean An Old List Before You Mail It.
- Run Tidy Names afterwards if the old tool left names in capitals or with odd characters. See Tidy Names: Fix Messy Names In Bulk.
- Everything you imported as a custom field works as a merge code right away. See Custom Fields: Create Your Own Data.
- For a list that keeps growing in another app, a connection beats a one-off file. The Sync from anywhere box on this screen explains WP Sync. See WP Sync: Import And Sync From 150+ Apps.