A broadcast is one email sent once to an audience you choose: a newsletter, an announcement, a launch email. Automations send on their own over time; a broadcast goes when you say so.
The composer walks you through four steps, saves your work as you go, and shows a live recipient count and a live preview the whole time, so you always know who gets the email and what it looks like before anything leaves.
Where to find it:
Emails, then Broadcasts. Press + New Broadcast at the top right of the list, or the New Broadcast button in the top menu bar. To carry on with a draft, press Edit on its row.
The Broadcasts list:
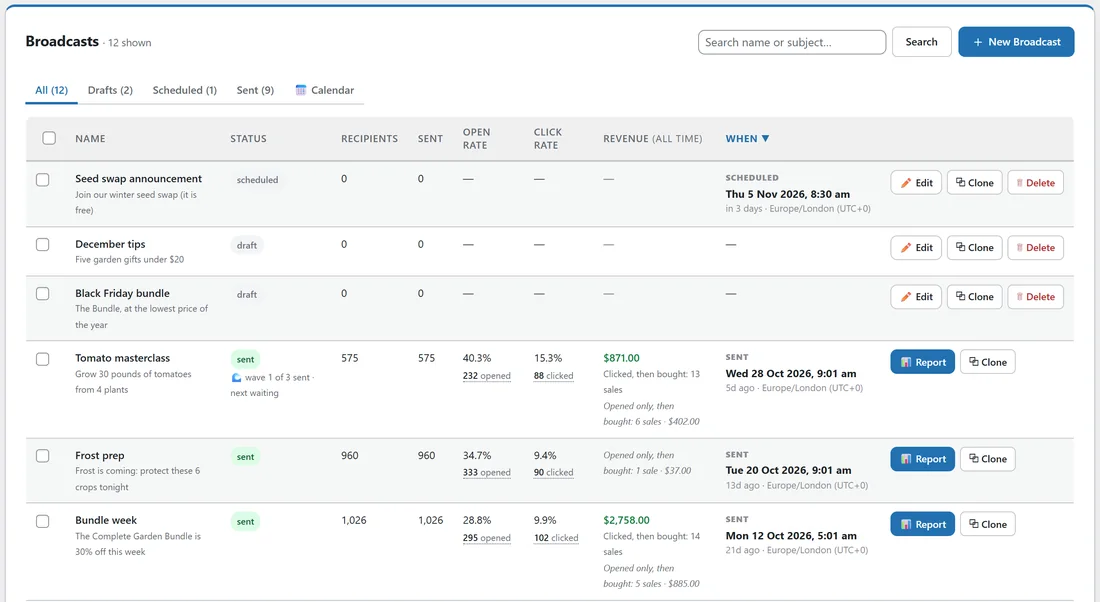
Every broadcast you have made lives here, newest first. The tabs along the top filter it: All, Drafts, Scheduled, Sent and Calendar. An Archived tab appears once you have archived something.
- Search name or subject finds a broadcast by its internal name or its subject line.
- Click any column heading (Name, Status, Recipients, Sent, Open rate, Click rate, Revenue, When) to sort by it. Click again to flip the order.
- The small "232 opened" and "88 clicked" links under each rate open that broadcast's report on the list of the actual people.
- Drafts and scheduled broadcasts have Edit, Clone and Delete. Sent broadcasts have Report and Clone. A sent broadcast is never deleted, because it is your reporting history.
- Tick the boxes on the left and press Archive to tidy the list. Archiving hides rows from the normal tabs and deletes nothing; Bring back returns them.
- When emails are waiting in the queue, a Run queue now button appears beside New Broadcast. It nudges the queue straight away, which helps on a quiet site.
How the composer works:
The four step tabs are Start here, Audience, Tagging (optional) and Review & send. All four belong to one email, so you can jump between them in any order.
Your work saves itself. Moving to another step saves the draft, and a few seconds after you stop typing it saves again. The bar under each step shows "Saved" with the time. The same bar has Back, Save draft, Send test and Save & continue.
On the right you always see the live recipient count (with View members in new tab to open the exact people on the Subscribers screen) and the live preview of the email.
Step 1, Start here:
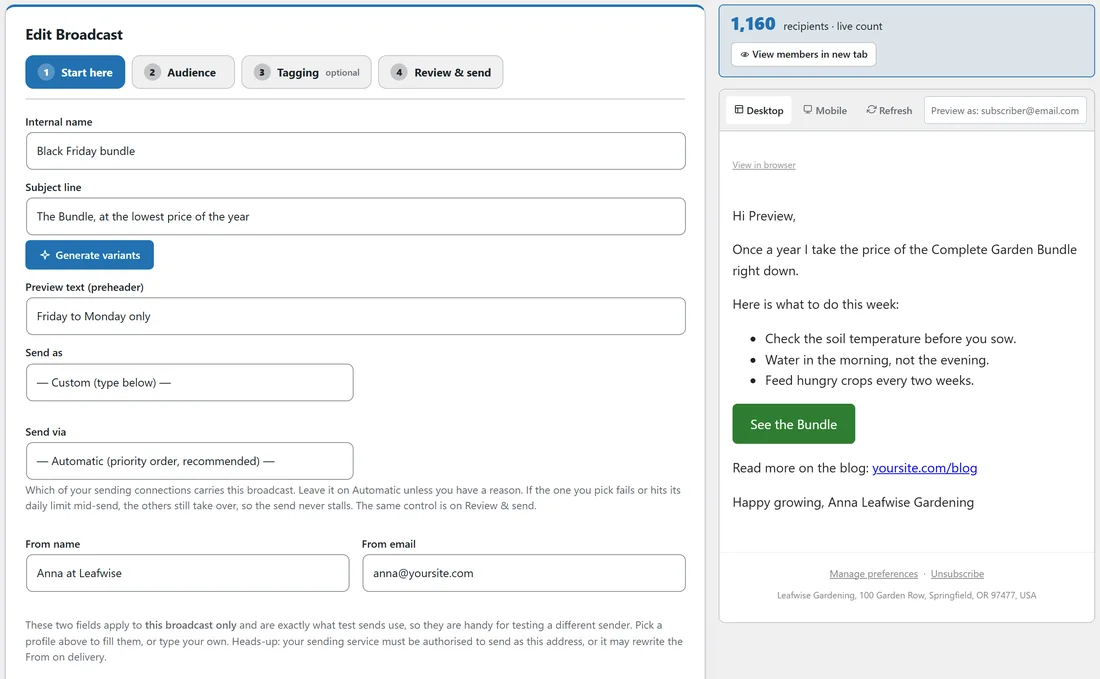
This step holds everything about the email itself.
- Internal name: only you see it. Make it easy to find later, for example "Black Friday bundle".
- Subject line: what readers see in their inbox. It is required; a broadcast without one stays a draft. Generate variants asks your AI for ten options (see AI Subject Lines, Rewriting And Inbox Score).
- Preview text (preheader): the short line shown after the subject in most inboxes. Use it to add a second reason to open, not to repeat the subject.
- Send as: pick one of your sender profiles to fill the From fields. The profile also decides the reply-to address and the postal address in the footer (see Sender Profiles).
- Send via: which sending connection carries this broadcast. Leave it on Automatic (priority order, recommended) unless you have a reason to force one. If the one you pick fails or reaches its daily limit, your other connections take over.
- From name and From email: these two fields apply to this broadcast only, and they are exactly what test sends use. They fill in from your default profile. Your sending service must be allowed to send as that address.
- Email body: start from a template, write with AI, or type straight into the editor. Merge codes such as {{first_name}} sit above the editor (see The Email Editor: Links, Buttons And Fonts and Merge Codes And Tag Codes).
The preview on the right has Desktop, Mobile and Refresh. Type a real subscriber's email into the Preview as box and the preview fills every merge code with that person's real data.
Step 2, Audience:
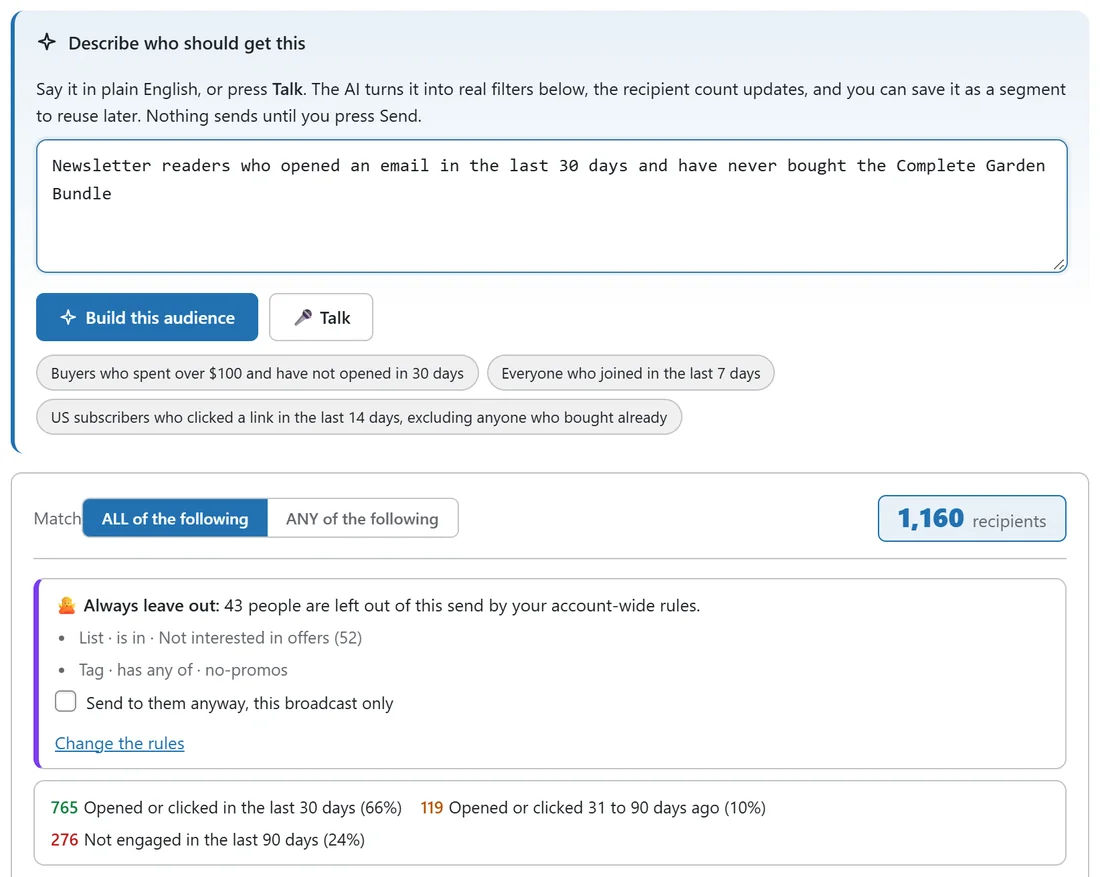
This step decides who receives the email. A brand-new broadcast starts with everyone (all active subscribers), and you narrow it from there.
- Describe who should get this: write the audience in plain words, or press Talk, then Build this audience. The AI turns your words into real filters below. This panel shows when an AI key is set up.
- Who gets this email?: tick lists and saved segments, and tick lists or segments that should never get it.
- Advanced filters: tags, country, engagement, opens, purchases, custom fields and more, with include rules and remove rules (see Building A Custom Audience).
- Under the count you see how many people your Always leave out rules took off this send, and how recently this audience opened or clicked (see Always Leave People Out Of Broadcasts).
- Save as reusable segment keeps this audience for next time. Check these emails opens Verify Leads in a new tab on this exact audience, to catch dead domains and typos before the send. Clear all starts again.
Step 3, Tagging:
Optional. Add tags to the people who open, who click any link, or who click one particular link, so an automation can follow up on its own. See Behavior Tagging: Tag People By What They Do.
Step 4, Review & send:
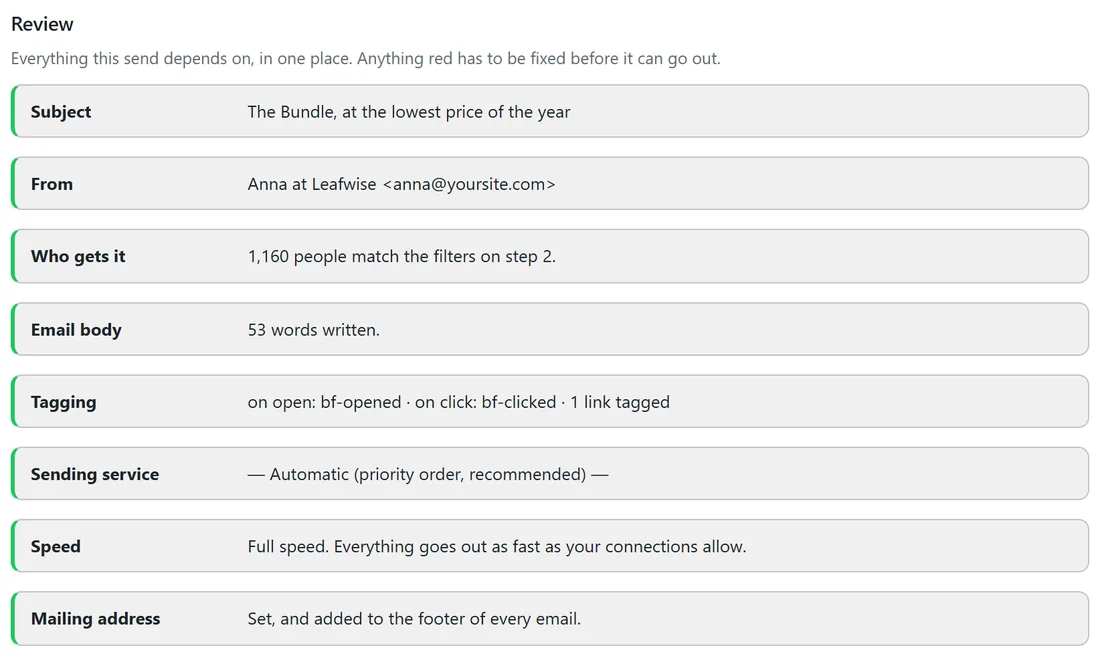
The Review list shows everything this send depends on in one place: Subject, From, Who gets it, Email body, Tagging, Sending service, Speed and Mailing address. A row in red has to be fixed before the email can go out.
Below the review you set how the email goes out.
- Send via: the same control as on Start here; changing one changes both.
- Sending speed: Use my global speed, or Drip this broadcast at its own speed in emails per hour. Dripping releases the send in small even sips and queues your most engaged people first.
- Send in waves: Send to everyone at once, or Send in waves, most engaged first (see Sending A Broadcast In Waves).
- Schedule: times are in your WordPress timezone, not your computer's. The box says which timezone that is and what the time is there right now, with a link to change it in Settings, General.
Send now or schedule:
- Check the Review list is all green.
- To send straight away, press Send Now. A confirmation shows how many people will receive it. Confirm to start.
- To send later, pick a date and time in the Schedule box and press Schedule.
Pressing Enter in a text box never sends a broadcast; only the Send Now button on this step can. A scheduled broadcast shows Unschedule (keep as draft), which takes it off the schedule and keeps everything, and Delete this broadcast permanently.
Once it is sending, the broadcast report shows the progress, and while it is still running you can pause it, change its speed or discard the rest. See The Broadcast Report: Opens, Clicks, Sales And People.
Send yourself a test first:
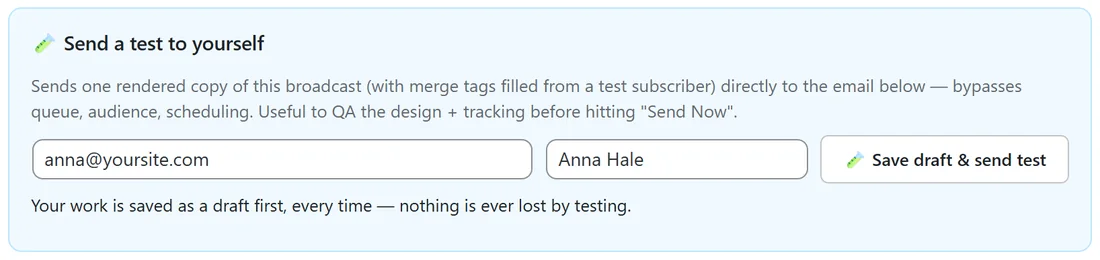
The Send a test to yourself box sits under the composer. The Send test button in the step bar takes you straight to it.
- Type the address the test should go to.
- Type a Recipient Name. It becomes the To name and fills {{first_name}} in the test, so the test reads like the real thing.
- Press Save draft & send test.
Your draft is saved first, every time. The test skips the queue, the audience and the schedule, and its subject starts with [TEST] so you can spot it in your inbox. Tests use your From fields, your sender profile's footer and your real merge codes.
A real example:
Leafwise Gardening wants to send a Black Friday email about the Complete Garden Bundle to its newsletter readers and seed guide readers, but not to people who already own the bundle.
- Anna opens Emails, then Broadcasts, and presses + New Broadcast.
- On Start here she names it "Black Friday bundle", writes the subject and the preview text "Friday to Monday only", and picks Anna (newsletter) in Send as.
- She starts from her saved template "Course launch (one offer, one button)" and writes the body, ending with {{snippet.signoff}}.
- On Audience she ticks Newsletter and Free Seed Starting Guide, and in Advanced filters adds a remove rule: Product purchased, bought any of, Complete Garden Bundle. The count shows 1,160 recipients, and the note under it says 43 people were left out by her account-wide rules.
- She types ella.foster@example.com into Preview as and the preview reads "Hi Ella".
- She sends a test to anna@yoursite.com, reads it on her phone, then on Review & send picks Friday 9:00 and presses Schedule.
Tips:
- Write the body before the subject. Generate variants reads your body, so the suggestions match what you actually wrote.
- Use the Preview as box with two or three different subscribers, including one with no first name, to see your fallbacks at work.
- For a big list, or one with many quiet readers, send in waves so the people who read everything go first.
- Clone a broadcast that did well and change only what needs changing. It keeps the layout, the audience and the tags.
- After sending, open the report and use Who clicked to tag your hottest readers for a follow-up.