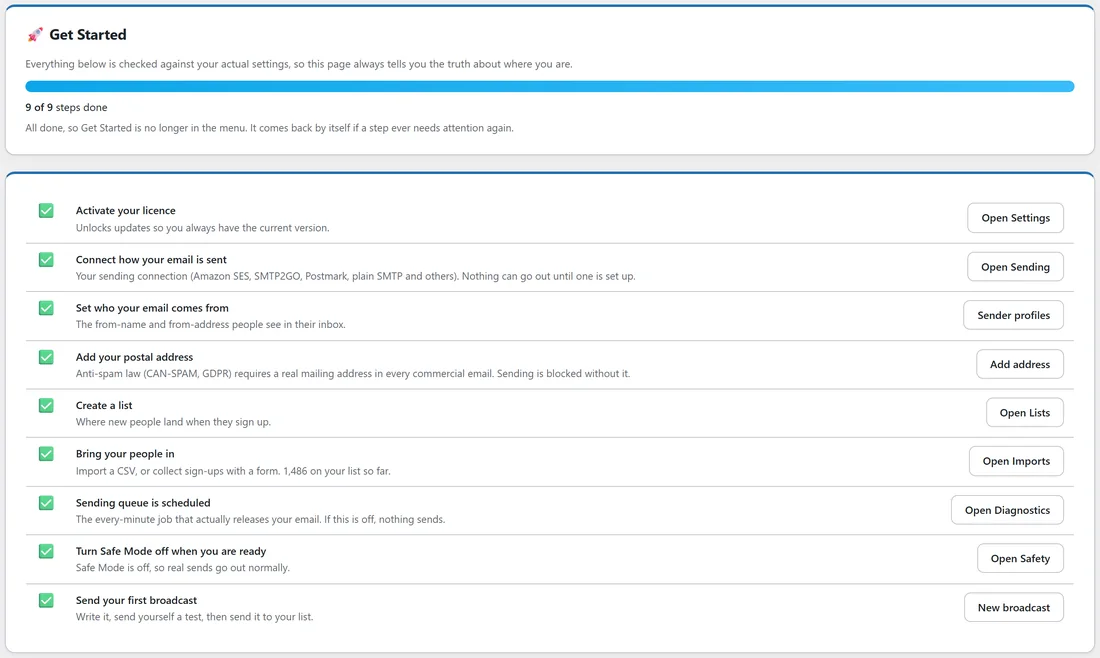
The Get Started screen is a checklist that reads your real settings. It does not show generic instructions: every row is ticked or not ticked depending on what is actually set up on your site, so it always tells you where you really are.
Use it on day one to get from a fresh install to your first broadcast, and come back any time something stops sending.
Where to find it:
Click Get Started in the blue menu bar. Once every step is done, Get Started leaves the menu by itself. It comes back on its own if a step ever needs attention again, for example if Safe Mode is switched back on. While it is hidden you can still open it from its address: admin.php?page=raim&tab=setup on your site.
The progress bar:
The top card shows a bar and a count such as 7 of 9 steps done. When everything is done it says All done, so Get Started is no longer in the menu.
The nine steps:
- Activate your licence. Keeps updates coming so you always have the current version. Button: Open Settings.
- Connect how your email is sent. Your sending connection, such as Amazon SES, SMTP2GO, Postmark or plain SMTP. Nothing can go out until one is set up. Button: Open Sending.
- Set who your email comes from. The from name and from address people see in their inbox. Button: Sender profiles.
- Add your postal address. Anti-spam law requires a real mailing address in every commercial email, and sending is blocked without it. Button: Add address.
- Create a list. Where new people land when they sign up. Button: Open Lists.
- Bring your people in. Import a CSV or collect sign-ups with a form. The row shows how many people are on your list so far. Button: Open Imports.
- Sending queue is scheduled. The every-minute background job that releases your email. Button: Open Diagnostics.
- Turn Safe Mode off when you are ready. While Safe Mode is on, real sends are held back and only test sends go out. Button: Open Safety.
- Send your first broadcast. Write it, send yourself a test, then send it to your list. Button: New broadcast.
A step still to do shows an empty box and a blue button. A finished step shows a green tick and a plain button, so you can still jump to that screen.
Working through it:
- Start at the top and click the button on the first row without a tick.
- Finish that screen, then come back to Get Started. The row is ticked as soon as the setting is saved.
- Repeat until every row is ticked.
Nothing on this screen changes a setting. It only checks and links.
Worth knowing:
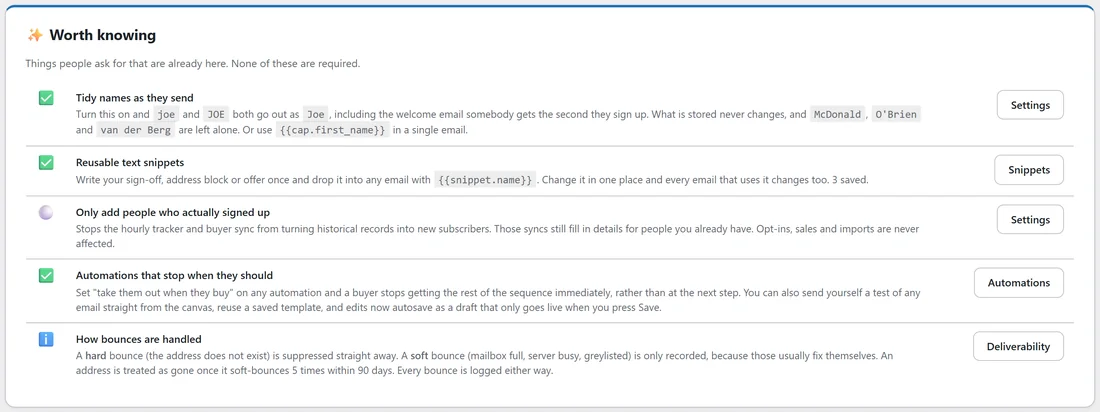
Under the checklist, the Worth knowing card lists helpful options many people never find. None of them are required, and each row is ticked if you already use it.
- Tidy names as they send: joe and JOE both go out as Joe, while McDonald, O'Brien and van der Berg are left alone. What is stored never changes. Turn it on in Settings, or use the {{cap.first_name}} merge code in a single email.
- Reusable text snippets: write a sign-off, address block or offer once and drop it into any email. The row shows how many you have saved. See Reusable Text Snippets.
- Only add people who actually signed up: stops the hourly tracker and buyer sync from turning old records into new subscribers. See Choosing Who Becomes A Subscriber.
- Automations that stop when they should: take people out when they buy, send a test from the canvas, and edits autosave as a draft until you press Save. See Taking People Out Of An Automation.
- How bounces are handled: a hard bounce is suppressed straight away, a soft bounce is only recorded, and an address is treated as gone once it soft bounces 5 times within 90 days. See Hard And Soft Bounces.
A real example:
Anna installs the Mailer for Leafwise Gardening. Get Started shows 3 of 9 steps done: the licence, the list and the queue. She clicks Open Sending and connects Amazon SES. She clicks Sender profiles, sets Anna Hale and anna@yoursite.com, and adds Leafwise Gardening, 100 Garden Row, Springfield, OR 97477, USA as the postal address. She imports her old newsletter list, sends her first broadcast after turning Safe Mode off, and the page reads 9 of 9 steps done.
Tips:
- If emails suddenly stop going out, open the Get Started page by its address. If a row has lost its tick, that row is the reason.
- Steps 3 and 4 are both set in a sender profile. See Sender Profiles and Your Mailing Address (Required By Law).
- Leave Safe Mode on while you import. See Safe Mode: Moving A Real List Without Accidents.