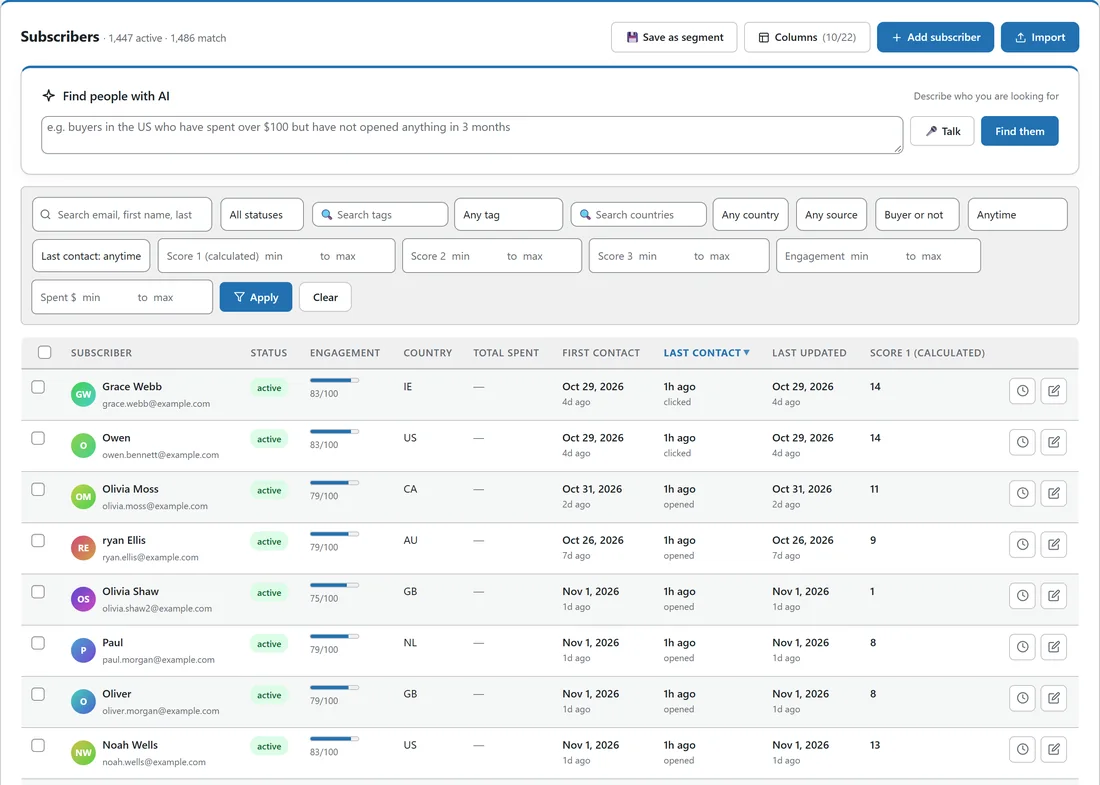
The Subscribers screen is the master list of everyone in your audience. From here you find people, look at what they have done, fix their details, and act on a whole group in one go. It stays quick with tens of thousands of people.
Where to find it:
Audience, then Subscribers.
The top of the screen:
The heading shows how many people are active and how many match your current filters. On the right:
- 💾 Save as segment: saves exactly what you are filtering on as a segment you can email. See Segments And The AI Segment Builder.
- Columns: choose which columns the table shows.
- Add subscriber: add one person by hand.
- Import: opens the Imports screen. See Importing Subscribers From A CSV.
- 📦 N archived: appears when anyone is archived. Archived people are hidden from this list, never emailed and never counted, and this button shows them.
Find people with AI:
With an AI key connected, a box called Find people with AI sits above the filters. Describe who you want, for example buyers in the US who have not opened anything in 3 months, and press Find them, or press Talk and say it. The AI suggests the filters and says what it understood. Nothing changes on screen until you press the button to show those people. See Connecting Claude Or OpenAI.
Searching and filtering:
The search box matches email address, first name and last name. Next to it are these filters.
- All statuses: Active, Pending, Unsubscribed, Bounced or 📦 Archived.
- Any tag, with a search box to find a tag quickly.
- Any country, with its own search box.
- Any source: how the person first arrived, for example form, import or api.
- Buyer or not: Has bought or Never bought.
- Anytime: First seen in the last 7, 30, 90 or 365 days.
- Last contact: Contacted in the last 7, 30, 90 or 365 days, or No contact for 90 or 365 days and more. Last contact is the latest of an email you sent them, their last open or their last click.
- Score 1 (calculated), Score 2 and Score 3, each with a min and max. See Lead Scoring: See Who Is Most Engaged.
- Engagement min to max, from 0 to 100.
- Spent min to max, for finding buyers by how much they have spent.
Press Apply. Filters combine, so you can look at active buyers in Ireland with high engagement in one view, and they stay in place as you move between pages. Clear resets everything.
Sorting and pages:
Click most column headings to sort by them, and click again to reverse. The default is Last contact, newest first, so the people you were most recently in touch with are at the top. The page shows 50 people at a time, and Per page at the bottom goes from 10 up to 500.
Choosing your columns:
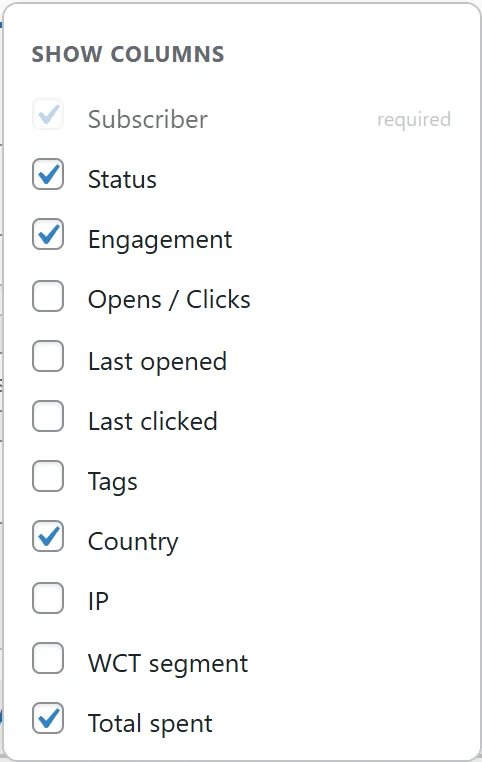
Press Columns and tick what you want to see. There are 22 to choose from, including Status, Engagement, Opens / Clicks, Last opened, Last clicked, Tags, Country, IP, Total spent, Purchases, Last bought, First contact, Last contact, Last updated, the three scores, Source and ID. Your choice is saved for your login, so the screen looks the same next time.
First contact is the earliest date known for that person from any source, for example the sign-up date from an imported file. Last updated is the last time the record itself changed through an import, a sync or an edit.
Looking at one person:
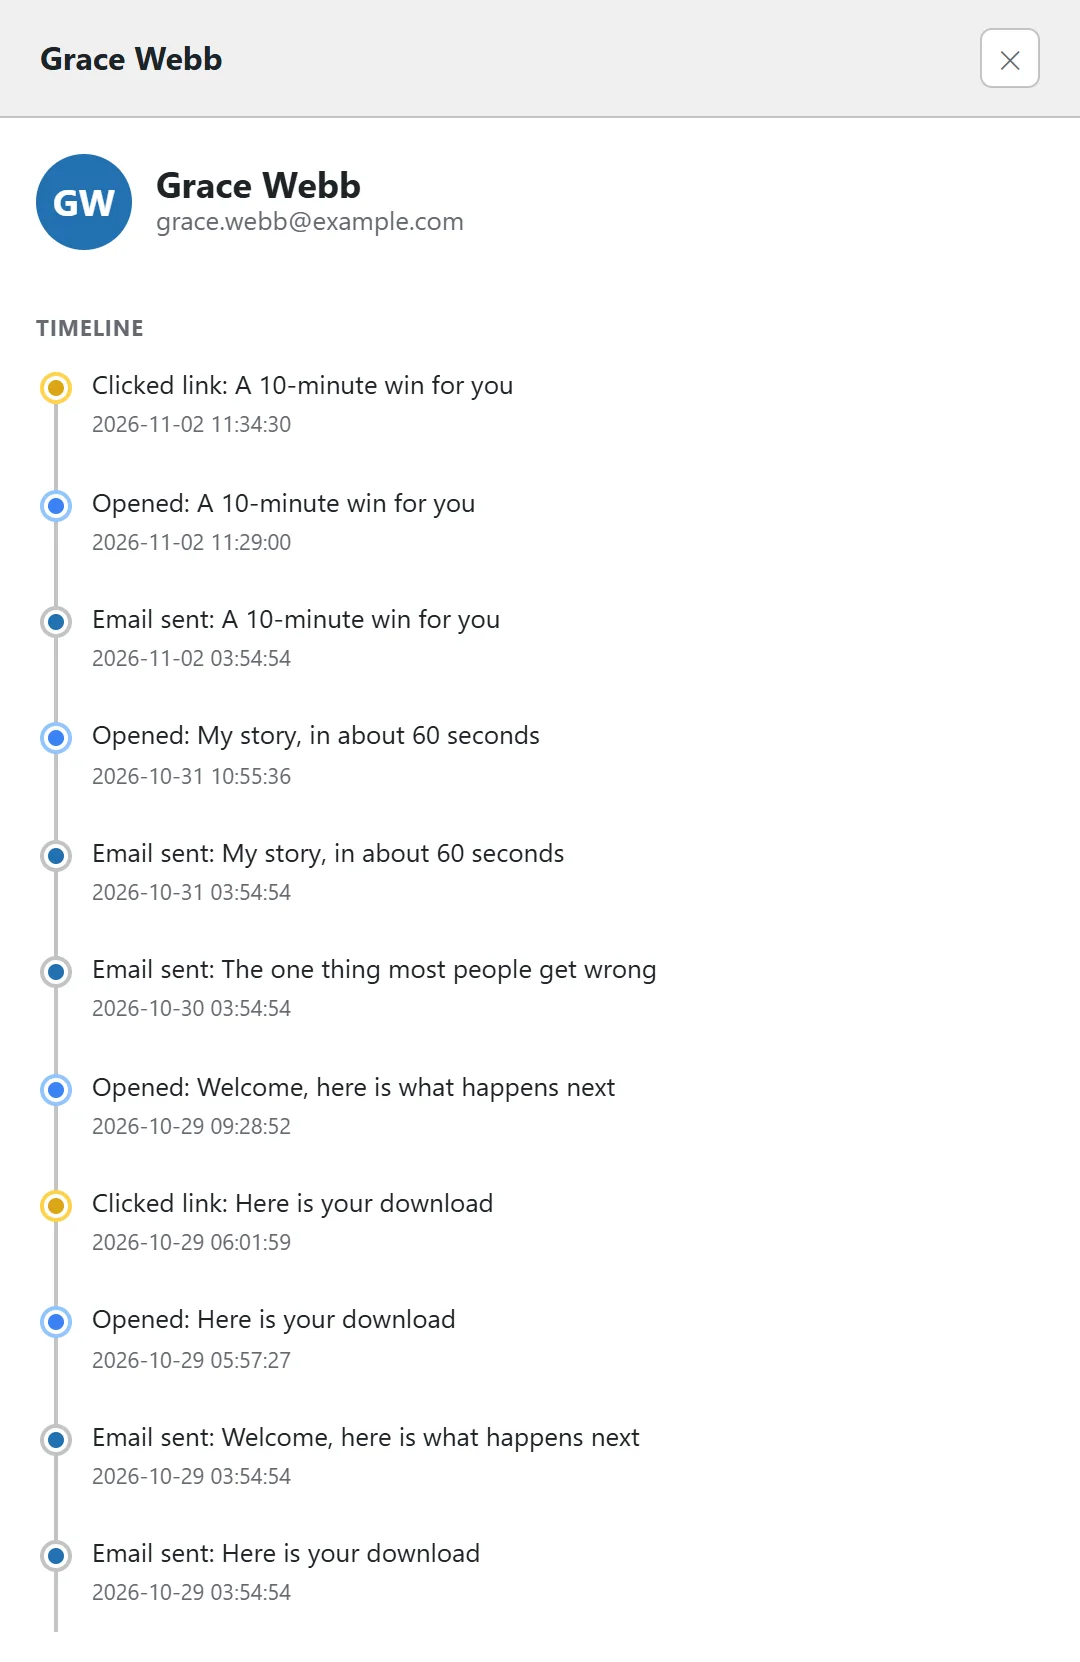
Each row has two buttons on the right.
- The clock opens a panel on the right with their timeline: every email sent to them, every open, every click and every purchase, newest first, plus their lifetime totals underneath.
- The pencil opens their full profile, where you can edit them.
The profile has their name, email, status, country and tags, Where they subscribed (source, sign-up page, sign-up date and IP, and their consent on record), Why this score, their Scores, and their Custom fields. Press Save subscriber after any change. Below the form, Lists this person is on has a Remove from list button for each list, and Automations this person is in shows every automation they are in. See Seeing Which Automations Someone Is In.
Acting on many people at once:

Tick the box on any row, or the box in the heading to tick the whole page, and the bulk bar appears. If your filter matches more people than one page shows, press Select ALL N matching this filter to include every one of them. Then choose:
- 🏷️ Add tag: adds a tag quietly. Nobody is started on a tag automation by this.
- ✔ Mark as consented: records consent you collected somewhere else, for example on a paper form. People who already have consent on record keep their original record.
- Add to list: adds everyone ticked to the list you pick.
- Enroll in automation: starts everyone ticked at the first step of the automation you pick. A draft or paused automation holds them until you switch it on.
- 📦 Archive: keeps everything about them but stops them being emailed or counted. They come back on their own if they ever click, buy or open something.
- 🚫 Delete + never email: deletes them and adds them to the suppression list, so no future import can bring them back.
- 🗑️ Delete: removes them and their list memberships.
- ✕ Clear: unticks everyone.
Every one of these asks you to confirm first. Deleting everyone matching a filter asks you to type DELETE.
A real example:
Anna at Leafwise Gardening wanted to thank her most engaged Irish readers. She chose Any country, then IE, set Engagement min to 75 and pressed Apply. She pressed Select ALL N matching this filter to take in every page, then 🏷️ Add tag and typed thank-you-ie. Then she pressed 💾 Save as segment so the group is ready in the broadcast composer.
Tips:
- Click a list's eye icon on the Lists screen to open this screen already filtered to that list.
- Archive rather than delete when you are unsure. It is fully reversible.
- To clean addresses before a big send, use Verify Leads: Clean An Old List Before You Mail It.
- To fix messy names in bulk, use Tidy Names: Fix Messy Names In Bulk.